Christmas season, for me, is filled with baking and decorating cookies. And I’m sure I’m not the only one! Through the years, I’ve experimented with so many different piping tools… From regular plastic sandwich bags, through plastic store-bought piping cones with and without nozzles, fabric cones, even special icing pens. And always, always, something was wrong. Having to clean a multiple-use bag was a nightmare when I only had one and wanted to do various icing types and colours in one afternoon. Nozzles were too small or too big. Plastic bags would break open and I’d be left with a sugar-coated catastrophe…
And then one day, I came across this simple method for making your own piping cones out of baking/parchment paper. And dear God, what a life changing discovery that was. I did all of my Christmas cookie decor with these cones with zero accidental splash out disasters. I always had as many fresh cones at hand as I wanted to. And those dozens of cones cost me a grand total of… £1, perhaps? I don’t think I’m ever going to return to other methods, not when it comes to simple cookie decor with royal icing or chocolate at least.
Here’s how to make your own piping bags
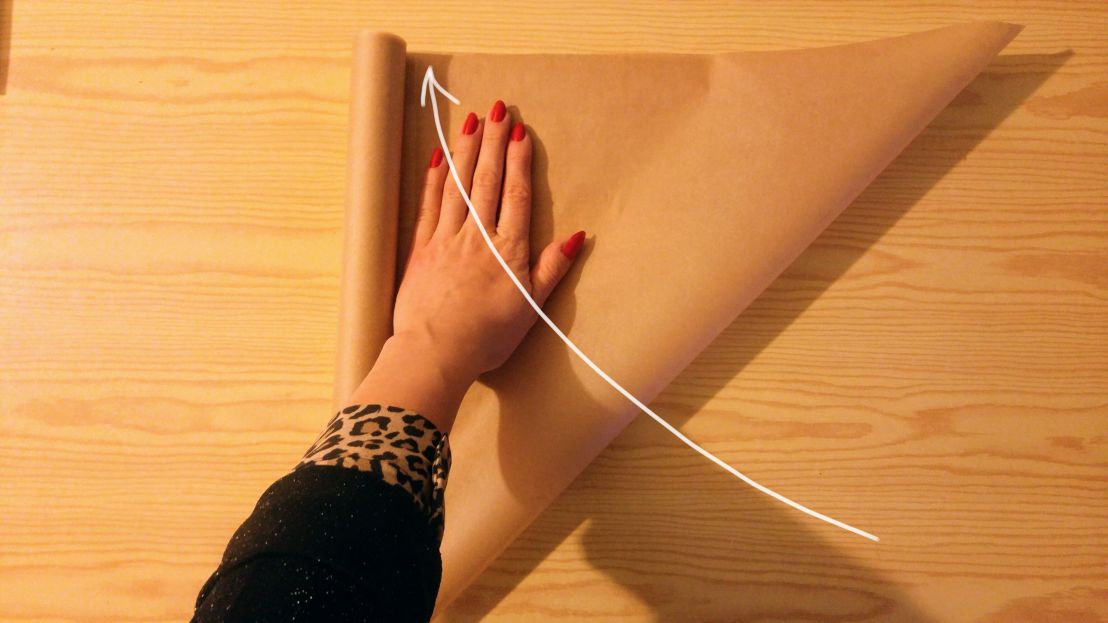
Unroll baking paper. Keep the roll on your left hand side and the free end on the right.
Grab the bottom right (free) corner and fold the paper as shown in the photo. Press the fold so it leaves a crease in the paper – it will be useful later.

Cut the paper as shown in the photo.

Unfold the paper. You should be left with a, more or less, perfect square.

Cut along the crease you’ve left earlier. You should be left with two triangles. They will make two cones.
Put one triangle away.
Place the triangle you’re left with so that the longer edge is the farthest away from you.

Grab the upper left apex and fold it to the right with a twisting motion – it should form a cone in the middle.
Grab the upper right apex and fold it to the left, closing the cone.


You should now have the three apices close together. You can manoeuvre them adjusting the tip of the cone. Try to close the tip completely (it might take a bit of trial and error to figure out which apex to pull – just keep trying 😉 ).

Once the tip is sharp and closed, fold the corners to the inside of the cone. You can fold them 2 or 3 times to make sure they don’t move.

Make two 1cm cuts where all layers of paper overlap, as shown in the photo. That little piece between the cuts is where you should be holding the cone while filling it up – when you hold in that place you’ll make sure the cone doesn’t unfold under the pressure of icing or chocolate being poured inside.

Fill the cone with whatever you want to use – royal icing, chocolate, cream… anything you like!
Close the opening of the cone and fold the corners to the middle, as shown in the photo.

Fold the edge with the opening tightly a few times, to make sure nothing comes out of the wrong end of the cone.


Cut the tip of the cone off – the more you cut off, the bigger the hole will be. Start by cutting only a teeny tiny bit off and test the width of the line it leaves. Adjust according to your needs.

Make sure not to squeeze the middle of the mixture in the cone – always press from the very top, folding the rear end in the process.
When you’re done, squeeze the remaining chocolate/icing/cream out to a container and simply throw away the cone.
These cones are perfect to use with melted chocolate or royal icing. I’ve recently posted an extensive guide for working with chocolate as well as tips and instructions for working with royal icing – be sure to check them out!
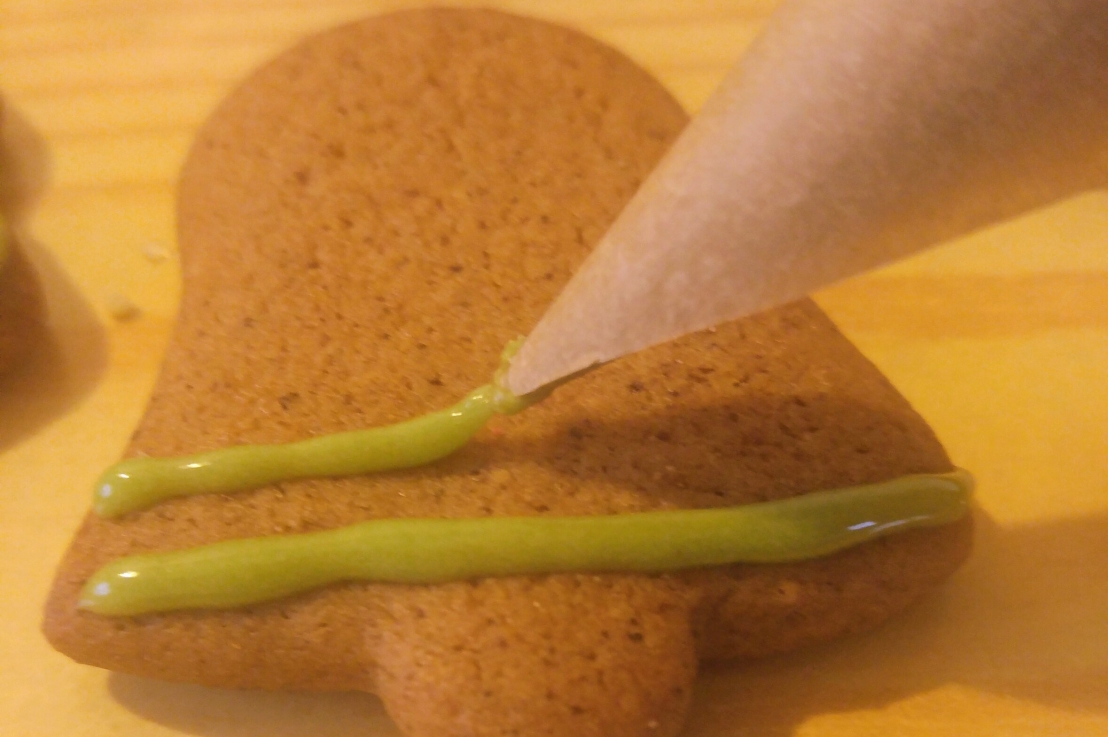
And here’s a sample of what you can achieve with these simple DIY paper piping cones:


Good tip! Thanks!
LikeLiked by 2 people
My daughter will love this post! Thank you
LikeLiked by 1 person
Brilliant! Your cookies look amazing!
LikeLiked by 2 people
Thank you! 🙂
LikeLike
Such a nice share !!
LikeLiked by 1 person