
I’ve recently posted an extensive guide for working with chocolate. Now, it’s time to have a look at another popular cookie decor medium – royal icing. In this guide, I will show you how to prepare royal icing, how to adjust its consistency, how to use it for cookie decor and also how to prepare little decorations in advance, to use them on cookies at a later time. So, without further ado, let’s get cracking!
Basic recipe – how to make royal icing glue
The basic recipe for royal icing – also known as royal icing glue, since you can use it to glue various decorations to cakes or cookies – is simple. The ingredients and proportions are:
- 1 egg white*
- 200g icing sugar
- a few drops of flavouring – optional
- a sprinkle of powdered food colouring – optional
* If you’re afraid of salmonella or simply prefer not to use raw egg whites and have powdered egg whites or egg white replacements available in your country – feel free to use them. Follow their individual instructions to prepare egg whites, then proceed to my instructions.
Using an electric mixer, beat the egg white on medium speed. Once a nice foam is formed (don’t overdo it, the foam doesn’t need to be stiff), start adding sugar. Do it gradually, spoon by spoon, mixing all the time. Flavourings and colourings are completely optional. I do recommend adding some flavouring though, otherwise the icing will taste of plain sugar. 😉 Add it along with colourings after you’ve mixed in all the sugar. Stop mixing when the colouring is evenly distributed.
Powdered food colourings are the best since they don’t change the consistency of icing. You can, however, use liquid or gel colourings – just keep in mind that they’ll dilute the icing. We’re going to add some water to our icing in the next steps of this tutorial – you may want to add a little less than suggested if you’re using water-based colourings.
The recipe above yields what is generally known as royal icing glue – very thick in texture, perfect for sticking decorations to cakes and cookies. To use the icing for cookie decor you’ll usually want something a bit thinner in consistency, so you’re going to add a bit of water. The amount of water you’ll need to add depends on what you’re aiming to achieve. The general idea is simple: the thinner the texture, the more liquidy the icing, the more it will spread – often uncontrollably. Therefore, if you want to achieve defined lines, you will only need to add a few drops of water. For flooding whole cookies with icing, on the other hand, you’ll need much thinner texture.
Note that proportions provided in this post are just a general guideline – it’s always best to test how the icing behaves before filling a piping bag with it.
Outline royal icing recipe
To make fine lines with royal icing, it has to be pretty thick in texture. Add 2-3 drops of water (or other liquid, like lemon juice or flavouring) to the icing and stir with a spoon. The thickness of your lines will depend on both the texture of your icing and the width of the opening in your piping bag.

Iced beads
In order to achieve nice, rounded beads or drops, you need to make icing a little bit more runny. 1/2 teaspoon of water per 1 egg white should do the job. Test your icing before filling a piping bag with it – you can take a bit of icing on a toothpick and make a bead on a flat surface. If the bead isn’t perfectly round and has a sharp peak on the top, where you lifted the toothpick – adjust the texture by adding a little bit more water (don’t overdo it! ‘a little bit’ is measured in drops, not teaspoons).
Filling icing
If you’d like to flood large areas (like, for example, the entire cookie) with icing, it’s best to use icing that’s quite runny and spreads easily. Add 1/3 of a teaspoon of water to royal icing glue made out of 1 egg.
Wet in wet technique – sunken patterns, marble effect
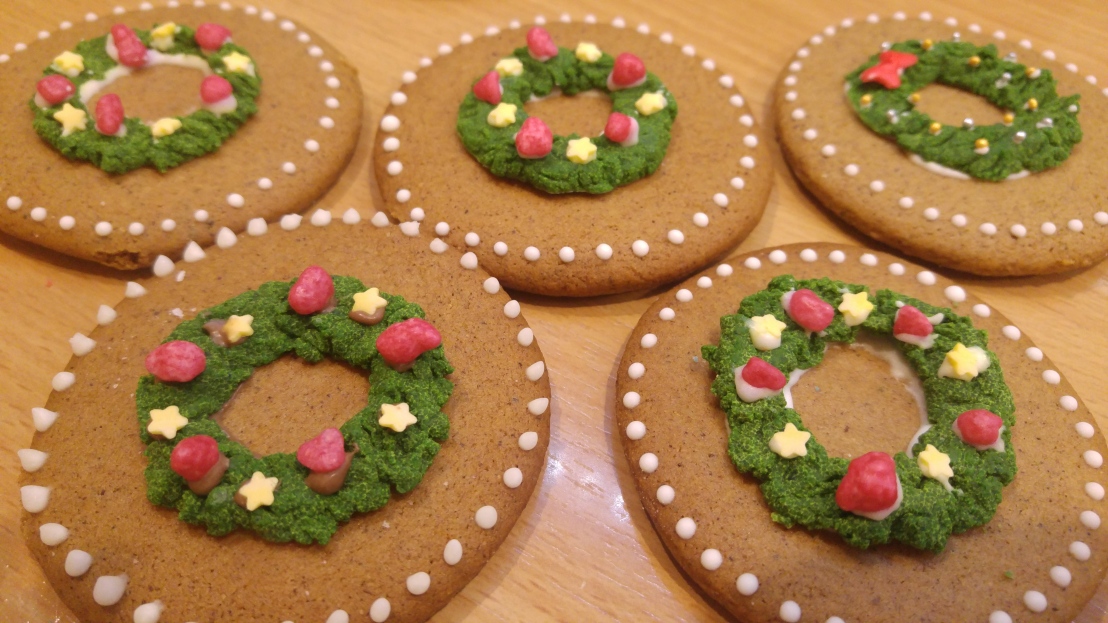
Icing of consistency used to fill large areas can also be used to create interesting designs. Start by covering the entire cookie with icing of filling consistency. Then, to achieve a pattern sunken in the first layer, immediately draw with a different colour-same consistency icing on top of the first, still wet, layer (bottom cookies in the photo). To achieve a marble effect, on the other hand (green cookie in the photo), make random lines or drops as the second step. Let them sink in the first layer, then take a toothpick and draw it through the icing in different directions, multiple times, until a nice marble pattern is achieved.

Preparing decorations in advance
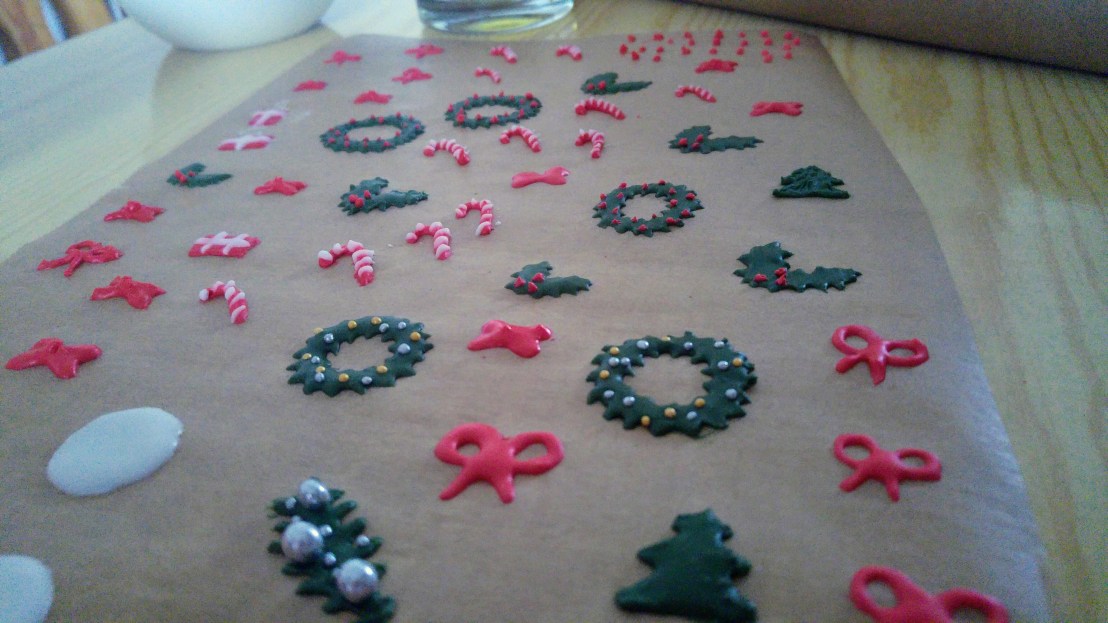
If you’d like to decorate your cookies with more intricate designs, it may be a good idea to consider preparing some of the decorations in advance (making multiple colours of icing in one day can be difficult to organize). You can get some of the work done in advance by creating little decorations on baking paper – they will come off easily once dry. Just be careful handling them, they will be very fragile! Decorations prepared that way can be stored… well, almost forever, I’d say. Sugar is a natural preservative after all, and there’s plenty of it in icing. So if you’re now panicking because you’re not quite ready for Christmas and there are only 10 days left – next year, consider pre-preparing some of the cookie decor in October. 🙂
Here’s a sample of what I made this year…
…and how I used those small decorations on actual cookies (glued with royal icing):


How to store royal icing
Royal icing tends to dry very quickly. Make sure to never leave it in an open container in room temperature, or you’ll quickly have a bowl full of sugary concrete. To prevent a batch of pre-prepared icing from drying, wet a tea towel and cover the bowl with it. It will maintain high humidity in the bowl. Icing preserved with this method will keep its texture all day. And if you forget to cover the icing? Accidents happen, not all is lost. Try adding water/more egg white and mixing everything. You can still save the day, though beware hardened lumps in the mixture.
If you’re not able to use all of the icing in one day (or simply want to prepare it in advance), store the icing in the fridge, covered with cling film.
Note that all of the above proportions are just estimates – the end result can vary depending on many factors – the size of the egg, air humidity, how long you’ve beaten the egg for etc. Moisture evaporates from the icing too, so the longer you’ve been working with it for, the thicker it will be. That’s why it’s best to always test the icing before filling a piping bag with it, to then discover the consistency is nowhere near what we hoped for.
You can always adjust the consistency. Stir in more sugar if it’s too thin; add a drop or two of water if it’s too thick.


yum!
LikeLiked by 1 person
Hi Alphe. Thank you for visiting and following HoB. Much appreciated!
LikeLiked by 1 person