
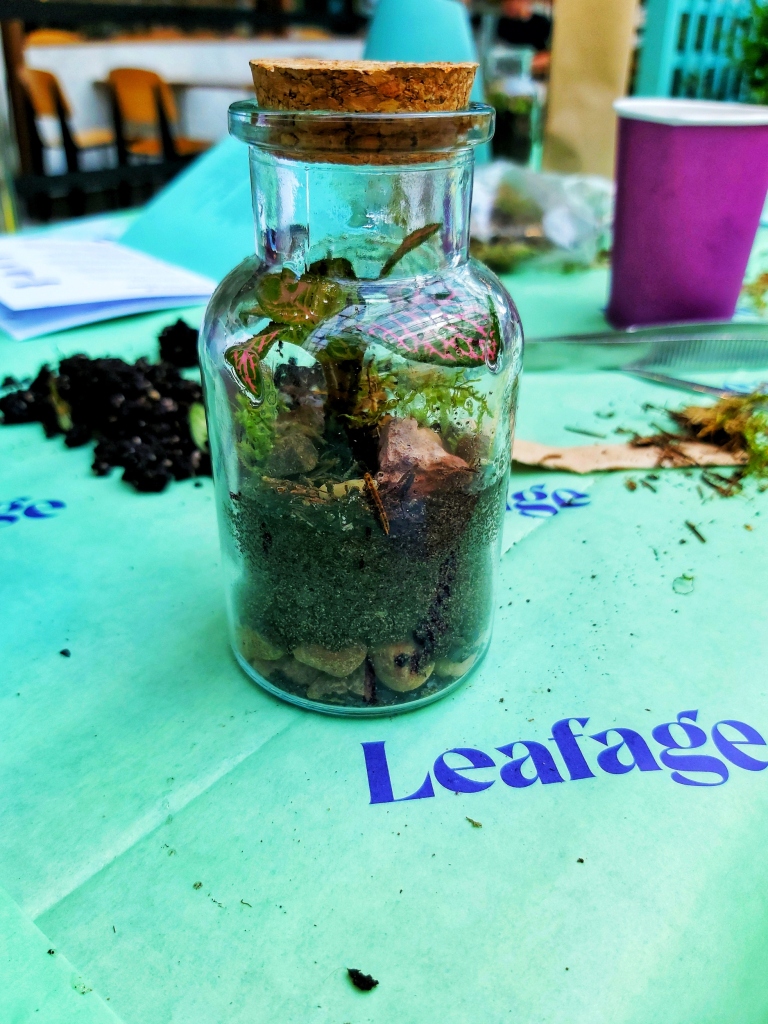
Hello, green-thumbed pals! I recently stumbled upon a gem of an event at our local shopping centre – a free terrarium-making workshop. Trust me when I say this: it’s like making a garden in a jar, and it’s unbelievably cute and low-maintenance. I have wanted to try this craft for ages, and was thrilled to have a chance to do it! So, in this post, I’ll give you the lowdown on what gardens in jars are, and a step-by-step tutorial on how to make your very own. Let’s get our hands dirty!
What on Earth Are Gardens in Jars?
Gardens in jars, or as they’re officially known, terrariums, are miniature ecosystems that live inside glass containers. They’re a wonderful way to bring a piece of nature indoors, and they require minimal care. The concept of terrariums is said to have been invented by none other than botanist extraordinaire, Nathaniel Bagshaw Ward, in 1842. He accidentally discovered that plants thrived inside sealed glass jars while studying moths. Thank you, Mr. Ward, for this brilliant idea!

Creating Your Terrific Terrarium: Step-by-Step
What You’ll Need to make a garden in a jar:
- A clear glass jar or container with a lid (Mason jars work a treat)
- Small pebbles or gravel
- Activated charcoal (available at garden centres)
- Potting soil suitable for terrariums
- A fittonia plant (also known as the nerve plant)
- A bit of moss
- Decorative pebbles or stones
- A spray bottle with water
Step 1: Build a Solid Foundation with Drainage Layer
Start by adding a layer of small pebbles or gravel at the bottom of your jar. This layer will help with drainage, so your plants don’t get soggy feet. You don’t need much, just about half an inch or so when making your garden in a large jar.
Step 2: Go Charcoal Crazy
Activated charcoal is like a breath of fresh air for your terrarium, and a secret ingredient you possibly didn’t expect. It will absorb any potential odours and keep the soil fresh, so don’t skip it. Sprinkle a thin layer of activated charcoal over the pebbles of the drainage layer.
Step 3: Lay Down the Soil
Now it’s time to add a layer of potting soil. Aim for about 2 inches or so per big jar. Make sure it’s suitable for terrariums – you want your plants to feel right at home!
Step 4: Plant Your Fittonia
This is the fun part! Dig a small hole in the soil and gently place your fittonia in the jar. These little plants are perfect for terrariums because they don’t mind the humidity inside. Pat the soil around it to secure the plant.
Step 5: Add a Bit of Moss and Pizzazz
Tuck in a bit of moss around the plant to add a touch of woodland charm. Plus, it helps keep the soil moist. If you fancy, sprinkle some decorative pebbles or stones for that final flourish.
Step 6: Shower Your Garden (with Water)
Use a spray bottle to moisten the soil. You don’t want to drown your plants, just give them a nice, gentle shower. This mimics a self-sustaining cycle inside your terrarium.
Step 7: Seal the Deal with a Lid
Pop the lid on your jar and seal it up. Your terrarium is now a self-contained little world! Place it in a spot with indirect sunlight, and watch your mini garden flourish. In theory, you shouldn’t need to open the jar at all. If your container isn’t perfectly sealed, you may need to water your garden every few months, depending on its needs. Make sure to regularly check on your terrarium (without opening it!). If you see drops of water on the sides of the jar, it’s a sign that there’s enough humidity inside and you don’t need to take any action.

Alternative Plants for Your Terrarium Adventure
Now, while fittonia plants are excellent choices for terrariums, there’s a whole world of botanical possibilities out there. My garden in a jar is tiny, perfect for a single plant. But if you want to take it a step further, you can use a large container and create a diverse jungle inside. So, if you fancy mixing it up a bit, here are a few alternative plants that thrive in the enchanting world of gardens in jars:
- Succulents: These little desert-dwellers are perfect for open terrariums. They require minimal water and come in an array of shapes and colours, making them a lovely addition to your glass garden.
- Air Plants (Tillandsia): Air plants are like the superheroes of the plant world. They don’t need soil, just a good misting now and then. You can attach them to decorative driftwood or stones for an artistic touch.
- Baby’s Tears (Soleirolia): If you’re after a lush, verdant look, baby’s tears are your best friends. They form a dense carpet of tiny, delicate leaves that look dreamy in a closed terrarium.
- Marimo Moss Balls: These adorable little green orbs are actually a type of algae. They’re practically maintenance-free and add a touch of whimsy to your miniature garden.
- Spider Plants: With their elegant arching leaves and air-purifying qualities, spider plants are a superb choice for larger terrariums. They’re low-maintenance and thrive in most indoor conditions.
So, feel free to get creative and experiment with different plant species to create your own unique garden in a jar. Just remember to consider their specific care requirements and the size of your container – and you’ll have a botanical masterpiece that’s all your own!
Enjoy building your own terrarium!
There you have it – your very own garden in a jar, an enchanting piece of nature sitting pretty in your home. These little ecosystems are not only charming but super low-maintenance. So, if you’re a fellow plant enthusiast, try making your terrarium. Your green thumb will thank you!
Also see:


Love a terrarium, aren’t they fascinating? A whole little world in a jar.
LikeLike
Loved it, Alphie. This is a good idea to consider … I will definitely give it a shot and see how it goes.
LikeLiked by 1 person