I love trying out new crafts. It’s like opening a door to an ocean of possibilities. Sometimes, I end up loving the new craft so much that I continue doing it for years. For example, I’ve been loving cross stitching for some 3 years now, and crocheting for almost a year. Sometimes, unfortunately, it doesn’t go that well. I’ve been wanting to try punch needle for ages, and recently, I caved in and bought an assorted punch needle set. I completed the project in a few days, and here are my thoughts after trying to punch needle for the very first time.
Contents of the kit
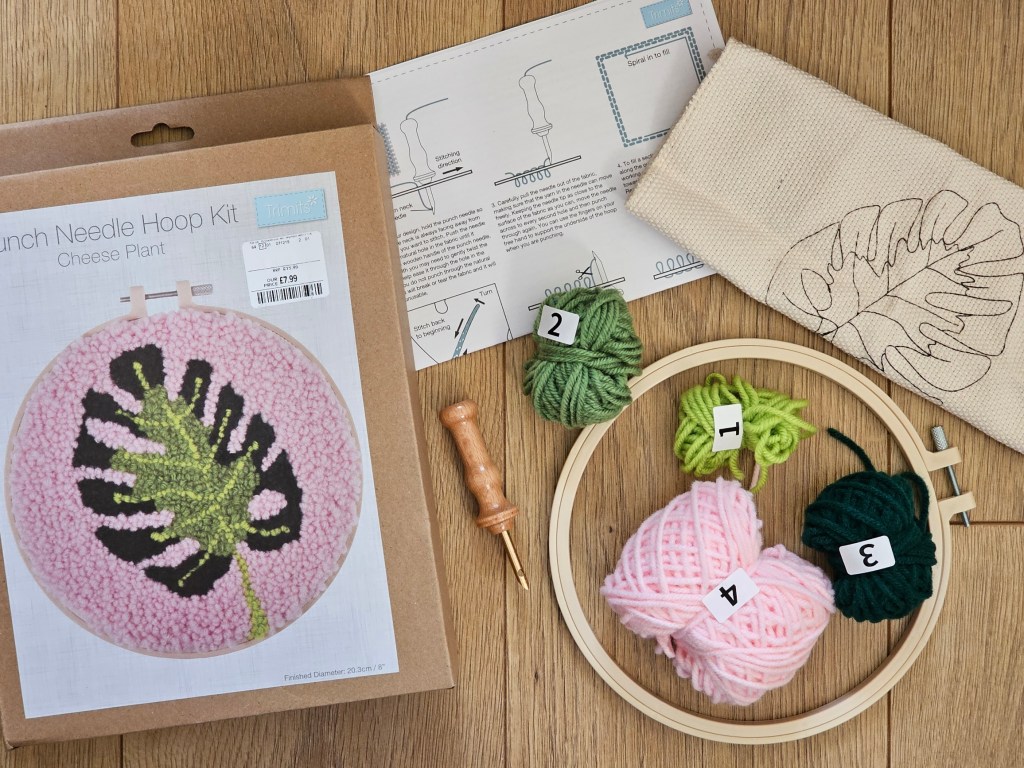
The set included everything I needed to create a picture of a monstera leaf: a wooden embroidery hoop, a canvas with the design printed on it, 4 balls of yarn in green and pink, a punch needle, and a leaflet with detailed instructions. There were also two long threaders included in the kit, not pictured below – I found them inside the box later on. The whole set was £7.99 in TK Maxx – quite a lot compared to my usual assorted DIY sets from TK Maxx. Cross stitch and crochet ones are usually around £4.
Starting off
Used to cross stitching, I immediately mounted the canvas onto the embroidery hoop, with the printed side facing up. I then proceeded to read the instructions, and learnt that the printed side should be on the back of the hoop. Oops. I quickly switched it and continued reading the instructions.
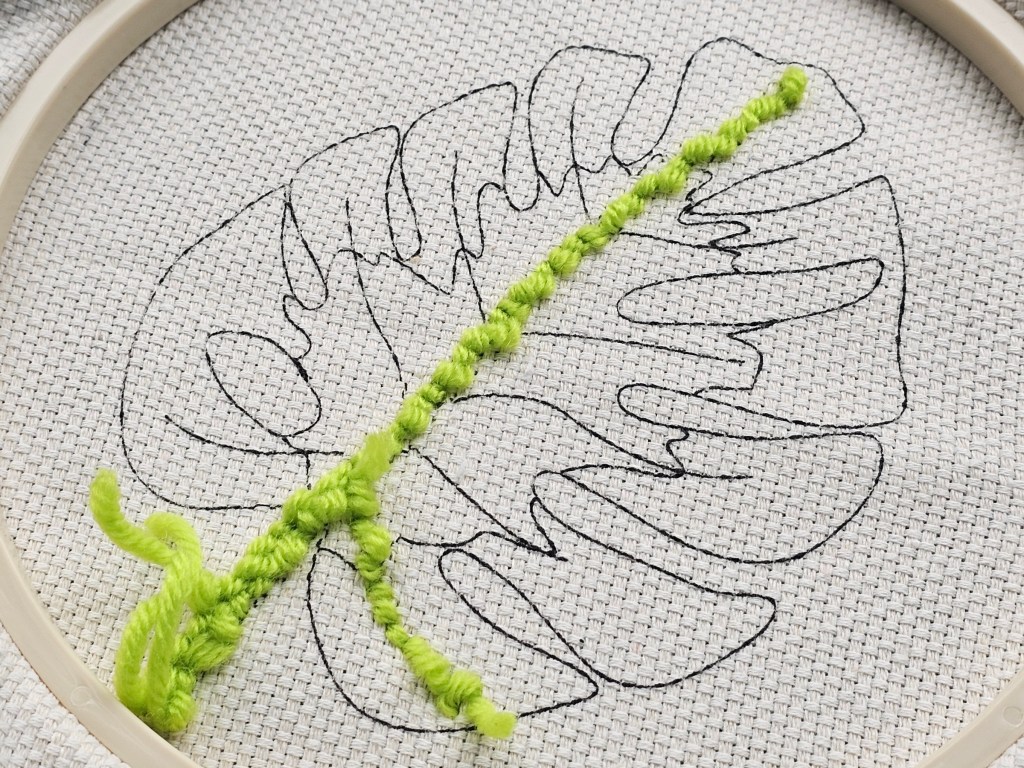
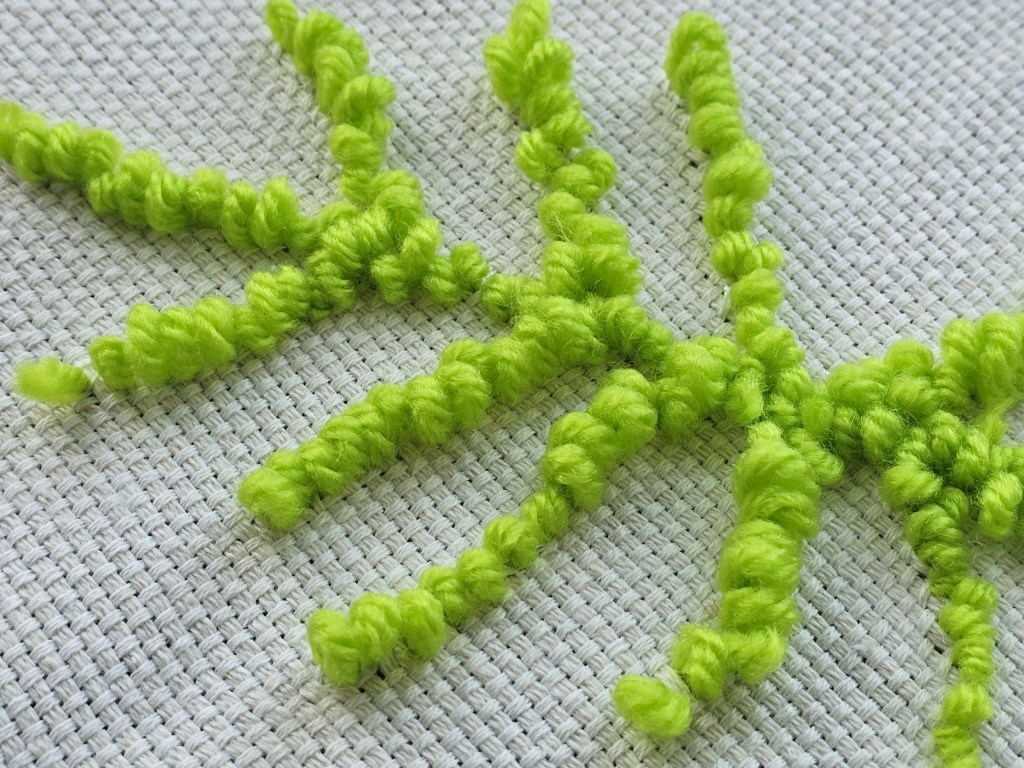
After threading the needle with the first colour – the light green – it was time to start punching.
The canvas was somewhat similar to that used in cross stitching, just with less obvious holes. I could clearly see the grid. The instructions said to start with the light green yarn and make the veins of the leaf.
I had no idea what I was doing. I always wondered how the punch needle designs stayed in place, if they were simply loops poking through the canvas, but now I get it. If you push one loop through a hole, it’s easy to pull it out. But if you fill an area of the canvas with loops in like every other hole, it gets pretty tight. Thick yarn takes a lot of space in the holes, and the more holes are filled with yarn loops, the more they support each other. I imagine I could still pull the loops out if I tried to, but overall, they stay in place and don’t just fall out.
It certainly didn’t feel natural to me, but I managed to complete the first couple of rows of loops. They didn’t turn out great, my lack of experience certainly shows. They weren’t even at all. At times, the loops would just come undone and I’d have to go back and redo a few in a row. And even when they stayed in place, they weren’t uniform in size. Honestly, at that point, I was close to abandoning the project altogether.
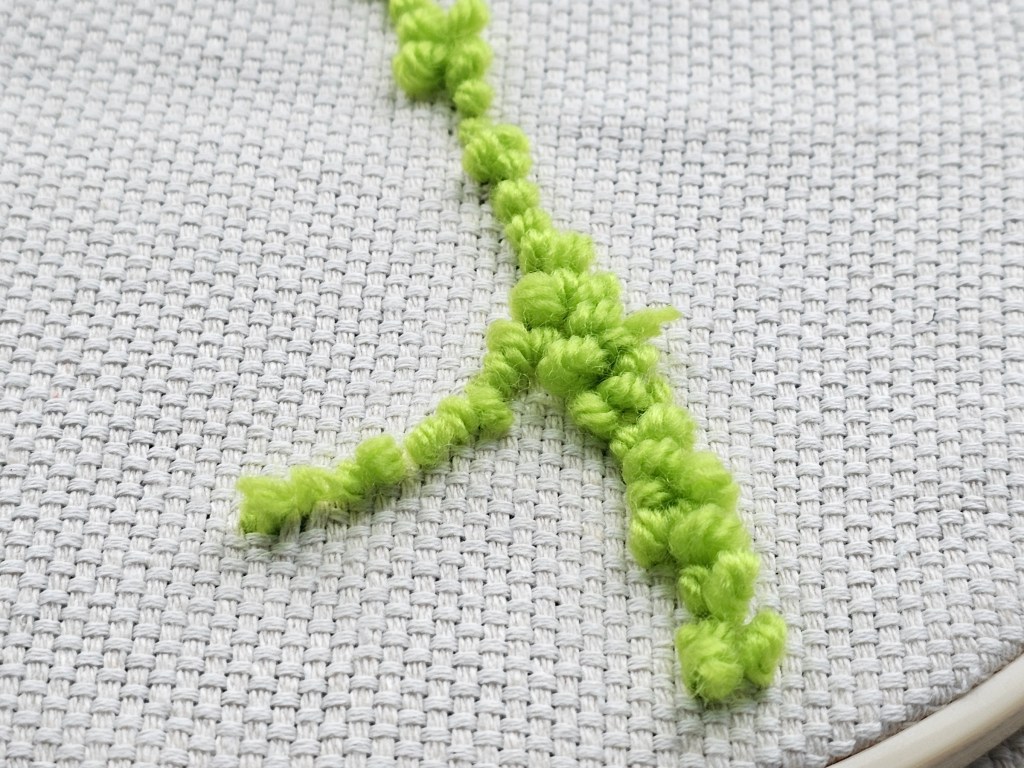
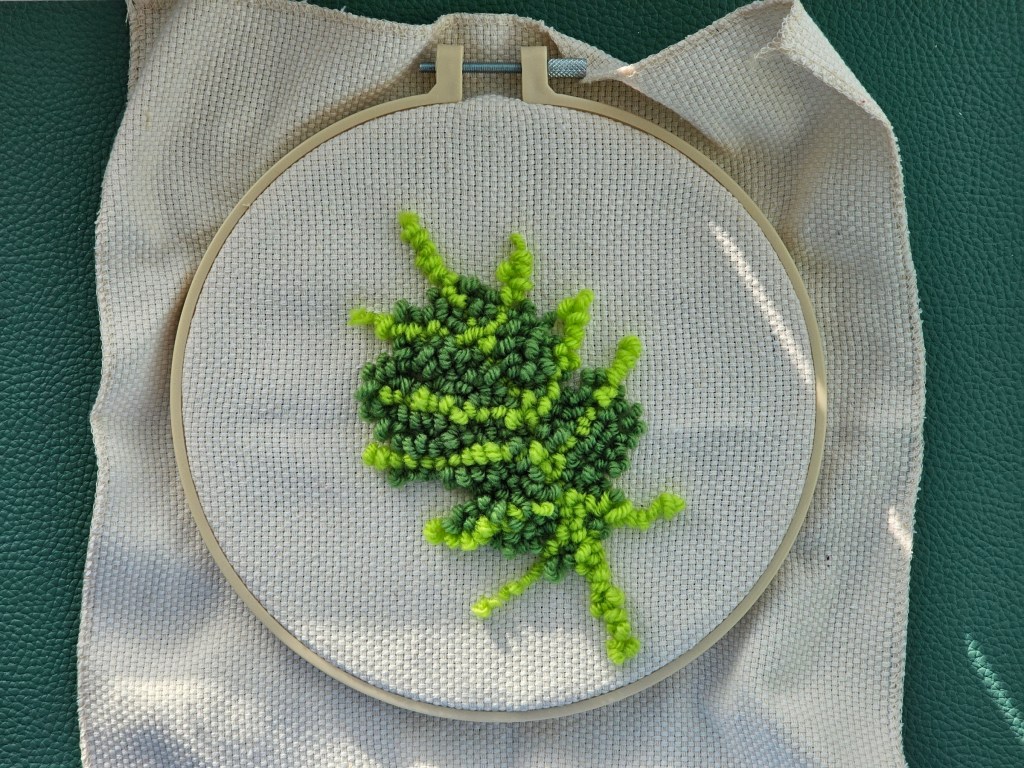
Still, it was just a learning experience, so I continued punching. I managed to complete the light green veins of the leaf. They were wonky, but good enough. It was time to move to the next colour, a slightly darker green.
Adding more colours
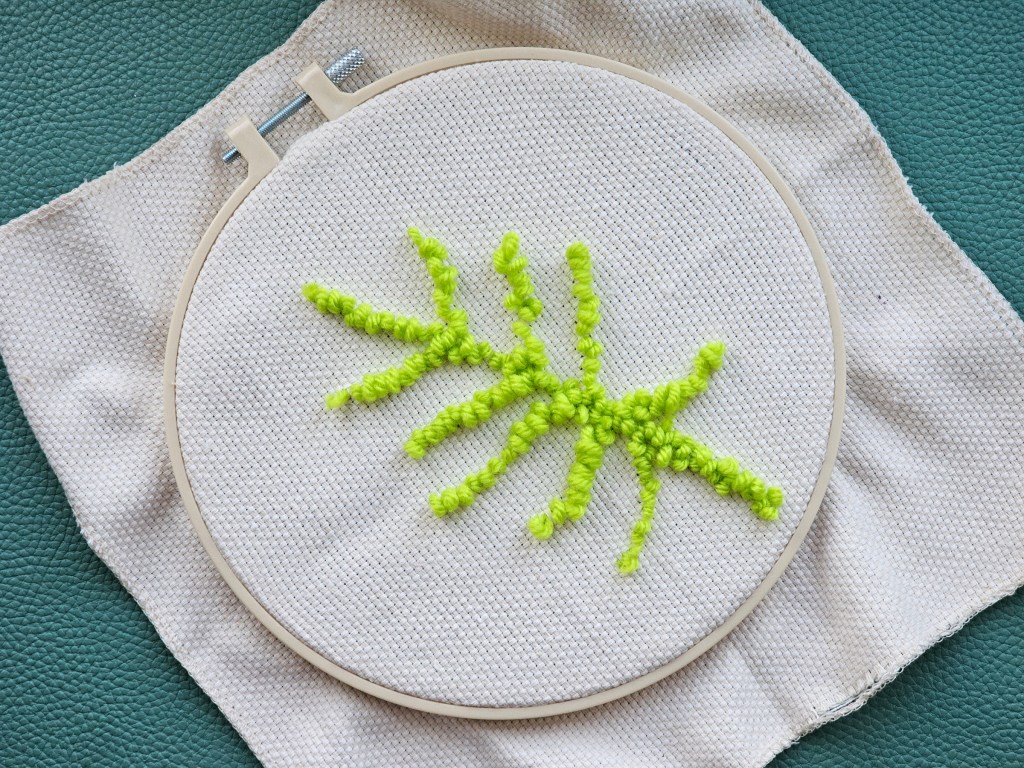
I started punching the second colour, and it became a little bit easier over time. I imagine having a large area completed with loops gives the canvas more structure and support, and the loops stay in place a lot better. Throughout the punching process, I was mainly looking at the ‘back’ side of the design. That’s the side from which you push the needle. Unfortunately, that means that you don’t see the outcome until you flip the design over.
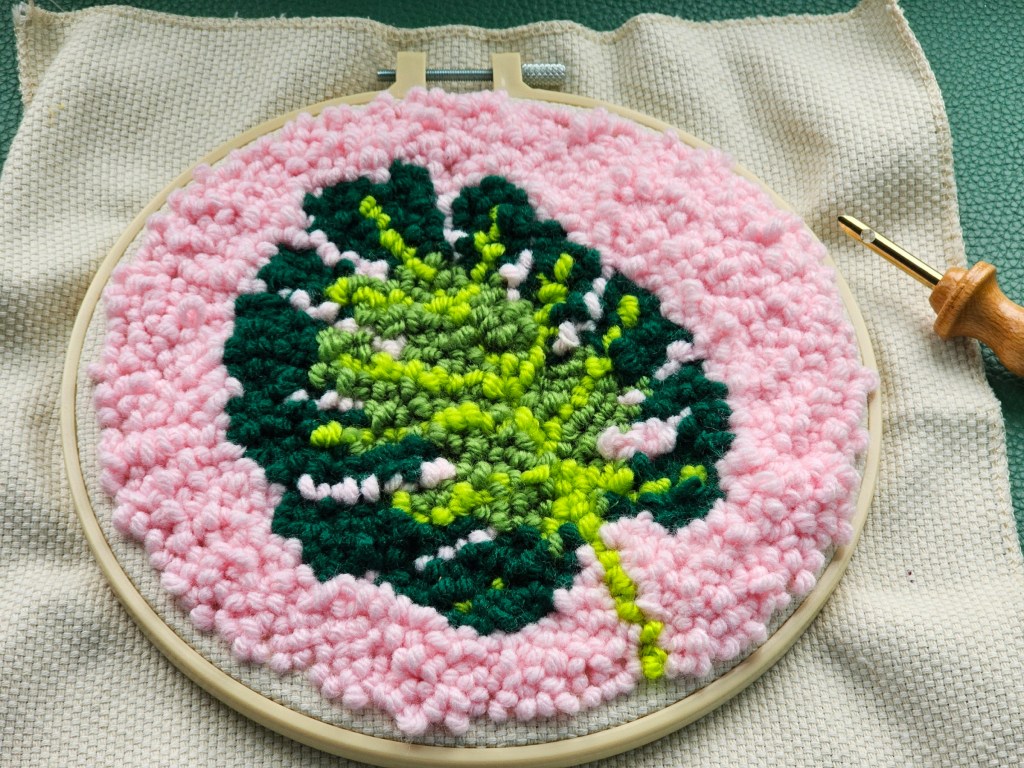
I noticed that the single lines of loops making the veins of the leaf got lost in the darker green. Oh well. I feel like the veins could have done with a double line of loops, but it was too late to go back.
I then moved to the third – and last – shade of green, to complete the outside area of the leaf. I feel like I was starting to get the hang of it by then, although the outcome wasn’t looking that great. I tried my best to follow the printed design really well, staying within the printed lines. When I flipped the canvas to the ‘right’ side, the leaf was looking a bit dense to me! I decided to trust the process and moved to filling the background.
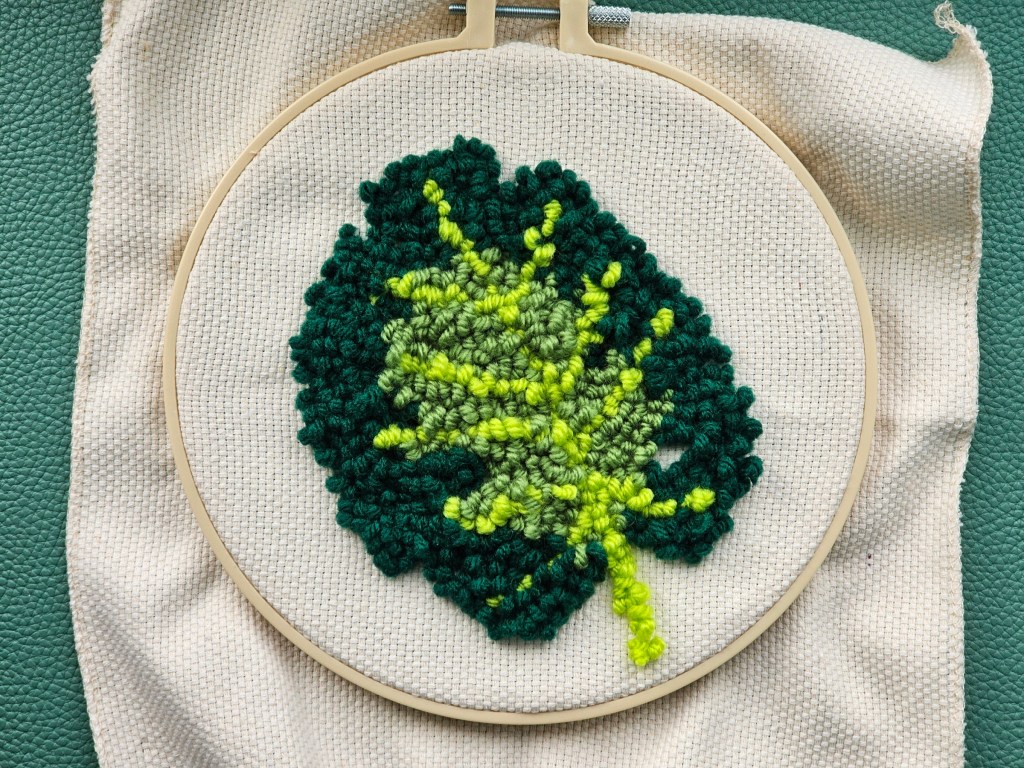
Filling the background
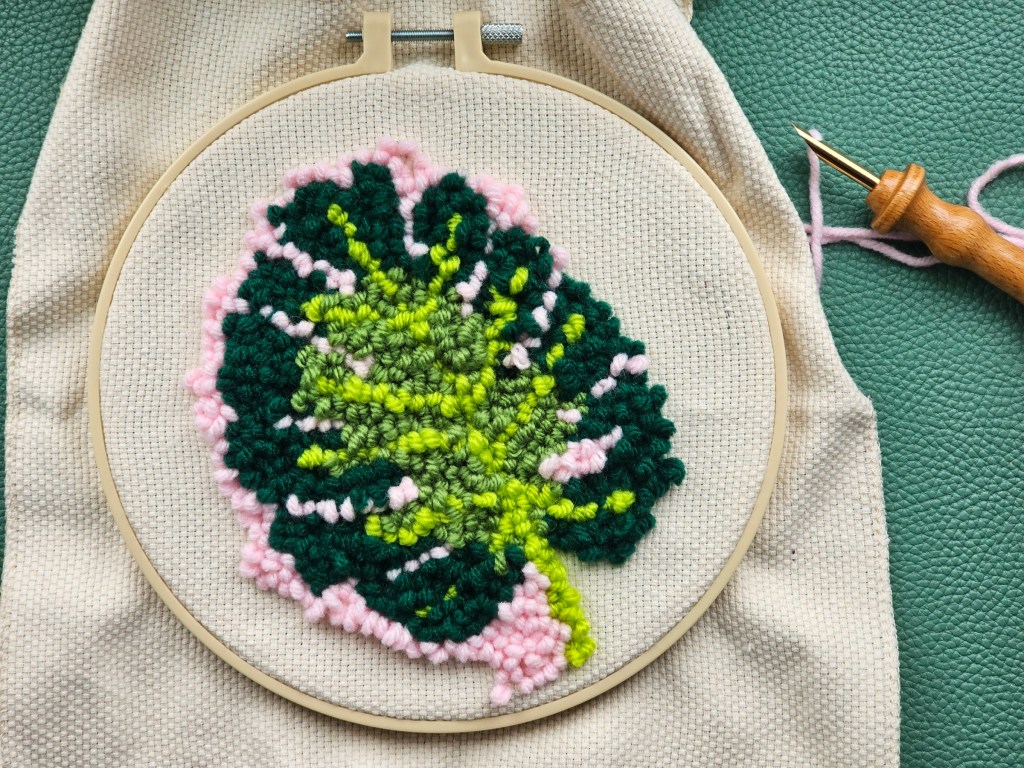
I started adding the background by filling the holes in the leaf. Unfortunately, it didn’t look that great! Now, writing this post, I realised what could have contributed to that. If you look back at the photo of the contents of the kit, you’ll see that the leaf in the photo on the box has nicely pronounced holes. But when you look at the printed canvas, those holes are a lot smaller. If I had spotted that before, I would have made sure to leave enough space for the pink background to show through. But since I didn’t realise and just followed the printed guideline, I was left with very little space for pink loops. That’s why the leaf doesn’t really look like a monstera leaf. It just looks like a dodgy green leaf with tears and holes. Oh well!
When I moved to punching the background around the leaf, that’s when I finally started to enjoy the process. Mindless punching is definitely a lot easier than trying to follow a specific shape. It was all going a lot more smoothly than when I started the project – it could be that the canvas, so full of already added loops, was already stretched a lot and kept everything in place much better.
Final thoughts
Even though I almost enjoyed adding the pink background, I wouldn’t say I had fun working on this project as a whole. It didn’t turn out great at all, and I couldn’t figure out how to make the loops perfectly even. The final result doesn’t really look like a monstera leaf. The holes aren’t pronounced enough, and the light green veins on the leaf are barely visible. Meh.
Considering that the set was quite expensive for a DIY kit from TK Maxx (double the price of my usual crochet and cross stitch sets), I don’t think I’ll be going back any time soon. I might give it one more chance one day, with a smaller / more precise project. The needle used for this monstera punch needle was huge, and even small irregularities between the loops are easy to spot. Perhaps with a smaller needle, it would be a bit more forgiving. But for now… I think I kind of hated this new craft? Which doesn’t happen often!
Also see: