I only picked up crocheting less than a year ago, but I feel like I’ve made decent progress already. I’m not an expert, don’t get me wrong – but I went from having no clue how to even read the patterns, to being able to follow instructions and even solve minor unexpected issues. So for Valentine’s Day this year, I picked up an assorted set for making crocheted coasters with a heart design. The box said it required ‘intermediate’ crochet skills, but that didn’t scare me off! I love a seasonal DIY project, and enjoyed working on these coasters.
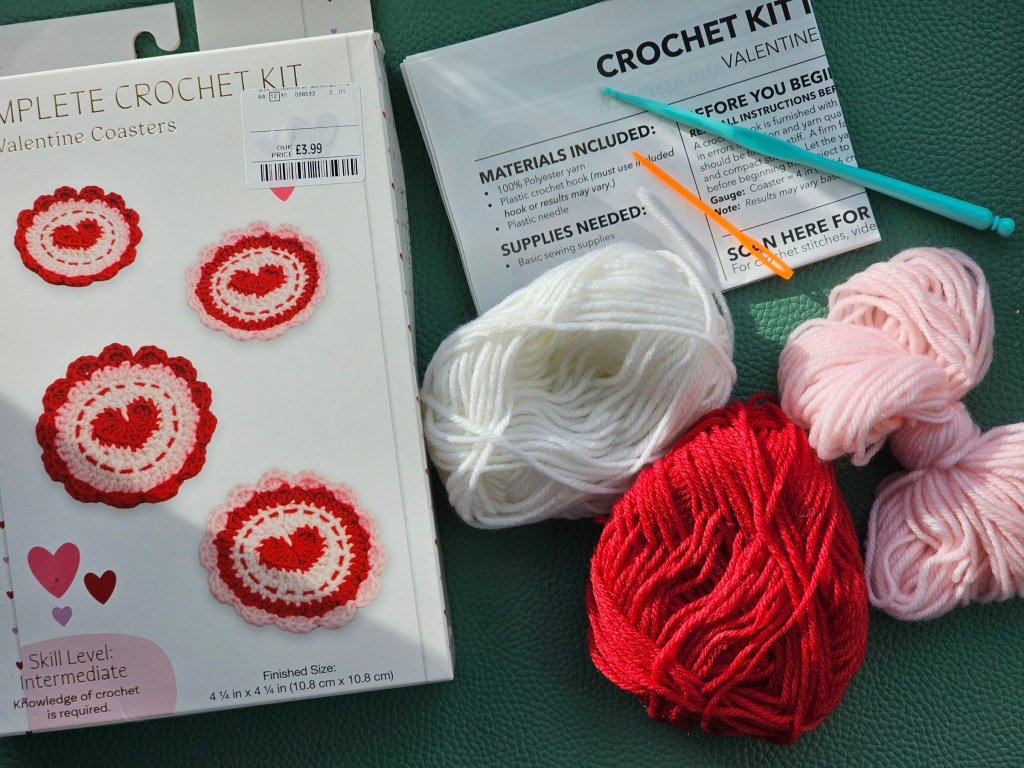
Contents of the set
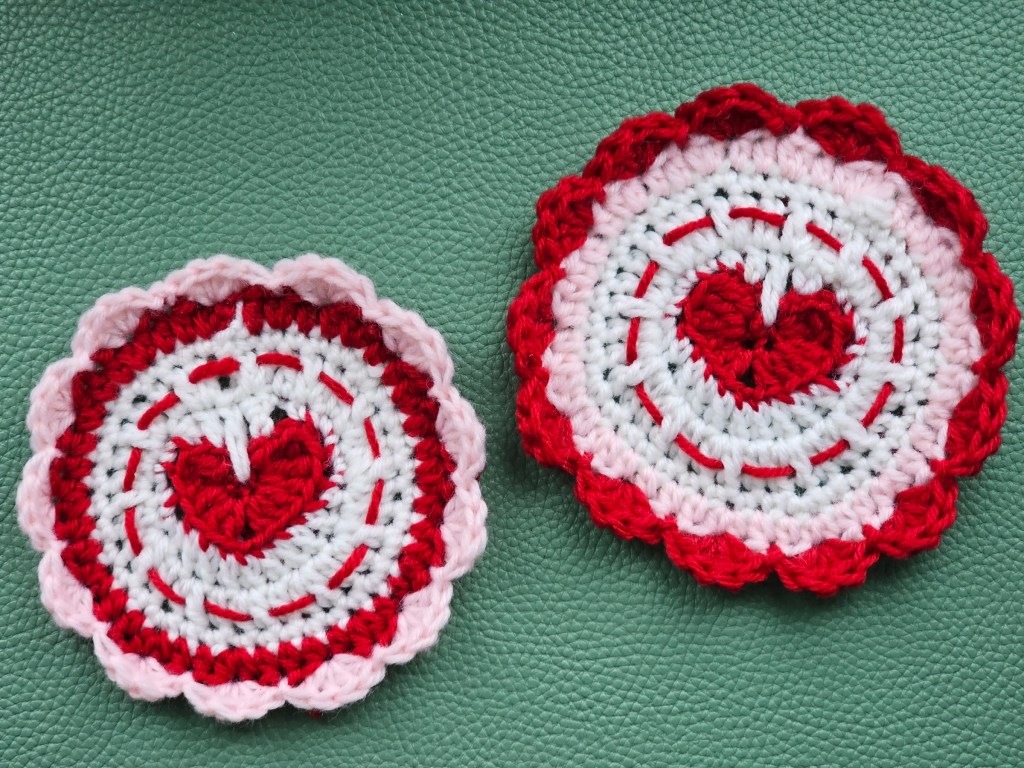
The set, which I bought in TK Maxx for £3.99, came with three small balls of yarn in red, pink and white. It also included a plastic crochet hook, a large plastic needle, and a leaflet with instructions.
Starting off… and rookie mistakes
I immediately jumped into crocheting. Even though I hate those plastic hooks included in assorted crochet sets and often swap them, I don’t have a better hook in an identical size, and I didn’t want to risk any issues.
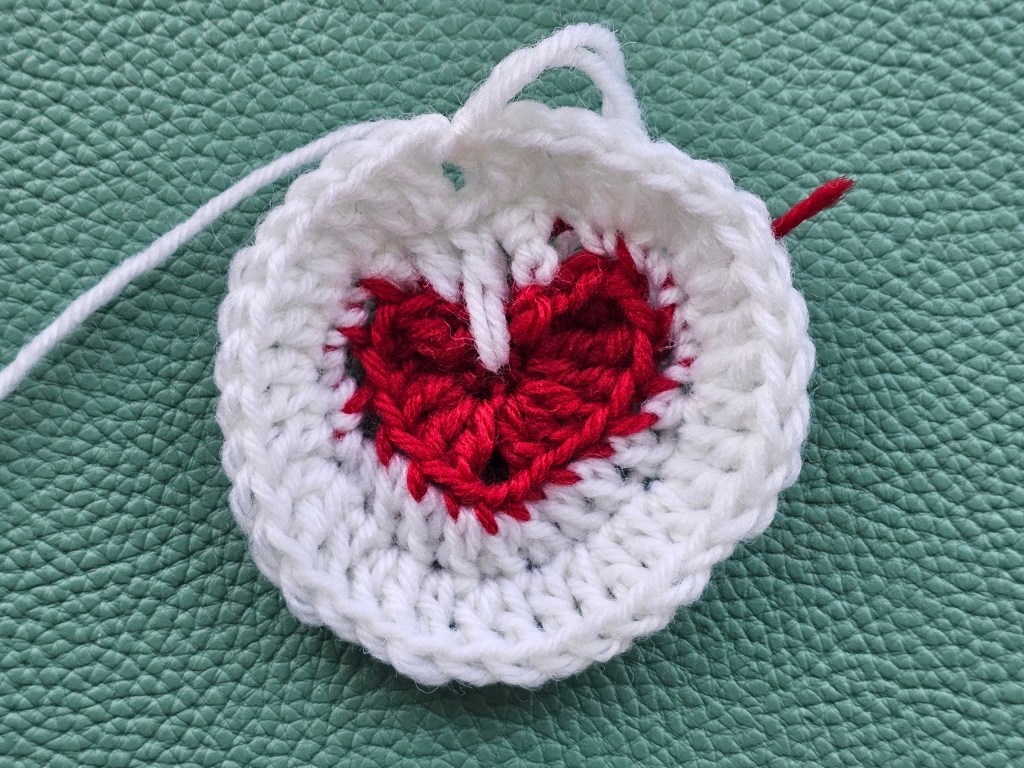
The instructions weren’t particularly clear. I’m not an experienced crocheter, but I can read most patterns! In this case, I would argue that the pattern didn’t explicitly say to increase or do multiple stitches in the same loop. Also, it didn’t help that the design started with just 4 chain stitches which formed the foundation. I’m well used to crocheting in a magic ring, but starting with a chain is more difficult for me. Especially when it’s a very short one!
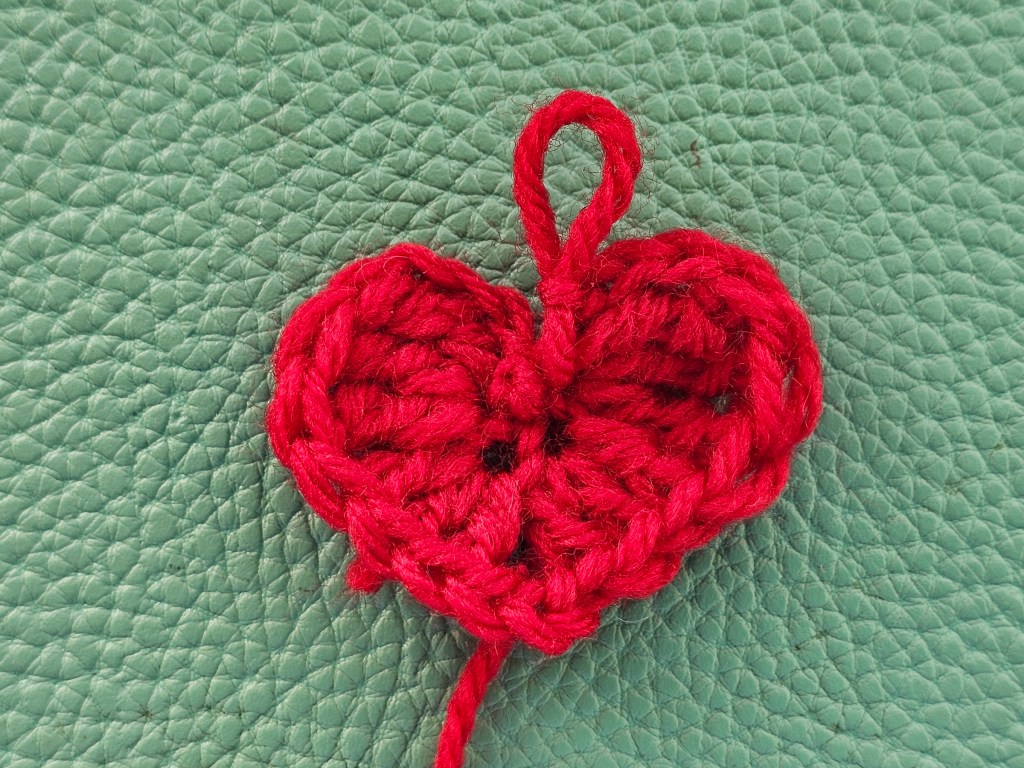
Despite the confusion and barely seeing what I’m doing with those tiny 4 starting chains, I managed to finish the round and was left with a small heart. Cute!

Happy with the result, I moved on to reading the pattern for the next round. And that’s when I realised. I made a rookie mistake.
Crocheting the heart, I saw double and treble crochets, and just followed what seemed to make sense, without thinking too much. I completely forgot about UK and US terms. Seeing lots of double and treble crochets usually tells me that the pattern uses UK terms.
Well, what did I see at the start of the following round? A half double crochet. US terms. Sigh.
Luckily, I hadn’t fastened off the previous round yet. I frogged everything and started fresh.
Once again, I struggled with the fiddly 4 starting chains, but managed to make another heart – slightly bigger, since it used taller stitches. I then moved to the next round and next colour of yarn.
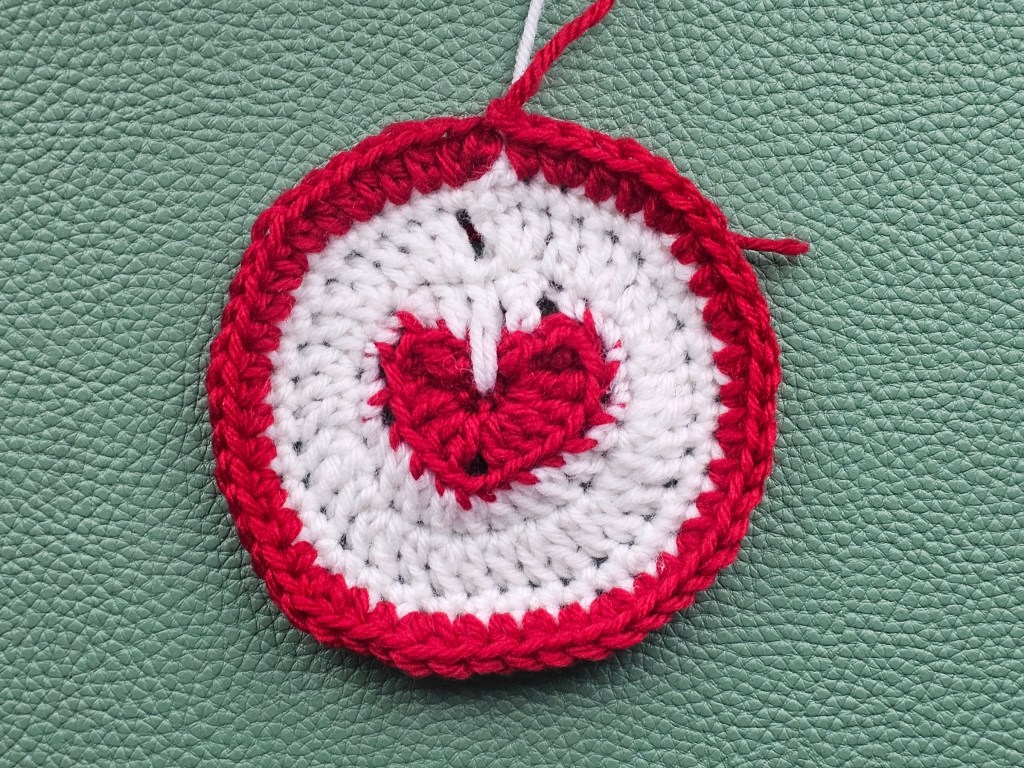
Crocheting around the heart
The next round was even more confusing. It was the round that aimed to take me from a heart shape to a circle, essentially negating the stitch height differences in the heart. I ended up drawing it all on a piece of paper (not as a proper graphic crochet pattern, just my own version of it). It really helped me make sure that I was placing the right stitches in the right loops. I managed to finish the round without major issues, though I have to say, everything looked a bit patchy and wonky. Not sure where the holes came from!
I then added two more rounds of white yarn, using basic stitches and increases.
Switching colour again
For the next round, it was time to switch colours again – this time, to the red that was used for the heart in the middle. Working in circles is easy, there were no surprises here – just a few increases on the way. I quickly added the red round to the coaster.
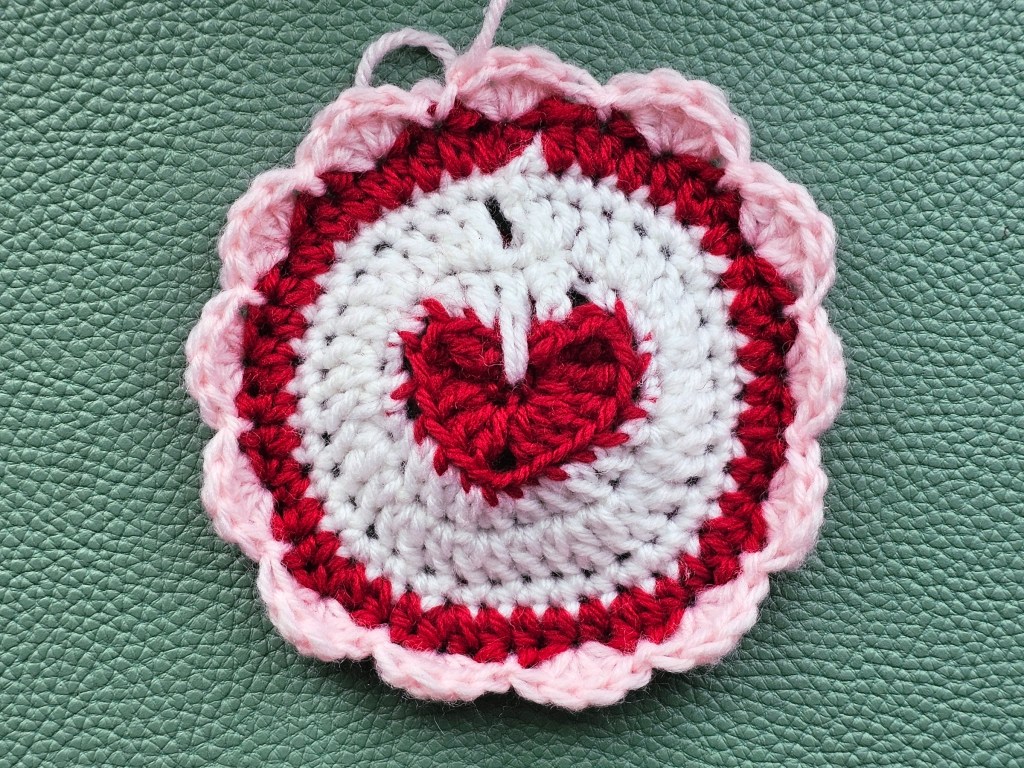
Adding scalloped edges to the coaster
Next, it was time for a fun round – adding pink wavy edges to my coaster. It used a very simple and easy to follow technique, and I love how it turned out. The coaster was nearly finished, it was just missing the final touches.
Final touches
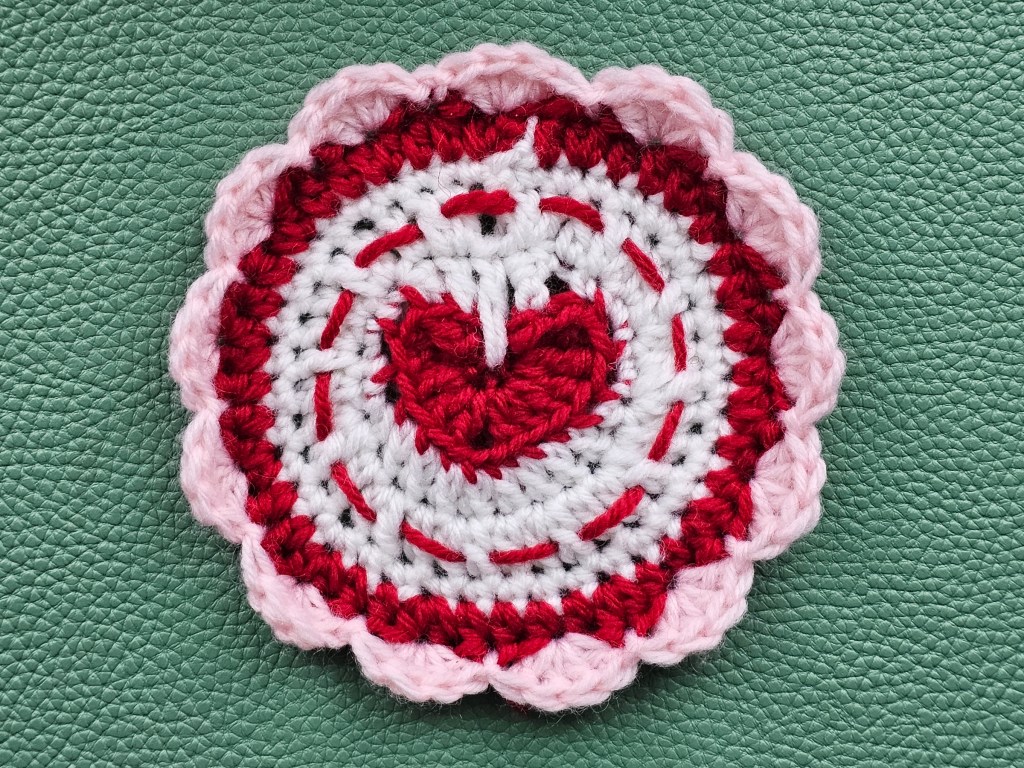
The last step was adding extra stitches to the front of the coaster, using a tapestry needle. I wasn’t exactly sure where to place those stitches, but I think it turned out pretty good. Once the first coaster was done, I also weaved in the ends – every crocheter’s least favourite job in the world.
Continuing with further coasters
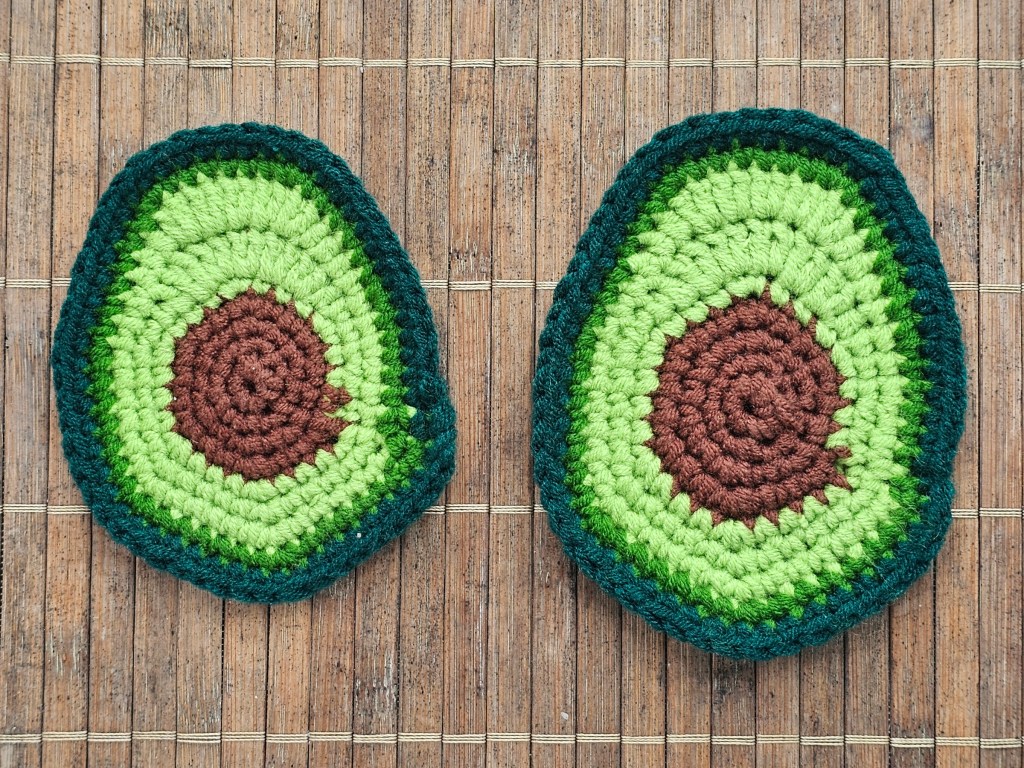
The instructions of the set suggest that you can make 4 coasters with the supplies provided – two in each colour combination. I made one coaster in the second colour variety, and decided to end it there – with one coaster in each version. Not because I didn’t like the final result or didn’t enjoy crocheting these coasters! I simply have too many coasters at this point. I previously crocheted avocado coasters, and I also recently tried diamond painting for the first time, with a coaster set too. That’s enough coasters!
Also see: