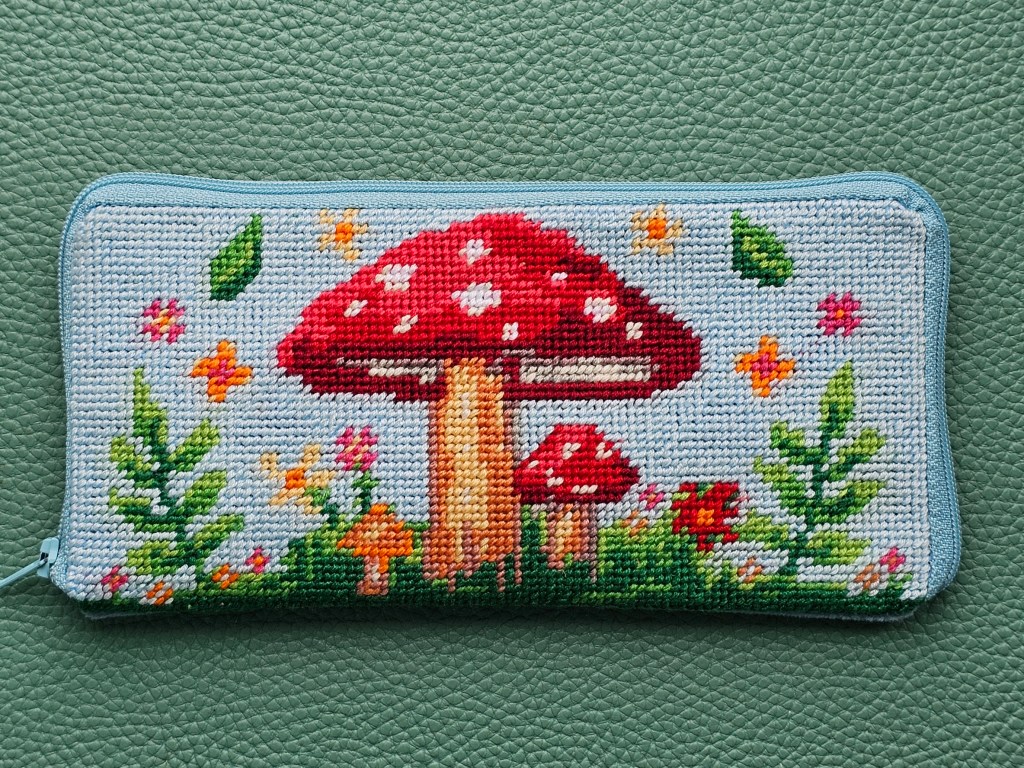
I’ve been on a cross stitching journey for almost two years now, but it was only a couple of months ago when I first discovered half stitching. In Hobbycraft, I saw this assorted DIY kit for making an embroidered case for glasses, using a half stitching technique. I was intrigued! I loved the idea of trying a fun variation of traditional cross stitching, and I particularly loved the idea of making a functional item in the process. I bought the kit, and recently got around to sewing my embroidered sachet with a colourful forest design. It was really fun and satisfying, and I love the final result!
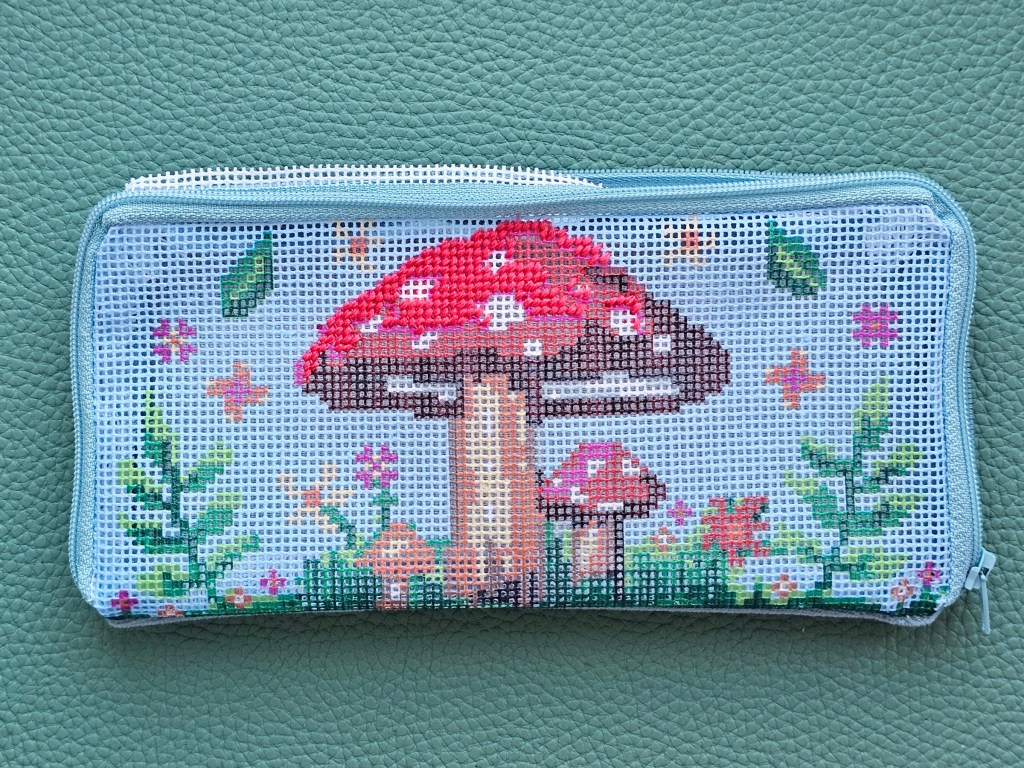
Contents of the kit
The set included a generous amount of yarn in assorted colours, clearly labelled with numbers. It also came with a needle and a leaflet with the pattern and instructions. And of course, it included the base of the case. The front of the case was made of a cross stitch canvas, with the design printed on it. The canvas didn’t feel like a traditional aida – I believe it was plastic, it was firm and stiff. The holes were quite a bit larger than in a traditional aida. The back of the case was made of a soft material in my favourite colour, baby blue. The sewn-in zip was really good quality, it moves smoothly and doesn’t feel like it’s going to fall apart any time soon.

Starting off with the large mushroom
First of all, let’s start with the main question: what on Earth is half stitching? If you’re familiar with traditional cross stitching, you know that it’s based on sewing crosses, each of them made of two diagonal stitches. Half stitching is essentially half of cross stitching – you only sew single diagonal stitches, all in the same direction. The texture of a finished half stitch project is therefore different than the texture of traditional cross stitch. Since you only sew one diagonal stitch per cell, you can complete the whole project faster than a cross stitch one.
The first thing I noticed when I was about to start sewing was that the print on the canvas wasn’t accurate. The colours blended between the cells, and I had no idea what colour should be used for each square. Straight away, I decided to refer to the diagram in the leaflet and just count the squares there. I started with the centerpiece of the design, the red mushroom.
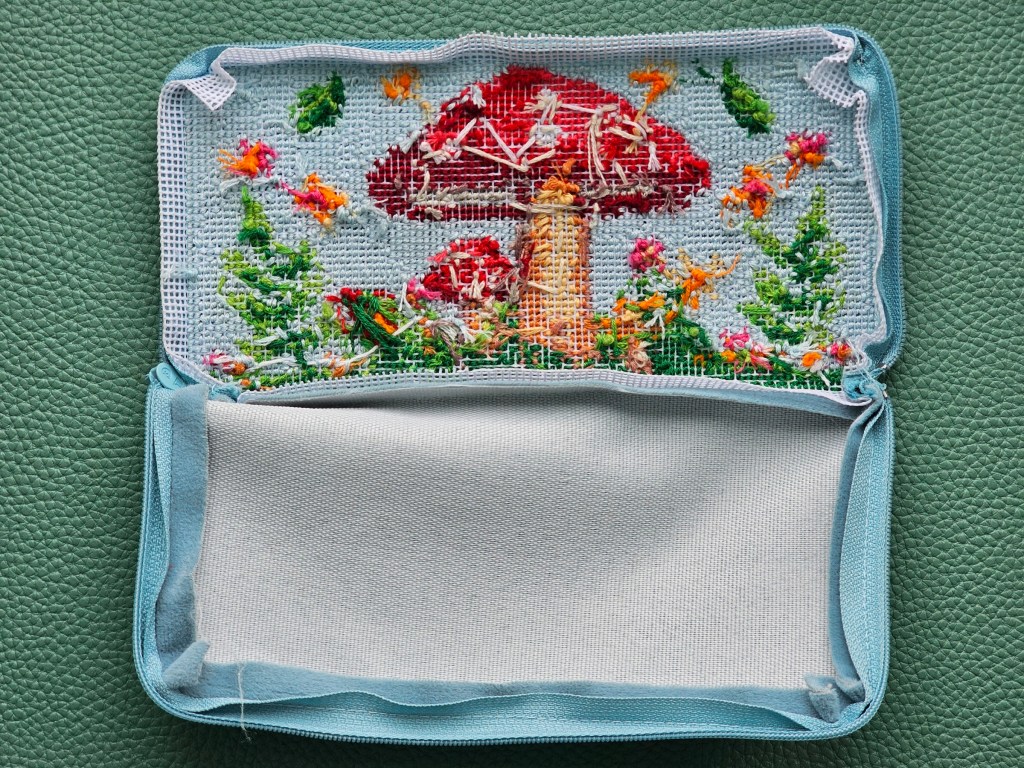
Half stitching was satisfying, and although it felt a bit awkward at the start – I was too used to traditional cross stitching – I quickly found my rhythm. One thing I struggled with throughout the whole project though was planning the optimal path for sewing. In cross stitching, when you sew a block of one colour, you can start by sewing all of the bottom diagonal stitches, and then sew the top ones on the way back, and end up with having the needle back in the same square where you started. After a couple of years of cross stitching, I’m quite good at planning the optimal sewing path in a way that minimises the need to end the thread and restart in a different place. I’m also good at minimising thread waste. In half stitching, you only sew a single stitch per square, which means that you always end up far from where you started. Until the very end of the project, I struggled to optimise the sewing path in my head and often found myself having to cut the thread and then sew a couple of forgotten squares with a new piece of thread. You can’t see if at the front of the design, but it made the back rather messy.
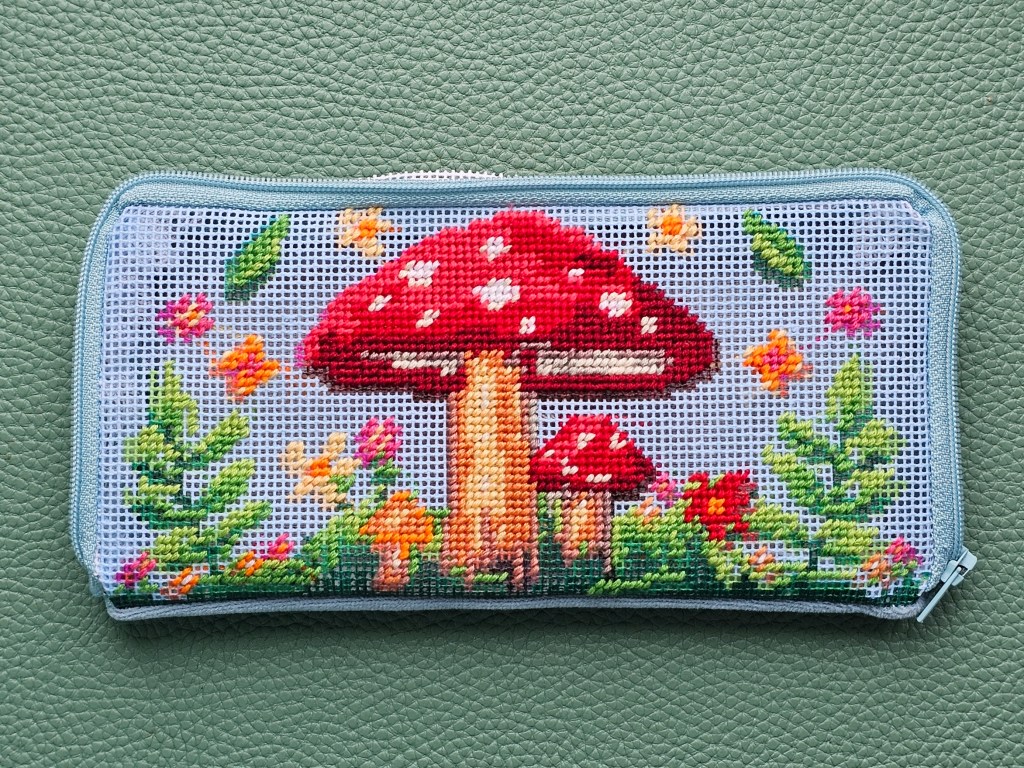
Adding more colours
After completing the first area – the cap of the mushroom – I was slowly getting into the rhythm of half stitching. I still had to carefully count the stitches following the diagram in the instructions, and the printed design on the canvas was a bit distracting, to be quite honest. The further away from the centre of the picture, the more skewed the print was. I triple checked the numbers of stitches in the diagram, I’m confident I got them right – however, the flowers on the left and right sides of the design were printed around 3 squares closer to their respective edge of the picture. It was a bit confusing, but I managed to ignore the print on the canvas and followed the diagram in the leaflet instead.

Once I got a few blocks of colours down in each section of the design, counting other squares in that area was much quicker and less error-prone. The design was starting to come to life – I had most of the mushrooms done, as well as a good portion of the leaves and flowers.

Nearly done
I then continued stitching all of the details – the flowers, the spots on the mushrooms, the leaves, and the highlights on the grass. I then proceeded to sew the main part of the grass, leaving just the blue background for the very end.
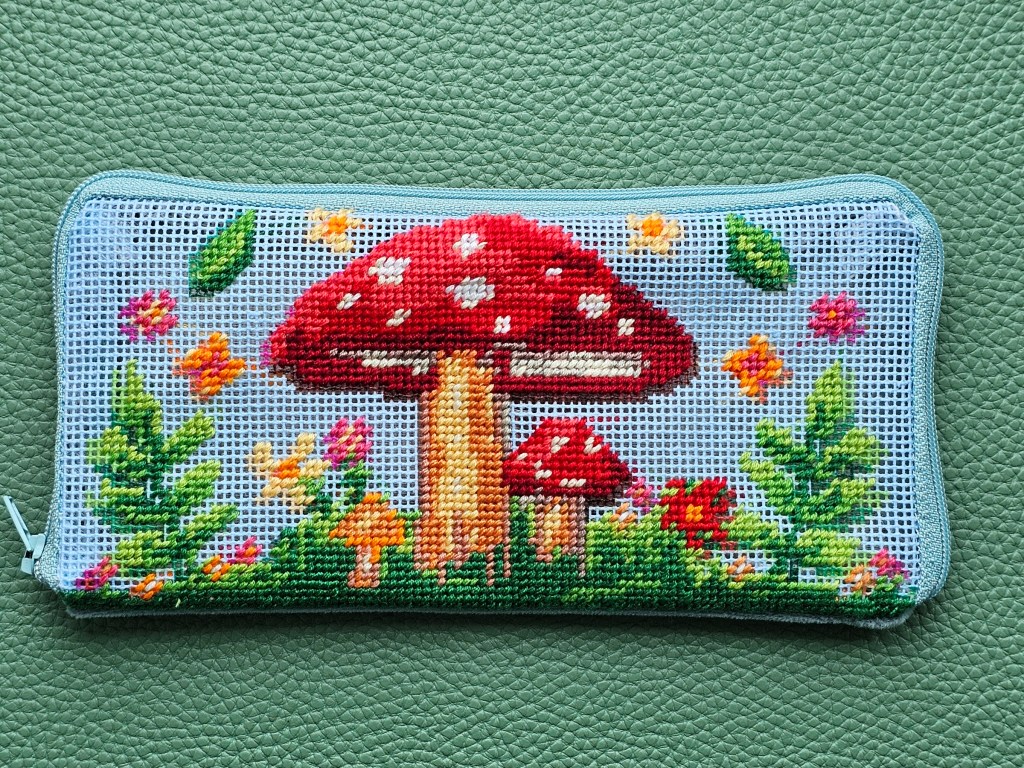
Final result
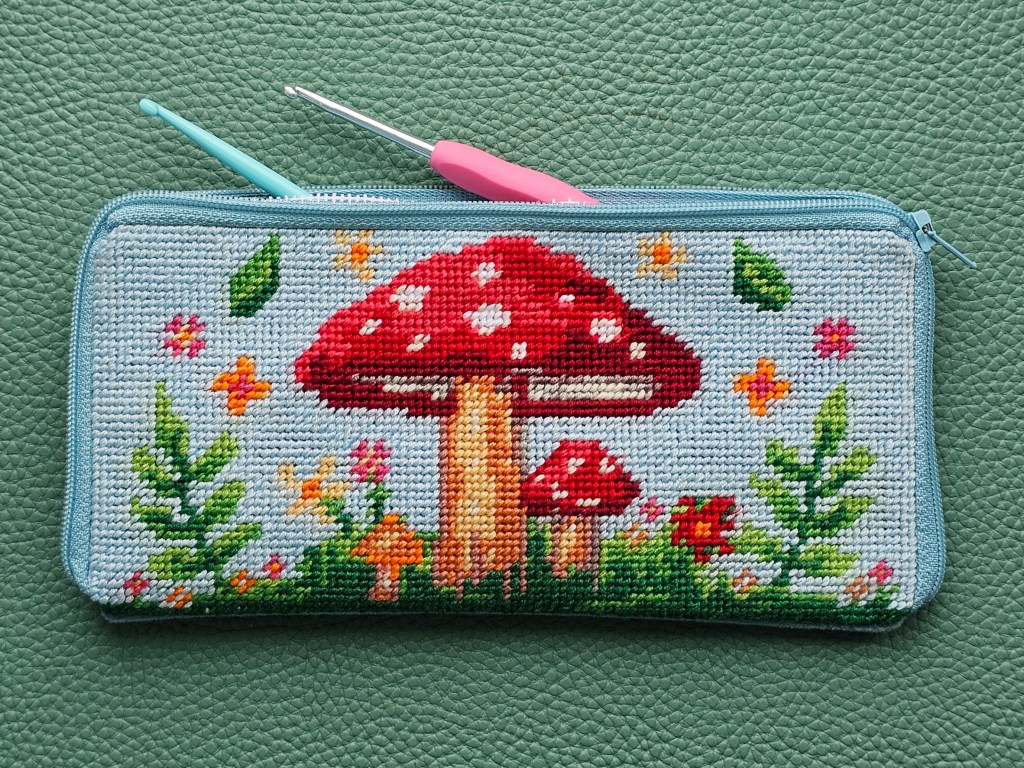
The, I stitched the blue background to finish the project. I’m actually delighted with the final result. The design is cute, I’ve recently been enjoying forest-themed decor. The baby blue background is my favourite colour, so bonus points for that. The half stitch picture came out smooth and looks really neat. I also love that it wasn’t just a canvas with a design but a full, functional item. It was sold as a glasses case, but I’m using it for my crochet hooks instead – it’s the perfect size. All in all, it was a fun project to work on!

Future improvements
The front of the design looks neat and cute, but the back of it – not so much. Plus, most importantly, the edges of the plastic canvas are quite sharp. This DIY set was sold as a case for glasses, but I’d be afraid of scratching my glasses with the edge of the canvas. However, the instructions mention that you can use an iron-on patch to cover the back of the half stitch design, which I think is a great idea. They even suggest a specific model of an iron-on fabric by the same brand. As I really like this case, I might try to get my hands on some iron-ons to cover the messy back of the half stitch and hide the sharp edges. I’m not worried about scratching the crochet tools that I keep inside, but a neat finish will help protect the design long term.
Also see: