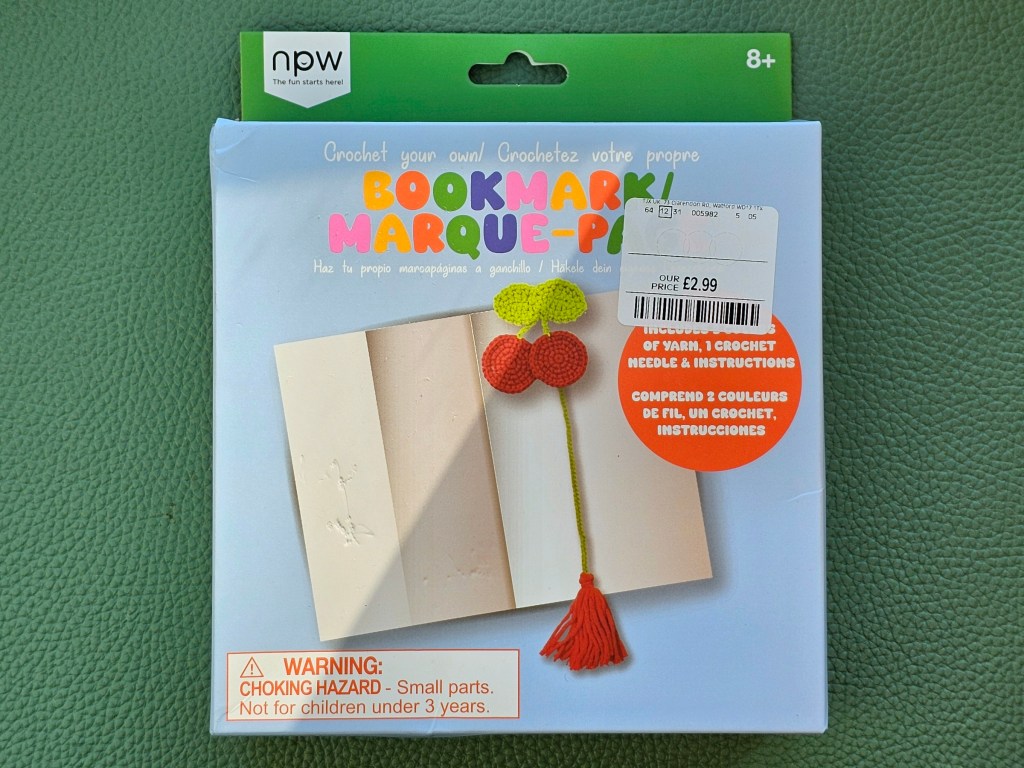
One of my New Year’s resolutions for this year was to learn to crochet – or at least learn the basics, for now. I’ve managed to make really good progress over the last few months, successfully completing several projects. Most recently, I crocheted a bookmark with cute cherries and a tassel. I used an assorted kits for this project, but frankly – you can easily replicate it yourself if you know the basics of crocheting. I will include some tips for that. Unfortunately, the kit itself wasn’t great and I had to make some adjustments. For that reason, it turned out to be a bit of a challenge for my beginner skills, but I managed to figure it out, and the final result is quite cute.
Contents of the kit
The set included green yarn, red yarn and a 3mm crochet hook. It also included a leaflet with instructions.
I’m not going to include the exact pattern in this post as I didn’t create it, but frankly, it’s very simple to recreate if you know the basics of crocheting. The stems are made with plain chain stitches, the cherries are essentially rounds of single crochet (US) [double crochet(UK)], and the leaves start with a few chain stitches which are then worked on both sides.

Making the leaves
Making the leaves was a bit confusing. They started with a short chain, which was then worked on both sides. I’m much better at working rounds around a magic ring, but I’ve previously completed a project that used chains at the start, and managed to figure it out. This time, the number of stitches in the pattern didn’t quite add up. Maybe it’s my lack of skills, maybe it’s the lack of quality in this assorted kit. Who knows! I did my best to follow the pattern, but had to improvise in a few places. Each leaf started with a short chain and then had some hdc and dc (US) [htc/tc (UK)] stitches added around.

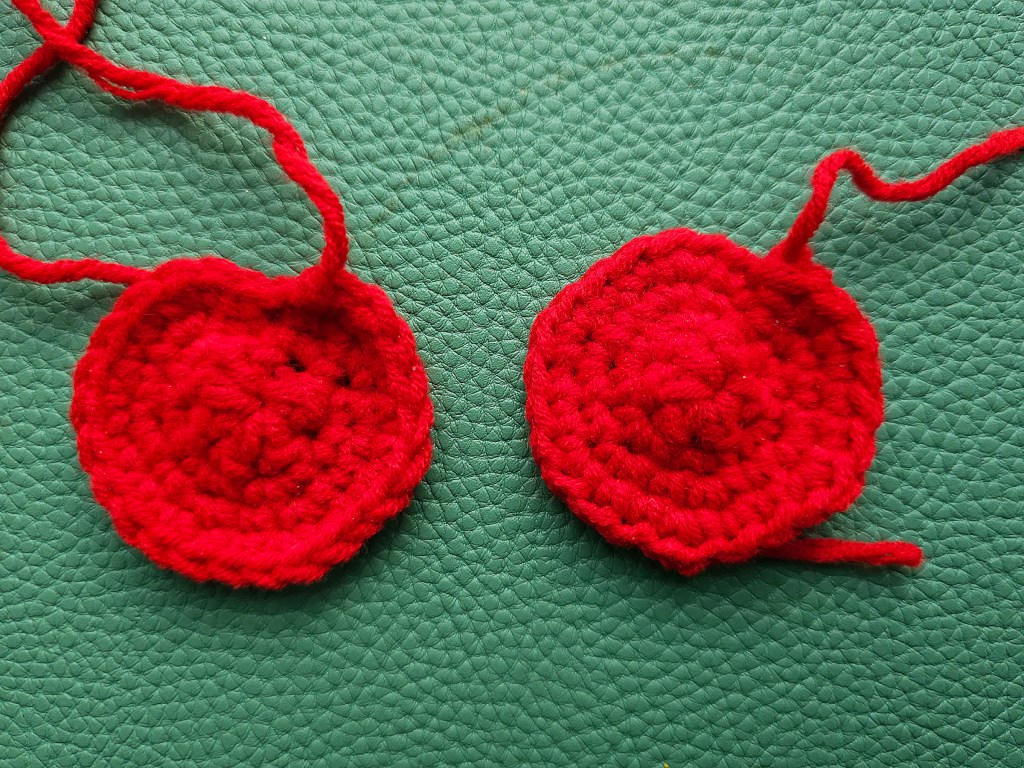
First cherry completed
Next, I started crocheting the cherries. This was much easier than the leaves. I basically started with a magic ring and then worked in rounds using basic stitches and increases. I’m still at the beginning of my crocheting journey, but I could make a solid circle with no issues even if you woke me up for it in the middle of the night, ha! The finished cherry seemed a little big. You can’t tell from the photo, but it was close to getting into coaster size territory. It was an early sign of potential upcoming issues.

Second cherry fiasco
I then proceeded to crochet the second cherry, using the same pattern. I quickly realised that there might be trouble on the horizon. My worries were officially confirmed when I finished the penultimate round with about 2 inches of yarn left. Ouch!
I didn’t have enough red yarn to crochet the final round of the second cherry. What’s more, the instructions say that you should also make a tassel for the bookmark with red yarn. I may be a beginner when it comes to crocheting, but I’m pretty sure it’s not my fault that I ran out of yarn. I followed the pattern perfectly – I was extra careful when crocheting the second cherry – and my tension tends to be on the tight side, which means that I usually use up less yarn than I should. I’m confident that crocheting two cherries with the provided pattern and making a tassel using just the yarn included in the kit is simply impossible. Eh.
Here are the two finished cherries, one with all rounds, the other missing the final round.

Going back
Since the first of the two cherries seemed way too big anyway, and the second – without the final round – was actually a good size, I decided to go back and frog (un-crochet) the final round from the first cherry.
As result, I had two cherries in the same size, and I also gained a lot of leftover yarn to use for the tassel. In fact, the yarn that came out of frogging the outermost round of the first cherry measured about 1 metre. This means that the kit should have had an extra 1 metre of red yarn for me to be able to crochet both cherries according to the pattern. And that’s excluding the tassel, which should also be red. Sigh!
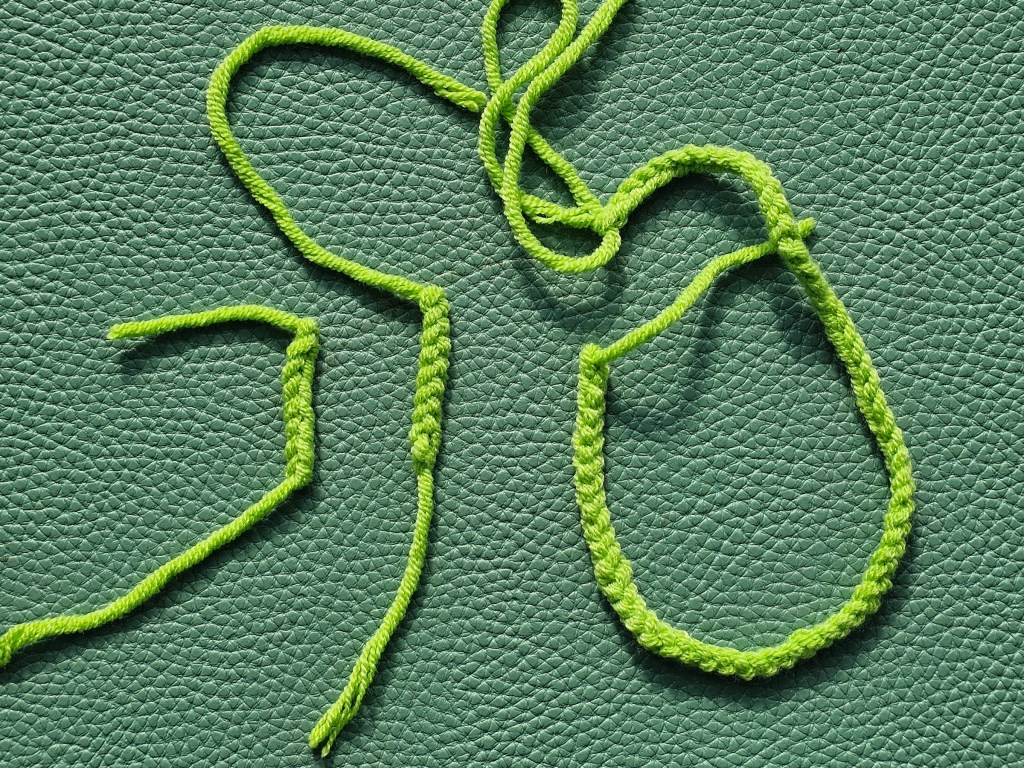
Making the stems
Now, it was time for the easy part. I made two short stems for the cherries with basic chain stitch, and a long chain for the bookmark itself. Simple! Funnily, I still had lots of leftover green yarn afterwards. Perhaps the makers of the set got the yarn lengths mixed up?
Final touches
Finally, it was time to assemble the bookmark.
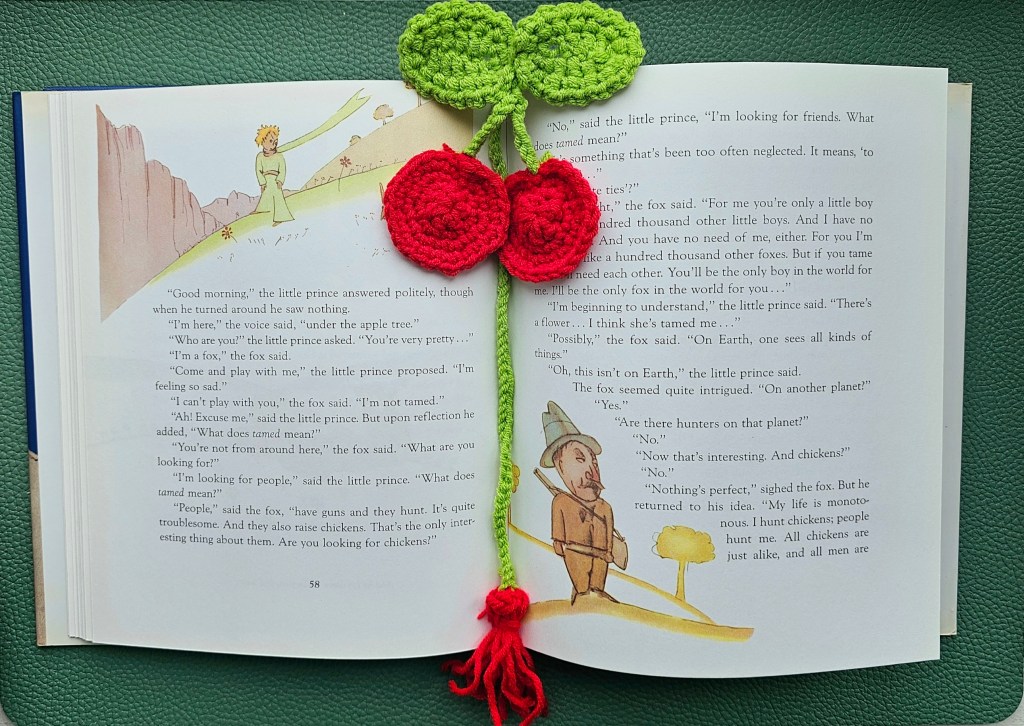
First, I attached the short stems to the cherries, and then attached the leaves at the top. I used the leftover yarn tails to sew everything together with a tapestry needle.
Next, I made a tassel out of the yarn I saved from frogging one round of the first cherry. I attached that tassel to one end of the long stem. Finally, I attached the other end of the long chain to the cherries, and the bookmark was complete.

By the way… insufficient yarn wasn’t the only thing that was wrong with this kit. The instructions were full of typos! They weren’t a result of poor translation, as it often is, it was clearly bad typing and no proofreading. Oh well.

Final thoughts
Assorted DIY kits are a convenient way to start a project without the need to do a lot of planning or buy a huge amount of supplies. In theory, you should be able to complete a whole project using just the supplies included in the set alone. I buy those sets all the time, for various crafts: crocheting, cross stitching, needle felting, and more. Most of those kits are good, and I usually end up with lots of leftover unused supplies too.
Unfortunately, sometimes, the kits disappoint. For example, cross stitch kits may come with insufficient yarn or mismatched colours of the thread. This time, the crochet set clearly didn’t include enough red yarn. But, it gave me an opportunity to think creatively and I managed to find a solution! Despite the issues, I’m actually happy with the final result. I just probably wouldn’t recommend buying that specific kit, it’s not the best quality.
Also see: