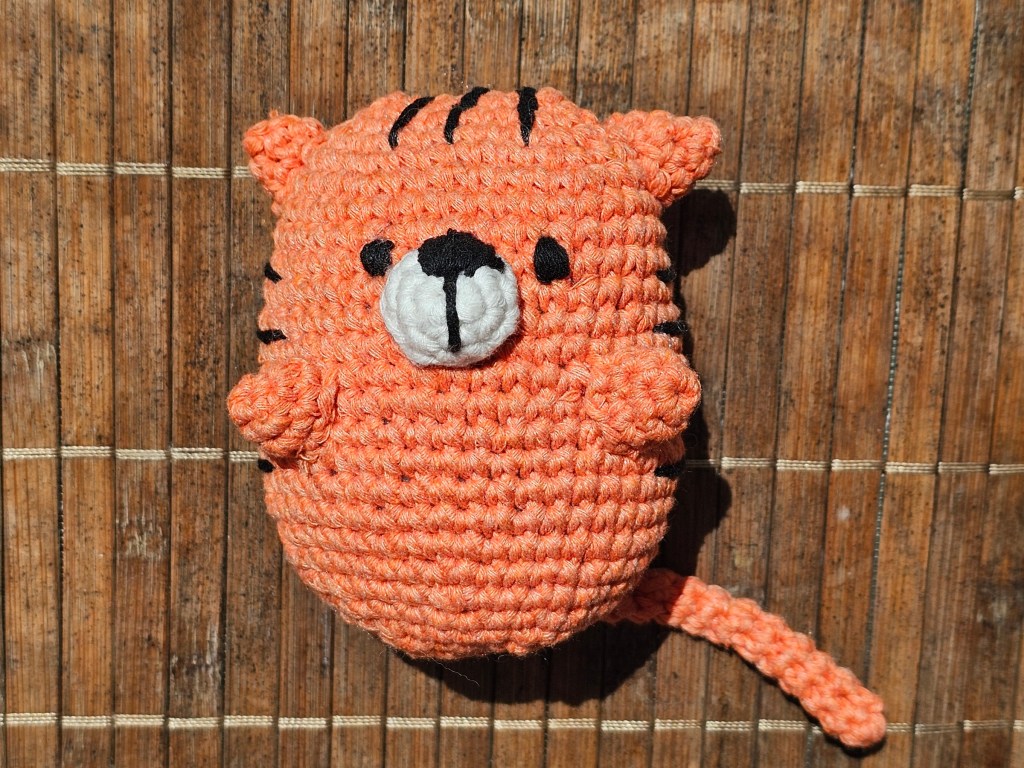
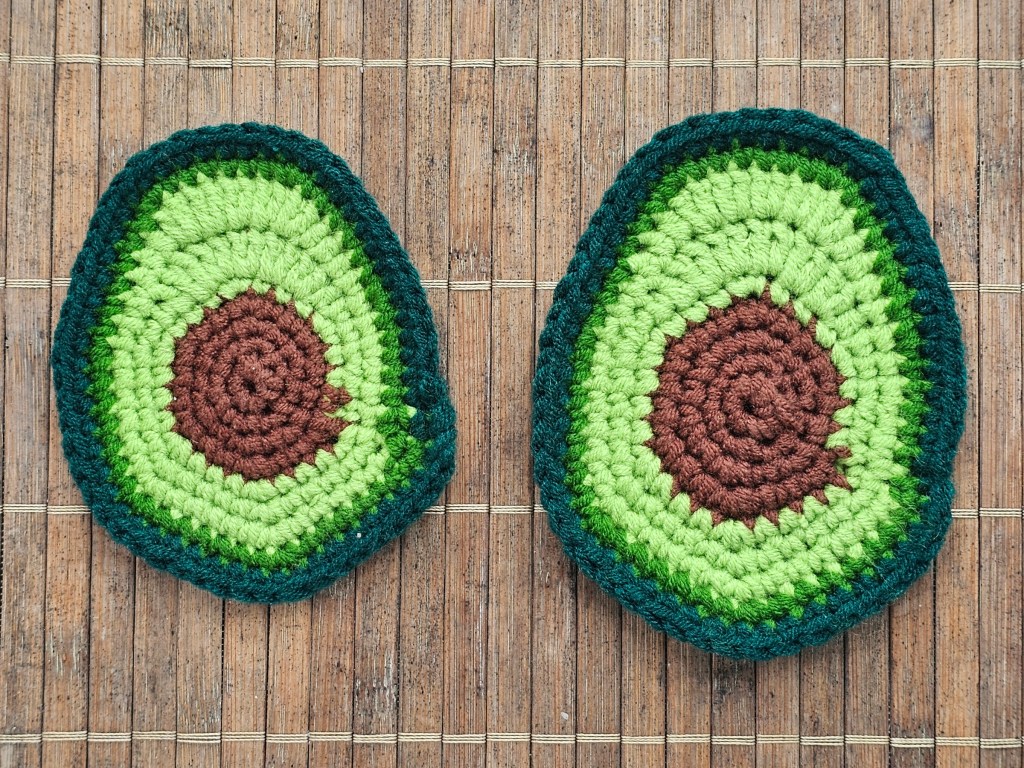
One of my New Year’s Resolutions for this year was to learn to crochet. It’s been a steep learning curve so far, but I’ve managed to make some progress. I’ve been able to make cute avocado coasters, but also a whole 3D tiger plushie. This time, I chose to work on a cute star keyring. I managed to successfully complete the project, and learnt a few things in the process!
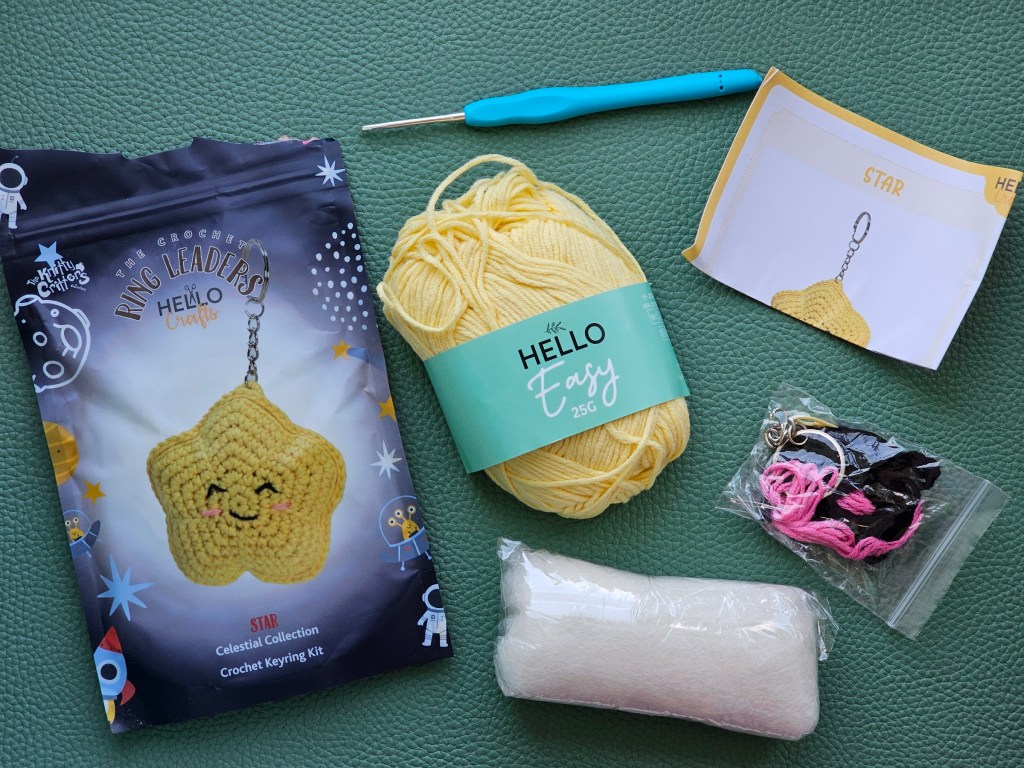
Contents of the kit
I bought this assorted crochet set in TKMaxx for about £4. It included a ball of yellow yarn, a crochet hook, shorter pieces of pink and black yarn, a tapestry needle, a stitch marker, and stuffing. There was also an empty keyring, and a leaflet with the pattern.
The contents of the kit were perfect for beginners. I especially appreciated the addition of a stitch marker. Some of the crochet sets I’ve seen in the shops don’t come with a stitch marker, and if there’s one thing I’ve learnt about crocheting this year, it’s that stitch markers are absolutely essential.
As always with these assorted kits, they aren’t great at teaching you the absolute basics of crocheting. The leaflet with the instructions won’t teach you how to hold a crochet hook or how to make basic stitches. Unfortunately, you need to learn the essentials elsewhere. Otherwise, though, this assorted kit was great.
Starting off
This pattern started with a magic ring. I remember when I first needed to make the magic ring for an Easter egg, my first crocheting project. It took me a couple of hours of Googling and watching YouTube videos to finally understand it. Now, when a project starts with a magic ring, I’m happy – it’s something I’ve practised many times!
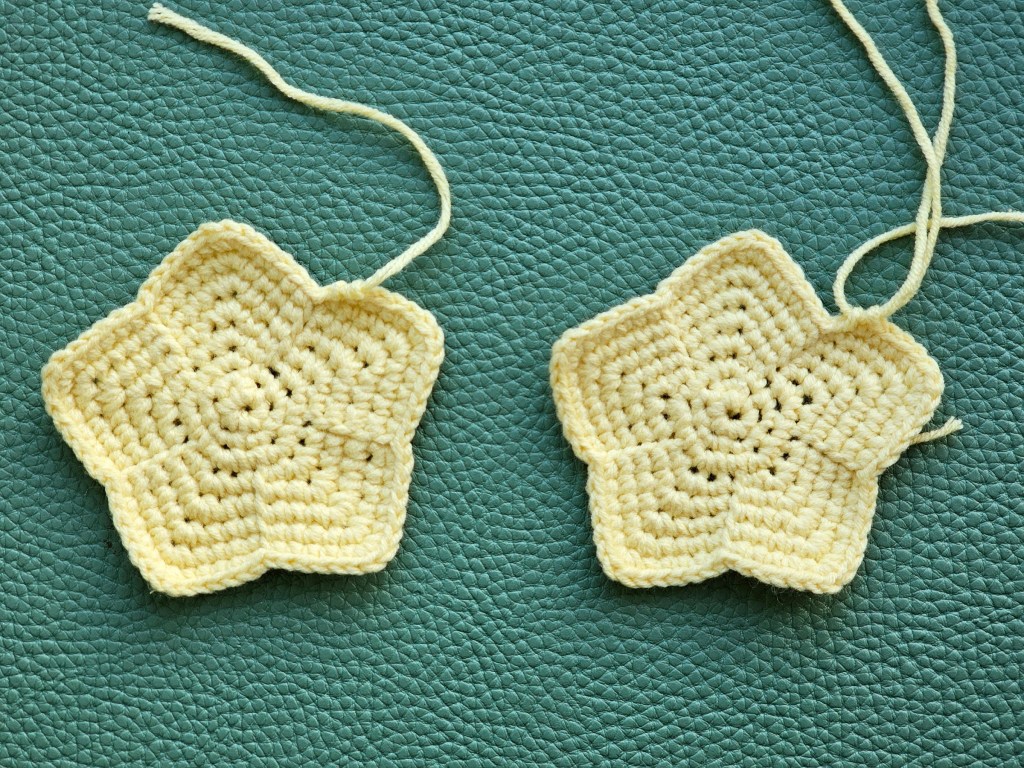
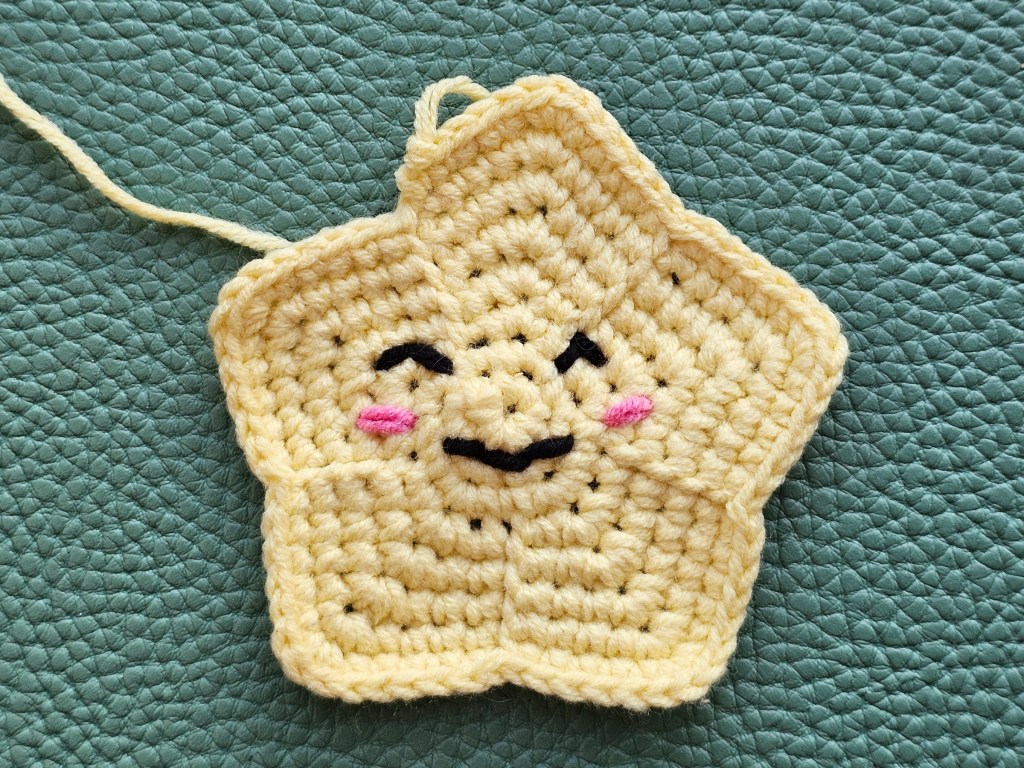
I worked in rounds, and what was originally a circle, quickly started resembling a star. It was fascinating to see how easily you can turn a crocheted circle to a defined shape, only using basic stitches. I’m still a beginner when it comes to crocheting, and would never be able to come up with this pattern myself. It was a valuable lesson!
Overall, I managed to finish the first star easily and relatively quickly, for my beginner standards. The final result was quite small, but I believe that I could continue crocheting the same pattern to make a bigger star. It would make a nice coaster!
Second star
Now, it was time to crochet the second star, for the other side of the 3D keychain. I wasn’t worried about crocheting the pattern, as I had already practised it. However, I was worried about making it the same size as the first one! After all, both pieces had to match.
When I was crocheting the first star, my tension was horrible. I tend to crochet too tightly, and find it difficult to fix when I’m already half way through. I was conscious of it when crocheting the second star. On one hand, I wanted to improve my tension and keep it a bit looser. On the other hand, I didn’t want to end up with a star much larger than the first one.
In the end, I was so focused on not making the second star too big, that it ended up being… even smaller than the first one. Oh well! The difference was negligible though, and I was confident that everything would fit together nicely.
Embroidering cute details
Next, it was time to add a cute face on one side of the star. Embroidering crocheted pieces is one of the hardest things to do, in my opinion. I can never make it look good! Luckily, the design on this star was super simple, and I managed to make it look cute. I added the eyes, mouth and blushed cheeks, and loved the outcome!
Connecting the pieces
Then, it was time to connect the two pieces. It was the most overwhelming step of the project for me. I’ve never tried connecting two flat crocheted pieces with another crochet stitch. Luckily, it went smoothly! I managed to figure it out and everything went well. I managed to align the two pieces well, and each stitch on one star had a corresponding stitch on the second star. When the two pieces were almost entirely connected, I filled the star with the stuffing included in the set. I then added the final stitches, and the little star was done.

Final result
Finally, it was time to add the keyring. I used yellow yarn and a needle to sew the keyring to the star. I then tied a firm knot at the end of the yarn and hid it inside the star. And just like that, the cute crocheted star keyring was finished!
I really enjoyed working on this project. I learnt some new things: using slip stitches and connecting two crocheted elements together. The final result is super cute!
I have lots of leftover yarn from this project, so I’m planning to make a larger star and use it as a coaster. I will also definitely be saving this pattern, it seems like a versatile design that might fit in many future projects!

Also see: