
One of my New Year’s Resolutions for 2025 was to learn to crochet. It was challenging at the start – you can read about by troubles here – but I’m now able to complete simple crocheted projects. Recently, I managed to make two cute avocado coasters. I’m by no means a crocheting expert, but I learnt a lot when working on this project and even managed to improve between the two coasters. Here is how it went!
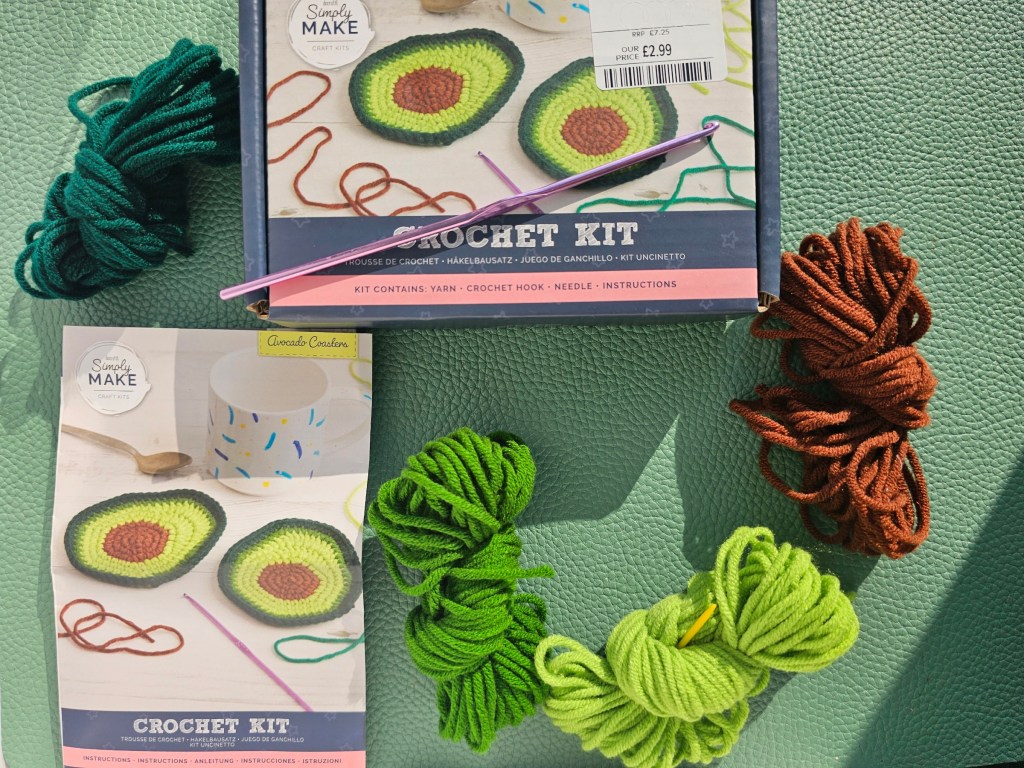
Contents of the box
The set included yarn in brown and three shades of green, a 3mm metal crochet hook, and a leaflet with the instructions. It also included a plastic needle, which I only found later on – it was inside one of the balls of yarn.
I’ve bought several assorted DIY crochet kits now, and I can tell that most of them aren’t great for complete beginners. They’re beginner friendly, but you need to first do your own research to learn how to sew the basic stitches. The instructions in this avocado coaster kit had a few pictures for some of the stitches used in the pattern, but not all of them – which seemed pretty odd! It’s a bit strange for the authors of the kit to assume that the user will know some of the more complex techniques, but benefit from pictures for the simpler ones.
I scanned the pattern, which was quite short, and found that I had already learnt all of the necessary stitches. I needed a quick refresher on making the magic circle, but other than that, I was ready to start crocheting the first avocado coaster.
Starting off
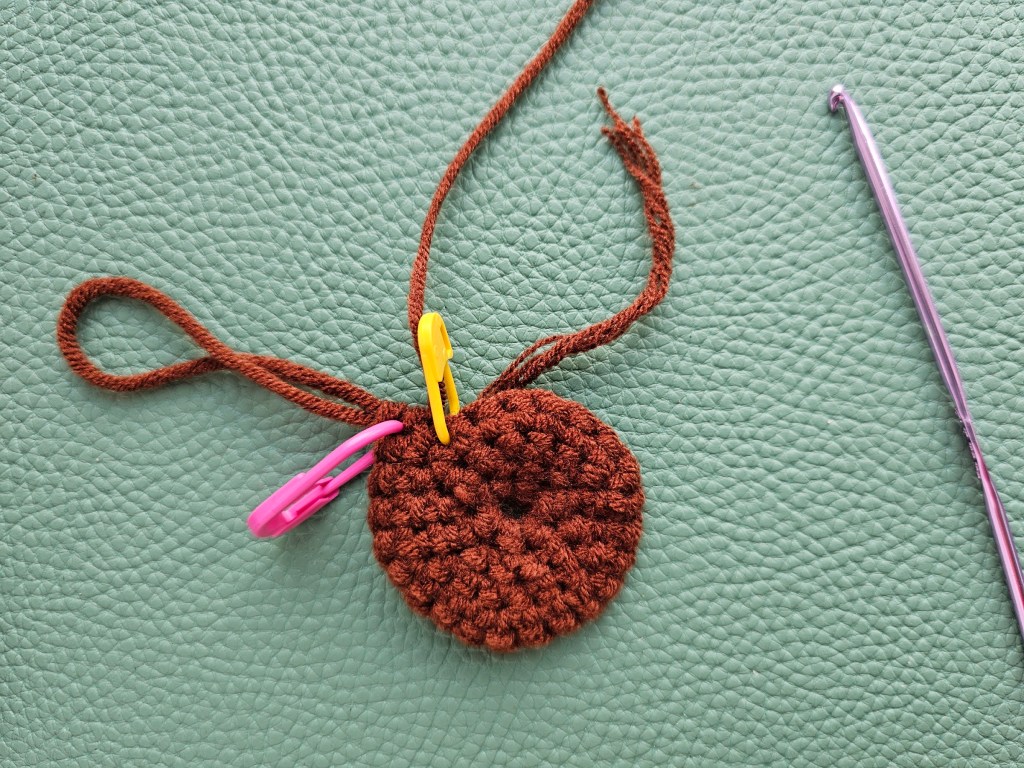
Making the magic ring was probably the most difficult part of the whole design. I really wanted to make it from memory, without referring back to any tutorials. After all, I’ve made it multiple times before! I spent about 15 minutes trying to remember it, but had to give up. I referred to the book I had bought – which has been amazing for learning to crochet – and finally, I had my magic ring ready. After that, I was able to quickly complete the brown part of the design.
Switching colours
I had already completed a couple of projects which required colour changes, so I remembered how to do it. I switched from the brown yarn to the vibrant light green, and started crocheting the flesh of the avocado. This part of the design used half double stitches and double stitches – I had used both before, but needed to check a tutorial in the book just to make sure I remembered them well.
I continued crocheting, always marking the rounds and counting the stitches, making sure I follow the pattern without any errors. Soon, the light green part of the coaster was done.
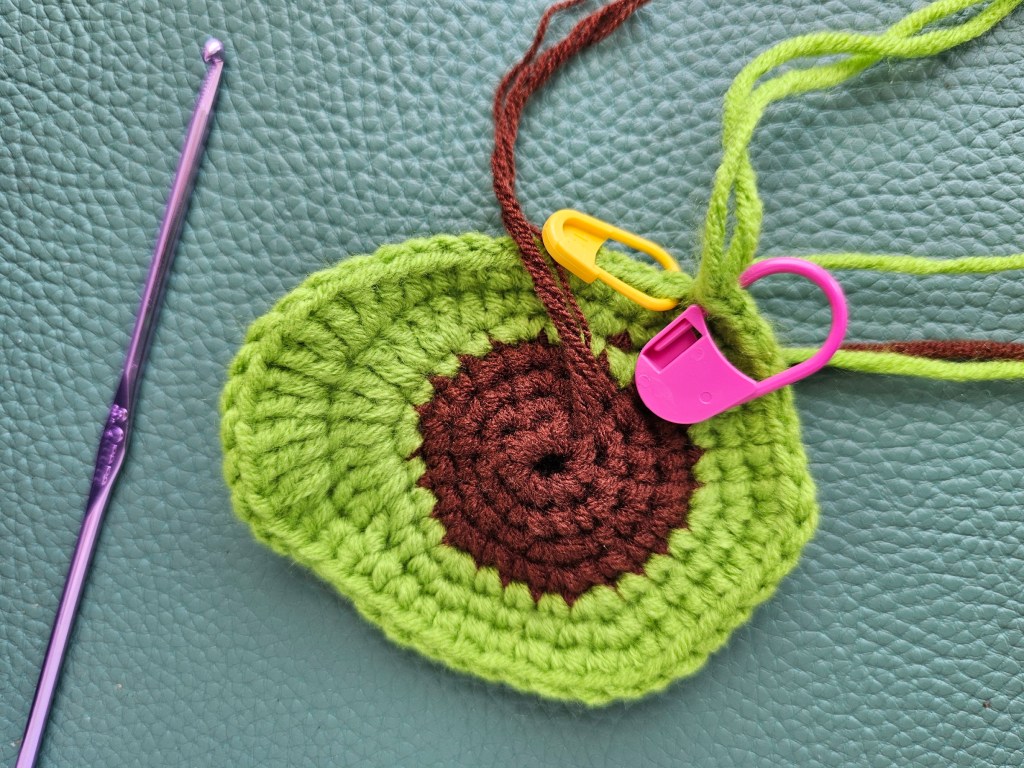
Adding darker shades of green
Next, I switched to the medium shade of green yarn, and then to the darkest one. Both of them were only used for one round each, and it didn’t take me long to finish them.

Weaving in the ends
The first avocado coaster was almost done. All I had to do was weave in the ends of the yarn. I used the plastic needle included in the set to hide the tails of the yarn between stitches. It was probably my least favourite part of the project, and frankly, I didn’t do a great job. But, finally, the first avocado coaster was completed!

Applying my learnings to the second coaster
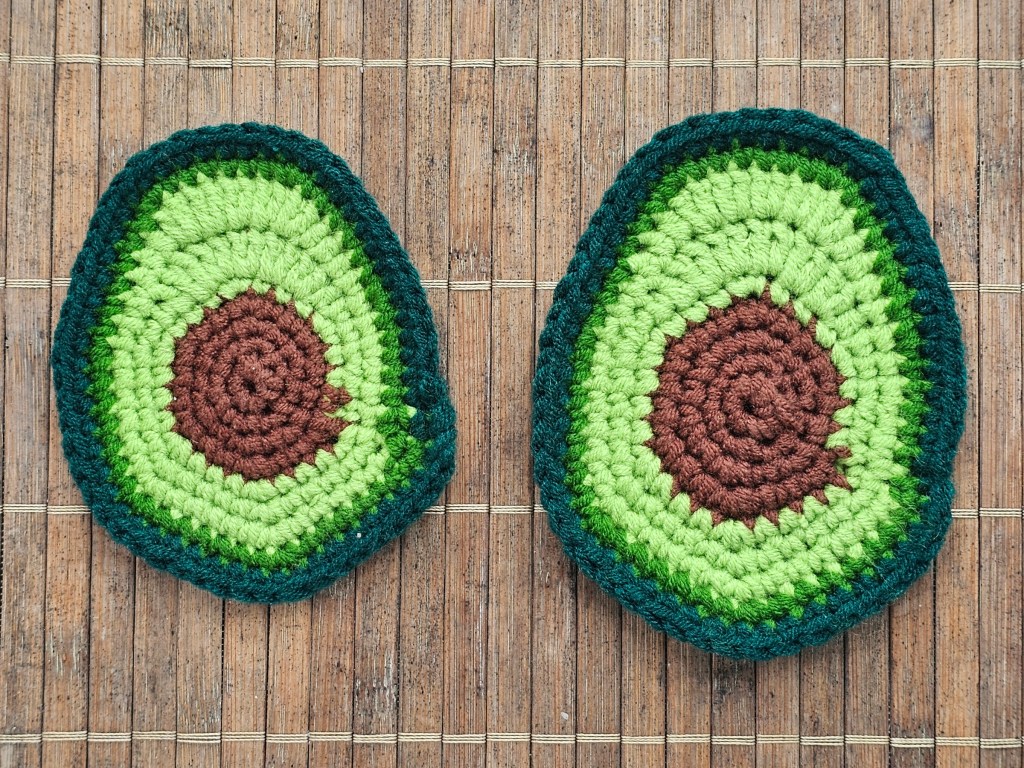
My first avocado coaster looked cute, but I saw room for improvement. I worked in continuous rounds, and you could clearly tell where the colour switches were just by looking at the coaster. The brown stone wasn’t a perfect circle, it was a spiral instead – like the shell of a snail.
I know it’s possible to crochet flat circles with invisible round ends and wanted to try to do that in my second coaster. I watched a YouTube tutorial and tried to do it myself. I think the second coaster looks better when it comes to round ends, but it’s still not perfect. I need to find a better method for it!
The second thing I wanted to improve with the second coaster was the tension. I tend to crochet too tightly, and my creations end up smaller than the pattern suggests. The first of the avocado coasters is around the size of a standard mug, and smaller than some of the wide mugs I have. When crocheting the second coaster, I tried to keep a looser grip of the yarn. The coaster ended up larger than the previous one, which was a good improvement. There were a few places where I made the stitches a bit too tight, but overall, I did quite well!
I also did a better job weaving in the yarn tails of the second coaster. I managed to find a neat method, which was quick to do, but also left the excess yarn almost undetectable. Yay!
Success!
And just like that, I made my own crocheted avocado coasters. I love the vibrant colours, and the design was perfect for a beginner-friendly project! I like that the coasters weren’t perfectly circular and instead used a variety of stitches to make one side slightly longer than the other. It was definitely more fun to crochet than a standard, circular coaster would be. I had a chance to practice magic circles again and refresh my memory on single, double and half double stitches. I also managed to spot my own mistakes and correct them with the second coaster. Overall, it was a perfect project to train basic crocheting skills while creating something cute.
This kit itself won’t teach you how to crochet – you need to learn how to make various stitches elsewhere – but it’s a great pattern if you want to practice. 10/10!
Also see:


Wow, these look so pretty 😍
LikeLike