
Today, I’m bringing you a simple idea for a DIY handmade Valentine’s Day card – just in time for the holiday coming up later this week. It does require basic artistic skills, but it doesn’t call for any fancy supplies. All you need is paper and some coloured pens. If you like adding a personal touch to your gifts but have limited supplies, this idea may be perfect for you!
Supplies needed to make a simple Valentine’s Day card
- a sheet of paper to cut out a heart template
- scissors
- soft pencil and eraser
- a card blank, or a sheet of thick paper – the base for the card
- colourful pens in various colours
How to make a last minute Valentine’s Day card
Making a heart template
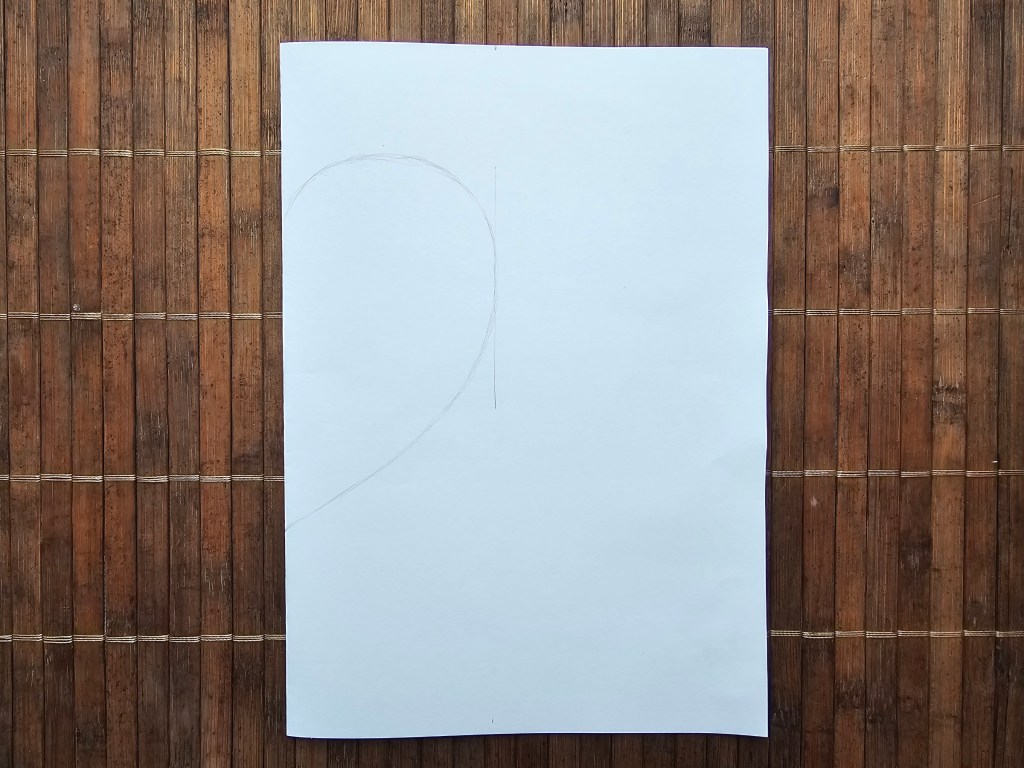
First, we need a heart-shaped template. You can find one online and print it out, or you can use the age old method and create it yourself, which is the option I chose.
I took a plain sheet of paper and folded it in half. Then, I drew half of a heart and cut it out with sharp scissors. Then, I unfolded the shape to reveal a perfectly symmetrical heart.
At that point, if you’re not happy with the final shape of the heart, you can fold it again and correct it.
When making the heart-shaped template, the key is to make it the right size. The heart needs to fit on the card, so make sure to match the template to the size of the card blank you’re going to use.


Preparing a card base
Card blanks are sheets of good quality paper, often coloured, that you can buy in craft stores. They’re usually folded in half or scored in the middle, making it easy to fold them yourself. If you don’t have any card blanks at hand, don’t worry! You can use a piece of thick paper and carefully fold it in half yourself.
Worst case scenario, if you don’t have any thick, good quality paper – any sheet of paper will do. After all, on Valentine’s Day, it’s the thought that matters most!
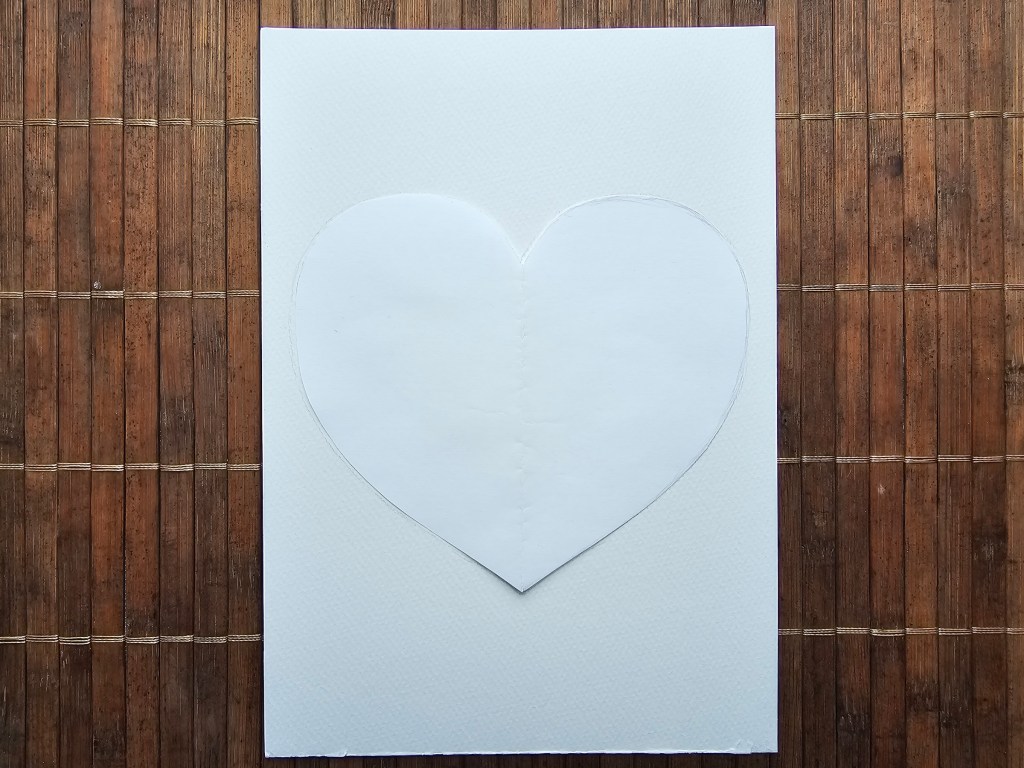
Making a heart outline on the card
Once you have a card base and a heart template, it’s time to start designing the card. Place the heart template on the card and carefully outline it with a soft pencil. Don’t press the pencil too hard – the heart should be barely visible. We will erase it later. It will only be used to help keep the rest of the design in place.

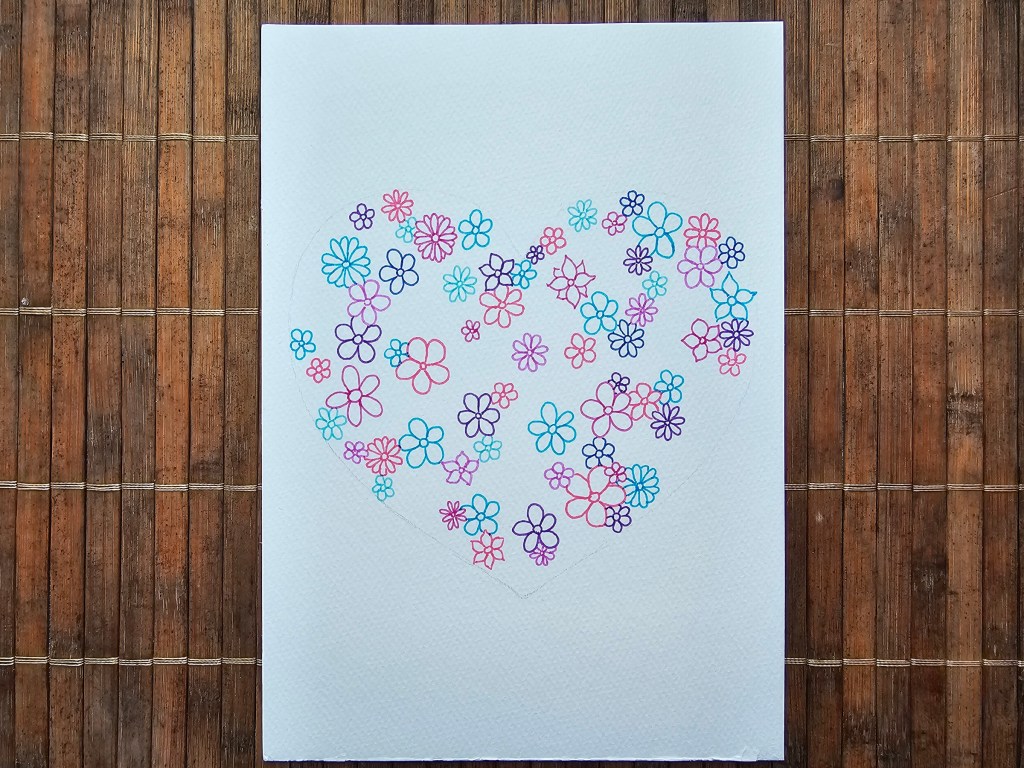
Filling the heart with flowers
Now, it’s time to reach for the coloured pens and start filling the heart with flowers. They don’t have to be perfect, and they don’t have to all look the same. Variety is key! Add some large flowers and some small ones. Give them round or pointy petals. You can even throw in some leaves in between the flowers. Let your imagination guide you!
Try to keep all of the flowers inside the heart guidelines. Once you’ve tightly filled the heart with flowers, you should clearly see them create a heart shape.


Final touches
Finally, it’s time to erase the heart outline drawn with a pencil – it’s no longer needed. You can decide to add some additional details to the design – perhaps some additional flowers and leaves, or some patterns on the petals.
You could also use coloured pencils to fill in the flowers, if you have some spare time left, but the outlines alone are perfectly fine. That’s how I decided to leave my card!
Finally, feel free to add some text to the front of the card, whatever message suits the card’s recipient best.

And there you have it – a finished DIY Valentine’s Day card with a floral heart. Happy Valentine’s!
Also see:


