
It’s been a little while since my last cross stitch post, but fear not – I have not lost my passion! I recently stocked up on more autumnal cross stitch designs and today, I’m bringing you the first one of them – a cute squirrel. As always, it was fun to slowly see the design come to life and I enjoyed stitching during a couple of rainy evenings.
The contents of the box
The tiny box contained everything I needed to cross stitch a squirrel. It came with a blank white aida, a needle, threads in assorted colours and a leaflet with a diagram and instructions. Unlike cross stitch kits by another brand that I often buy, this one didn’t include a hoop. I didn’t mind though – I don’t necessarily need a hoop to cross stitch a small design, but if I needed one, I could use one of the numerous hoops I already have from buying other assorted cross stitch sets. It’s nice when a kit like that includes all tools if it’s the first time you buy one, but it feels quite wasteful now to have a dozen of plastic hoops from all the projects I’ve completed.
It’s always good to read the instructions

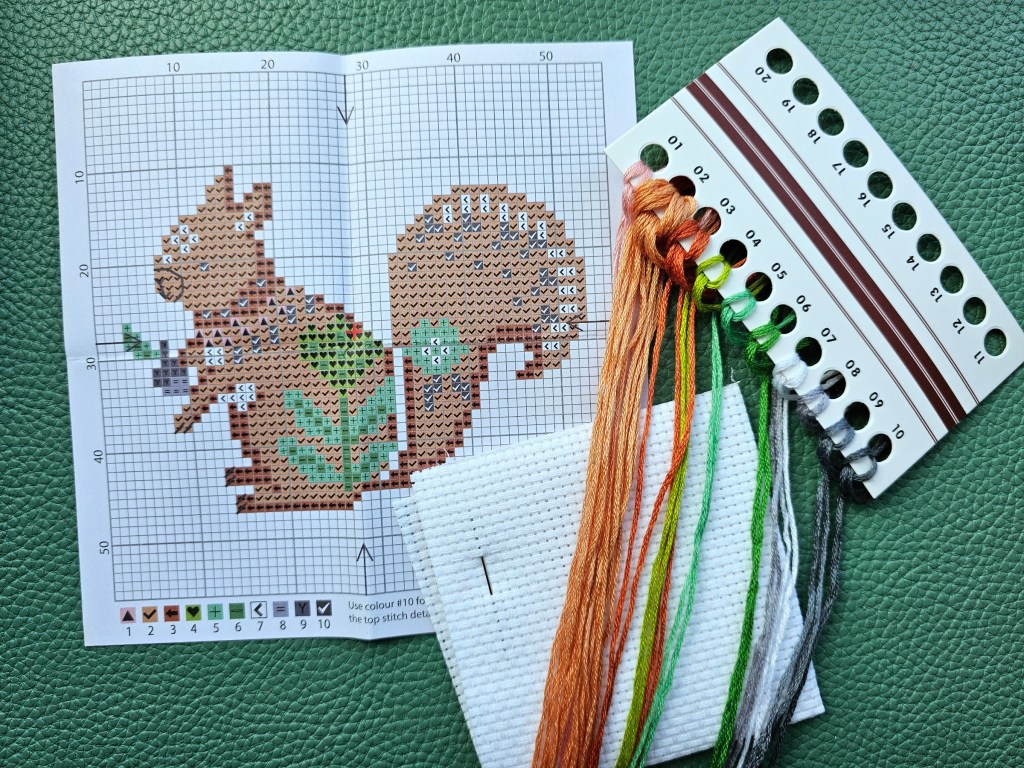
I feel pretty confident in my cross stitching skills and I nearly discarded the leaflet with instructions without looking at them. I’m glad I didn’t! They called for using three strands of thread, which is different from what I’m used to. Most of the designs I completed recently used two strands. Luckily, I spotted it before I even separated the first thread so I didn’t end up messing it up.
First block of colour
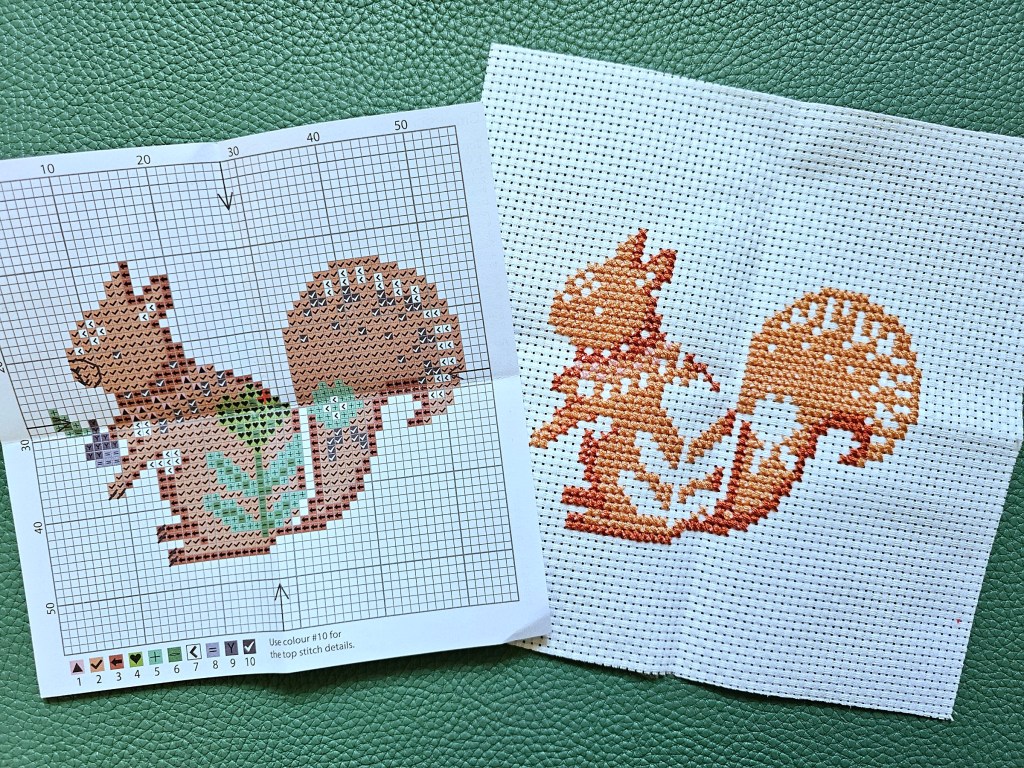
I started with the primary colour of the design, the orange-brown body of the squirrel. Right after placing the first stitches, I realised that the aida wasn’t exactly the same as those I had worked with before. The distance between the holes was clearly bigger than I expected, so every cross was larger than on my previous designs. That explained the need to use three strands of the thread instead of two! Apparently, not all aidas are the same and you can purchase them with different numbers of holes (stitches) per inch. The more you know! That was a valuable cross stitching lesson for me, and a reminder that I’m still just a beginner.
It took me some time to complete the whole colour, but once I did, I could already see the silhouette of a squirrel come alive.

A few more colours down
Next, I moved on to adding some details on the squirrel with brown and pink thread. I noticed that the colours weren’t exactly the same as on the diagram, but I quite liked the more ginger-orange look. I also added the white and black details. It wasn’t long before most of the squirrel was stitched on the canvas.
Then, I added the green parts of the plants. The contrast between the orange body of the squirrel and the vibrant green thread of the plants made the whole cross stitch design stand out. The picture of the squirrel matched the autumnal weather outside, putting me in a cosy mood. Not quite sure why – are squirrels autumnal at all? Perhaps it’s the colour palette of the design that felt appropriate for this time of year.

Final details
Finally, I completed the black item the squirrel is holding – I guess it’s an acorn? Then, with a simple stitch, I gave the squirrel a face and nails. And just like that, the squirrel cross stitch project was finished!
I really enjoyed working on this squirrel design, and it felt like the perfect size as well – bigger than the mini cross stitch designs I had previously completed, but smaller than the large ones. It was just right for a couple of evenings! This kit was also extremely generous with yarn – I had plenty of leftovers. It would be great for beginners, with clear instructions and enough thread to accommodate mistakes.

Also see:


