
Today, we’re diving into the beautiful world of Kintsugi – a Japanese art form that celebrates imperfections and turns them into something extraordinary. In this post, I’ll take you through my recent Kintsugi workshop adventure, where I broke and then pieced together a bowl, transforming it into a stunning work of art.
What is Kintsugi
Kintsugi, or “golden joinery,” is an ancient Japanese art that dates back to the 15th century. Instead of disguising flaws, Kintsugi embraces them, highlighting the fractures and repairs with gold or other precious metals. The philosophy behind Kintsugi is profound – it teaches us that breakage and repair are part of the history of an object, making it even more beautiful and unique.
Traditional Kintsugi
In traditional Kintsugi, the sap of the lacquer tree (urushi) is mixed with genuine powdered gold, silver, or platinum and is used to mend broken pottery. The process requires patience and precision, as layers of lacquer are applied, allowing each to dry before the next is added. The final result is a piece that not only has physical mends but also tells a story of resilience and transformation.
Urushi lacquer requires specific conditions to harden (70-85% humidity and 20-30°C) and the hardening process takes a lot of time. Raw urushi can irritate the skin, and it’s important to handle it with caution. Traditional method of kintsugi has been used for centuries and is proven to provide durable results. Thanks to only using natural ingredients, dishes pieced together with traditional kintsugi are food-safe.
Modern methods of kintsugi use synthetic glues instead. Those are affordable, accessible and can be used in any climate conditions. They harden within minutes, which allows you to complete a simple kintsugi project within a few hours. However, synthetic glues aren’t food-safe and dishes fixed with synthetic glues should be used for decorative purposes only.
Kintsugi Workshop: Step by step
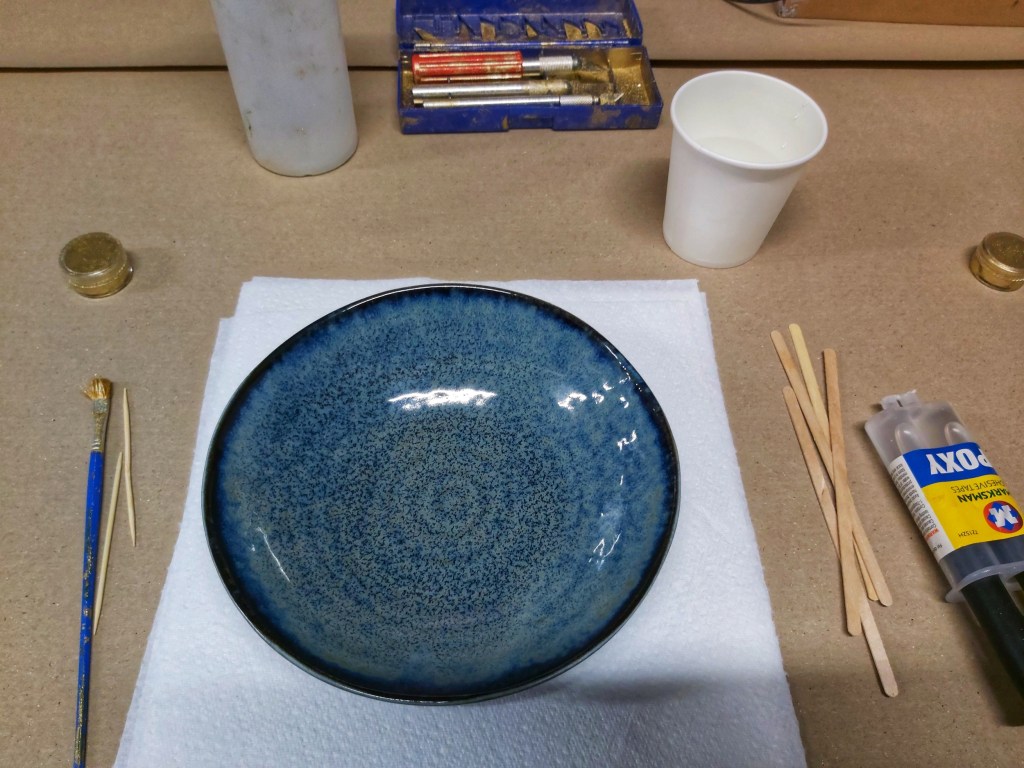
Now, let’s fast forward to my Kintsugi workshop experience. Picture this: a cozy studio filled with eager crafters, all ready to give new life to broken ceramics. The anticipation in the air was palpable as we gathered around our workstations, armed with our choice of dishes and a sense of adventure. I chose a beautiful, navy blue bowl. I almost didn’t want to break it, it was so pretty as it was!
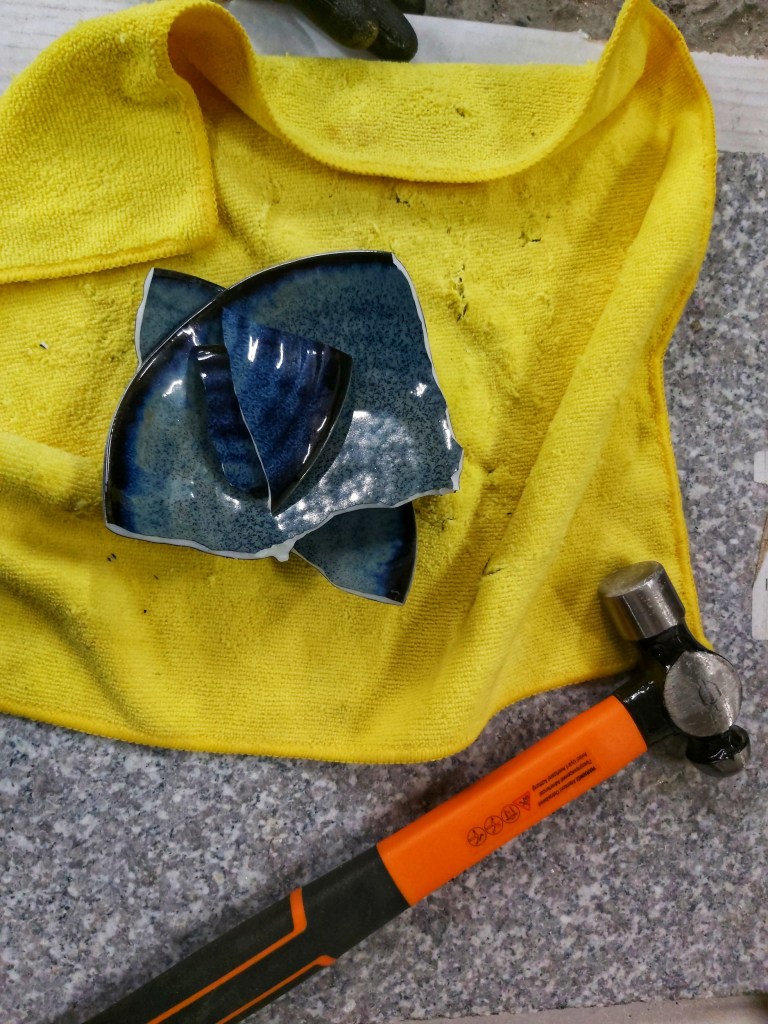
Step 1: Breaking the Bowl into 4 Pieces
The workshop kicked off with a bang – quite literally! We each took turns smashing our ceramic bowls into pieces. Now, if you’re a bit sentimental about your creations like I am, this part might feel a tad heart-wrenching. But trust the process – the magic is about to happen! Surprisingly, this was one of the most difficult parts of the workshop. If you think it’s all about taking a big swing of the hammer and delivering a blow that can cleanse you of all of the day’s frustrations, you couldn’t be further from the truth.
There’s a precise strategy behind making sure you break your dish into a few large pieces (ideally, 4-6) and not into a million crumbs. However therapeutic it would be to smash something into dust, you would spend weeks to put that jigsaw back together! In the kintsugi workshop, we learnt how to first gently cause damage to the internal structure of the ceramic bowls (without visibly breaking them), and then cause them to crack into a few pieces. And remember: safety first! We wore protective gloves and glasses when breaking the dishes with a hammer.
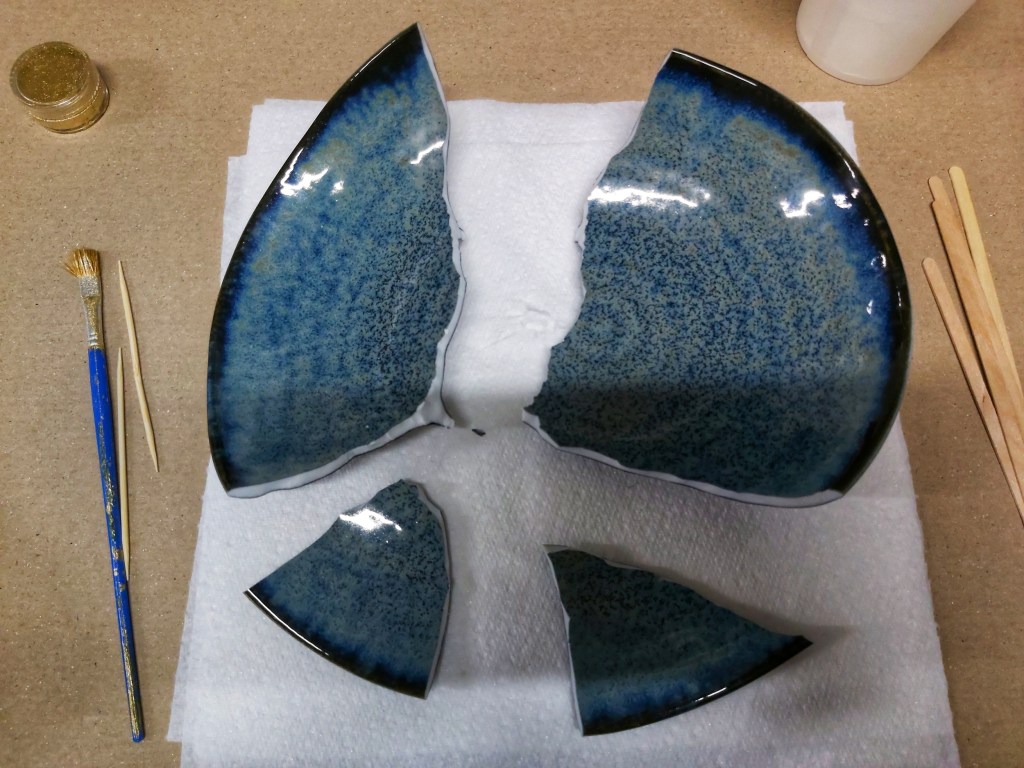
Step 2: Piecing It Back Together with Epoxy and Gold Dust
Once the initial shock of breaking our bowls subsided, we got down to the nitty-gritty. Using epoxy adhesive, we meticulously reassembled our shattered bowls, two pieces at a time. We then blew the gold powder onto the glue, to make it attach to it and fully cover it. The gold dust not only added a touch of glamour but also emphasized the cracks, turning them into brilliant veins of golden beauty.
This step was a delicate dance between precision and creativity. It’s where you get to decide how bold or subtle you want your golden seams to be. You could choose to use a minimal amount of epoxy for thin veins, or be brave with the glue and have a bolder outcome. It was a balance between patience (epoxy took a few minutes to harden) and speed (to make sure you covered all of the glue with gold, on both sides of the vein, before it hardened).
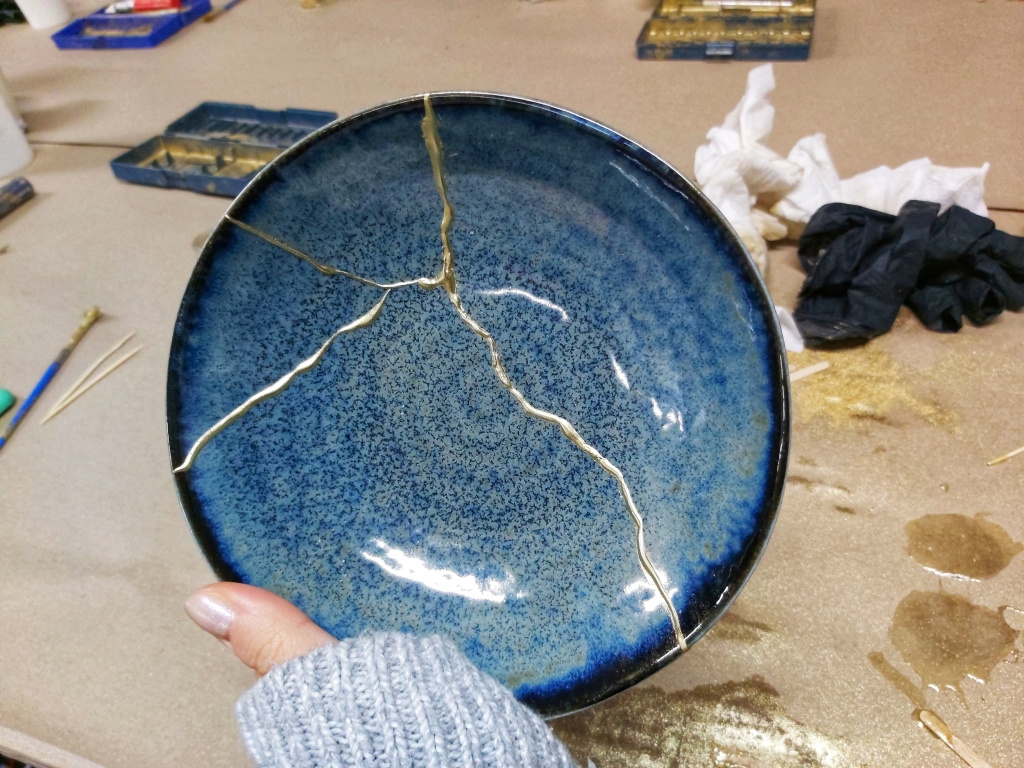
Step 3: Embracing the Imperfect Result – A Masterpiece Unveiled
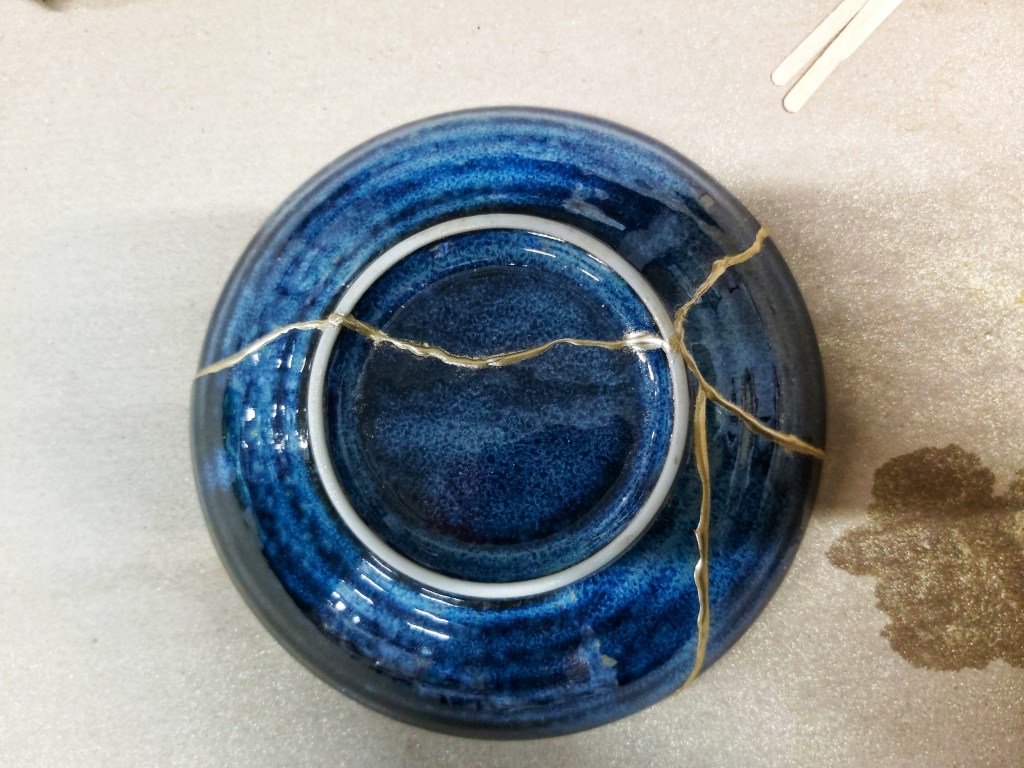
As our bowls were pieced back together, part by part, the excitement in the room reached its peak. Once the final vein of epoxy and gold had set, our once-broken bowls were revealed in all their Kintsugi glory. The amalgamation of shattered ceramic and gleaming gold created a visual symphony that was both awe-inspiring and deeply symbolic.
The pieced-together bowls weren’t perfect. Typically, when putting the last two pieces together, you would notice that they don’t precisely fit together, and some of the seams would be a little off. However, that’s the beauty of kintsugi and the perfection of its imperfection.
Step 4: Clean up and final improvements
When our bowls were back in once piece, it was time to fill in any outstanding holes or apply more epoxy and gold dust to veins you wanted to expose more. Finally, we wiped the gold dust off of the bowl with tissue and water. Any stains of glue could be scraped off with a craft knife.
New craft learnt
And there you have it – my journey through a Kintsugi workshop, where broken bowls found new life through artful repairs. The workshop wasn’t just about crafting; it was a lesson in embracing imperfections, finding beauty in the broken, and creating something extraordinary from the ordinary. So, if you’re ever in need of a therapeutic and transformative crafting experience, consider giving Kintsugi a go. Your broken ceramics will thank you for it! You can search for kintsugi workshops in your local area, or even buy kintsugi-at-home DIY kits online. Happy crafting!
Also see:


11 thoughts on “Kintsugi Workshop”