
Today, I’m bringing you another Christmas crochet project inspiration. This time, with a free pattern included! I bought an assorted kit for making a garland of crocheted Christmas trees, but ended up changing the pattern to my own taste, and making individual hanging decorations instead of a garland. It was a bit of a learning cure, especially with the pattern tweaks, but I’m really pleased with how cute these turned out!
Contents of the kit
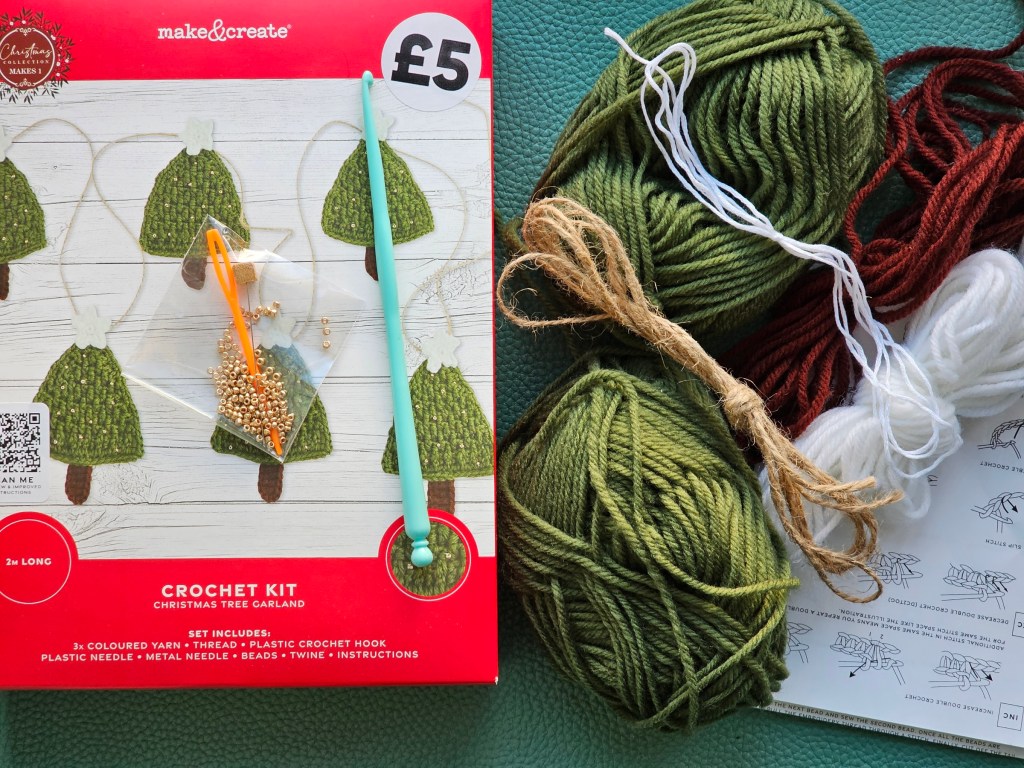
I bought this kit in the Works, a British chain of stationery and craft supplies. Inside, there were two balls of green yarn, shorter pieces of brown and white yarn, and a plastic crochet hook. There was also a piece of white thread and a piece of jute thread, as well as a plastic tapestry needle, a thin metal sewing needle, beads, and a leaflet with the pattern.
Pattern for a crocheted Christmas tree garland
Usually, I don’t include patterns for cross stitch or crochet designs that come in assorted sets. I take copyrights seriously, and try not to share someone else’s designs as my own. But in this case, I feel like I can, and here’s why.
The set includes a leaflet with the pattern. But, on the outside of the box, there was also a sticker with a QR code saying to scan it for updated instructions. First of all: anyone seeing this craft kit in store can scan the code, even if they don’t buy the set. The code took me to a publicly available website, which doesn’t require a proof of purchase to enter. I originally used that pattern, but ended up making various adjustments to it along the way, using the original instructions as inspiration.
So, since I changed and adjusted a publicly available pattern, I’m going to share my own take on it. Here is how to crochet the green trees. Scroll down to see how I made the trunks and the stars too!
| round | pattern | stitches in round |
| R1 | 17 ch, turn, 16 dc | 16 |
| R2 | 3 ch, 15 tr | 16 |
| R3 | skip 1, 7 * [fptr, bptr], fptr | 15 |
| R4 | skip 1, 7 * [bptr, fptr], bptr | 14 |
| R5 | skip 1, 6 * [bptr, fptr], bptr | 13 |
| R6 | skip 1, 6 * [fptr, bptr] | 12 |
| R7 | skip 1, 5 * [fptr, bptr], fptr | 11 |
| R8 | skip 1, 5 * [bptr, fptr] | 10 |
| R9 | skip 1, 4 * [bptr, fptr], bptr | 9 |
| R10 | skip 1, 3 * [fptr, bptr], fptr | 7 |
| R11 | skip 1, 2 * [bptr, fptr], bptr | 5 |
| R12 | skip 1, fptr, bptr, fptr | 3 |
| R13 | skip 1, bptr | 1 |
- ch – chain
- dc – double crochet (UK) – equivalent to single crochet in US terms
- tr – treble crochet (UK) – equivalent to double crochet in US terms
- fptr – front post treble crochet (UK) – equivalent to front post double crochet in US terms
- bptr – back post treble crochet (UK) – equivalent to back post double crochet in US terms
Starting off
I decided to start with the main element and crochet the first Christmas tree. I grabbed green yarn, made a slip stitch, and finished the first chain. And then I got confused.
I think this was the very first time I worked on a project that worked through rows rather than circular rounds. What’s even more confusing, the rows were shrinking in length. When crocheting the first two rows, I had a lot of doubts, but the number of stitches seemed to make sense, and after 6 or 7 rounds I could see that the shape was also looking reasonable, so I continued.
The first couple of rows took me ages to complete – I always struggle manoeuvring a slim, long crocheted chain. But a few rows later, the piece felt more rigid and crocheting was a lot easier, and faster. Soon enough, I had the first tree crocheted.
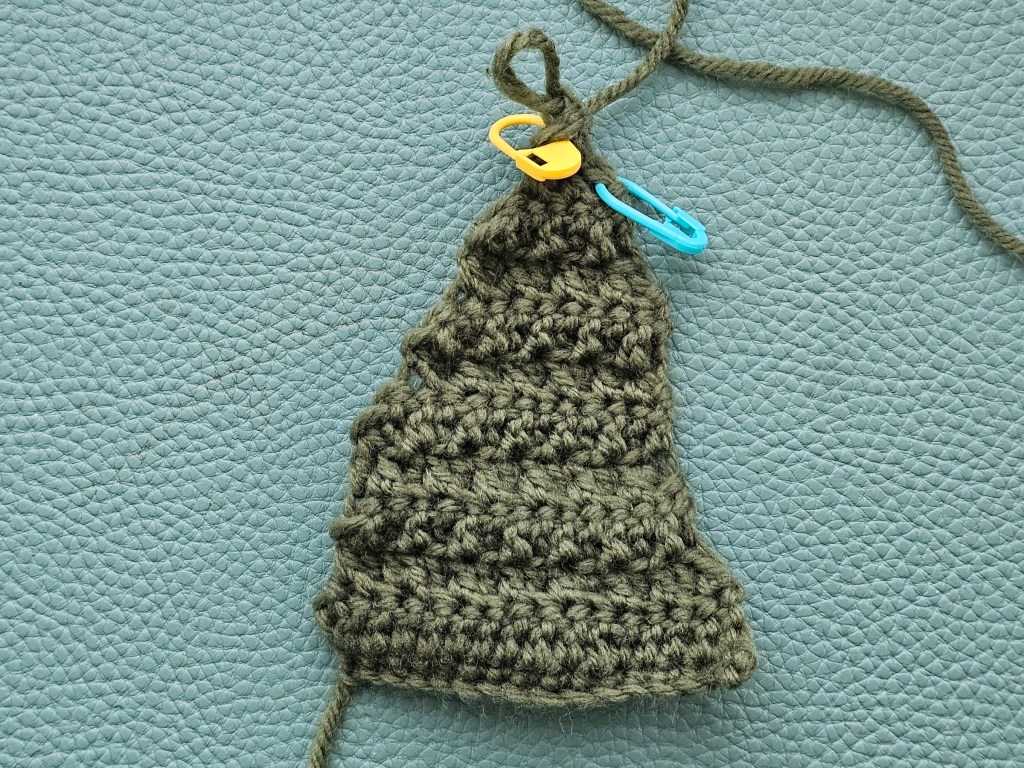
The instructions included one additional step – adding some stitching around the edges of the tree. One again, I was confused. There were no clear loops running in a neat order all around the tree. Which, I guess, is the whole point – the pattern wanted me to add those stitches to make the outline look neater.
I had no idea where to even put the crochet hook, so my placement of those outline stitches is rather questionable. But overall, it doesn’t look too bad.
Sudden realisation
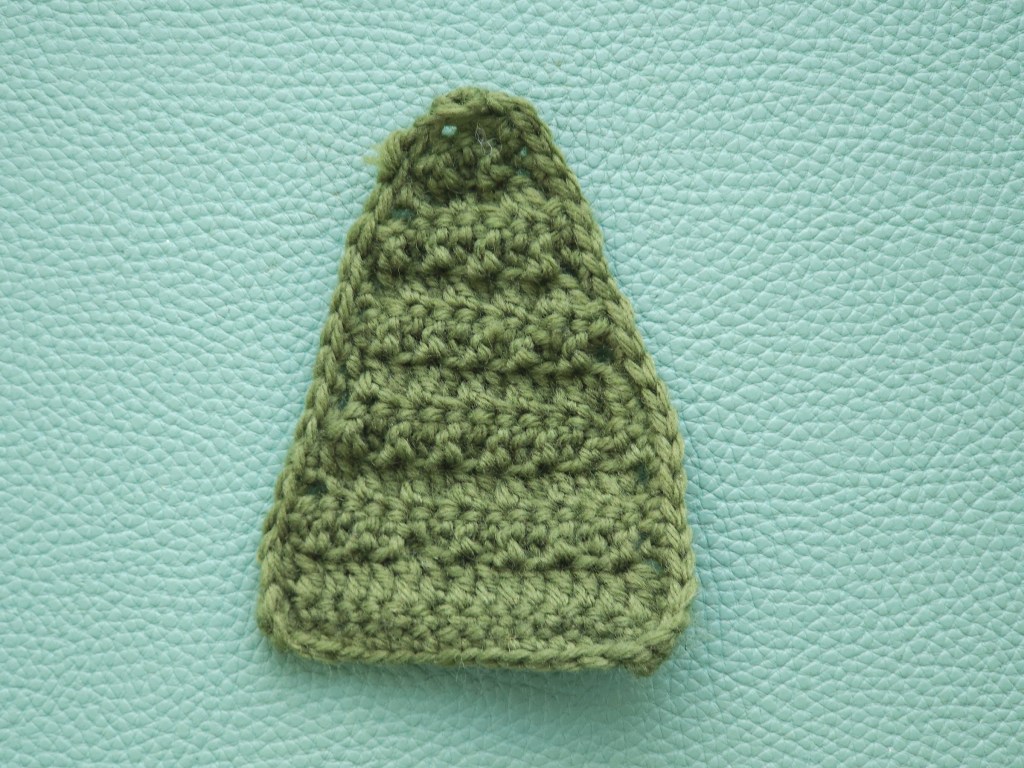
At that point, I had to leave the project for a couple of weeks due to travelling and other life commitments. When I picked it up again and looked at the instructions, a sudden realisation hit me. My completed tree, which was a struggle to make but turned out alright, didn’t look like the trees in the photo on the box. I re-read the pattern and spotted my mistake.
The pattern called for ‘back post’ and ‘front post’ stitches, which I wrongly read as ‘back loop’ and ‘front loop’. I had never seen references to ‘posts’ before and I had crocheted back/front loops many times, so I just assumed it’s the same thing. Well, let me tell you – it is not.
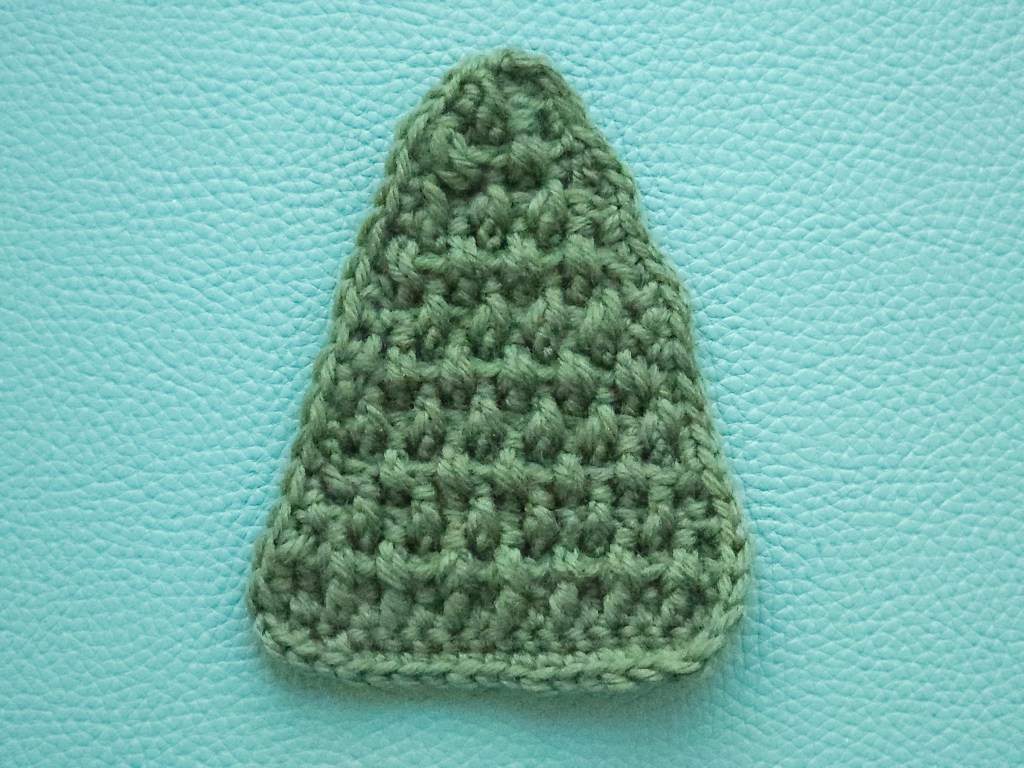
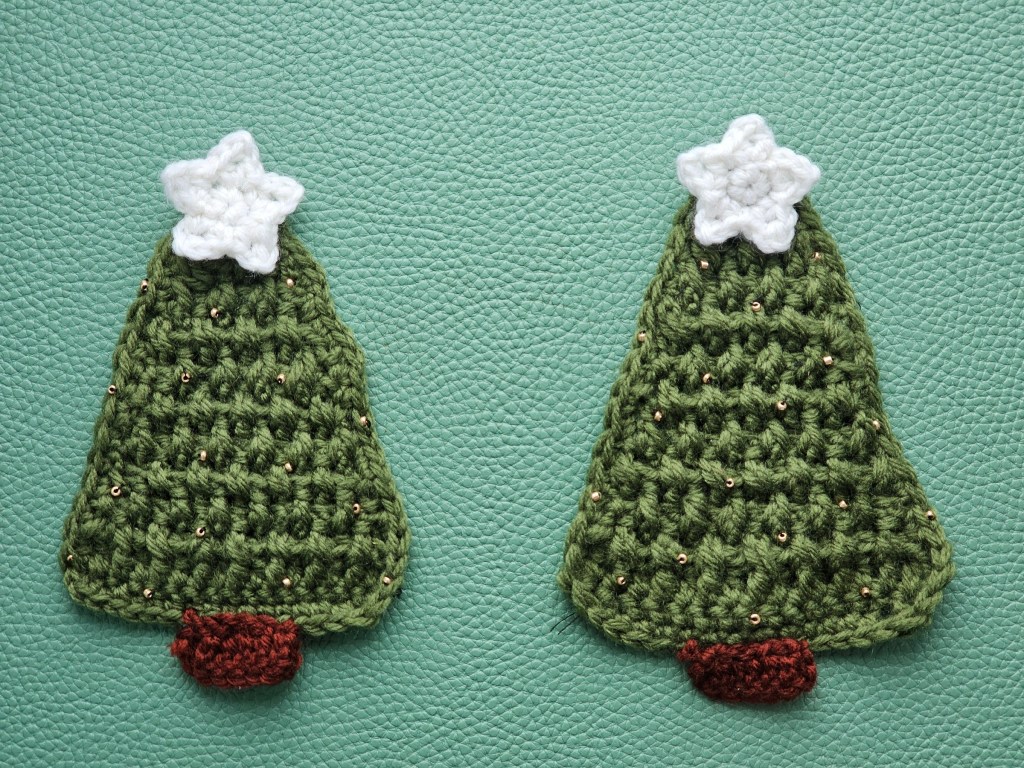
I completed the second tree, this time crocheting back/front posts, not loops, after learning how to do it. That tree looked a lot more like the photo on the box. I also tweaked the numbers of stitches and rows, as I wasn’t entirely happy with the original pattern.
You can see the difference between the two trees below. There’s a significant difference in the texture! I have to admit, the ‘correct’ tree on the right does look better, but the ‘wrong’ one on the left isn’t that bad. This set was sold as a garland, but frankly, I already knew that I was going to make individual hanging decorations, so the trees didn’t need to be identical.
Don’t mind the size difference between the two trees. I used the plastic crochet hook included in the box to make the first tree, but honestly, I can’t stand crocheting with plastic hooks. I decided to use one of my own hooks instead, eyeballing the size, as the plastic hook from the set wasn’t labelled. The hook I ended up going for was close in size, but I could see it was a little bigger than the original hook from the set. This explains why the second tree is slightly bigger than the first one.

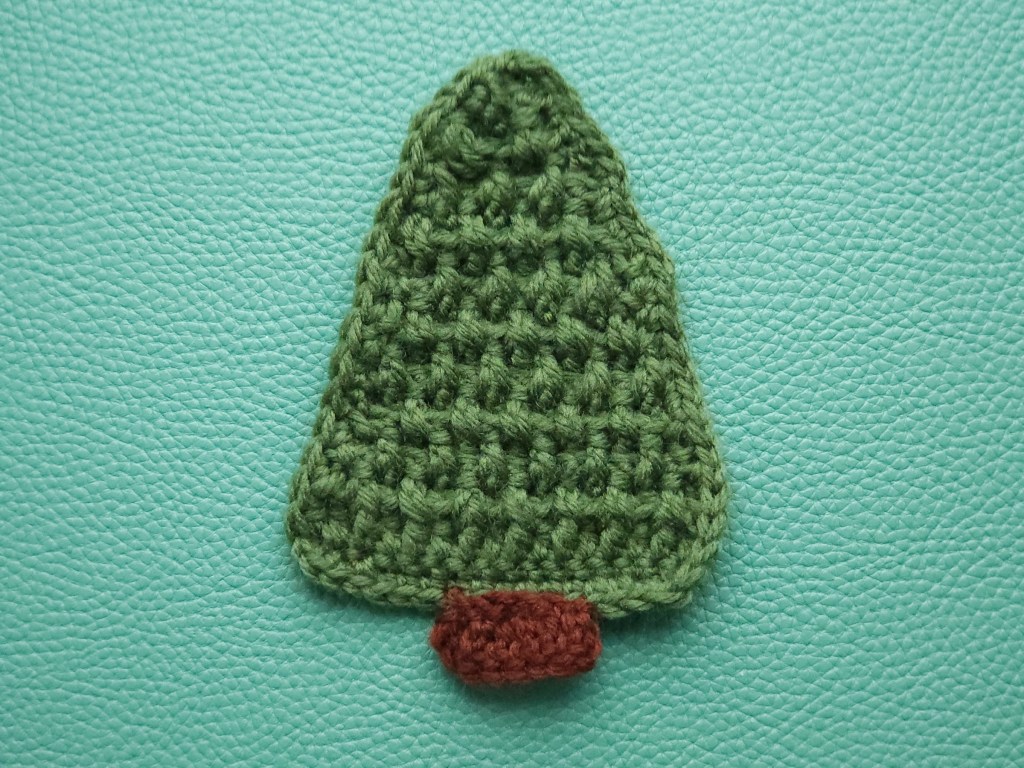
Crocheting a trunk
Next, it was time to make a brown trunk. I originally followed the pattern from the set, but wasn’t the biggest fan of its shape, so decided to freestyle it. It only took me a few minutes to complete the first trunk, I’m happy how it turned out! The pattern I used was really simple.
- chain 8
- yarn over, insert hook in 4th stitch from the hook, 5 tr
- chain 3
- slip stitch into the starting chain
- leave a long tail for stitching the trunk to the tree

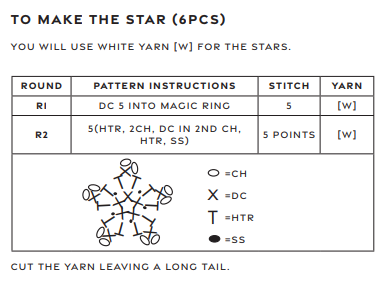
Crocheting a small star
Then, it was time to make a star. It was really confusing.
It was my first time seeing a graphic pattern alongside written stitches, and I had no idea how to read it. I spent a decent amount of time comparing the written pattern with the graphic one and – after a few failed attempts – I managed to crochet the little star. It actually turned out really nice!
Here is the pattern for the star, taken from the original, publicly available website. I’m copying it for my own benefit, in case the link breaks in the future. I paid for this set, after all, and want to make sure I can remember the updated pattern.

Assembling the first tree
Now, it was time to assemble the first Christmas tree. I attached the star and the trunk, and everything came together really nicely.
I also used some of the beads included in the set to decorate the tree. It turned out super cute!

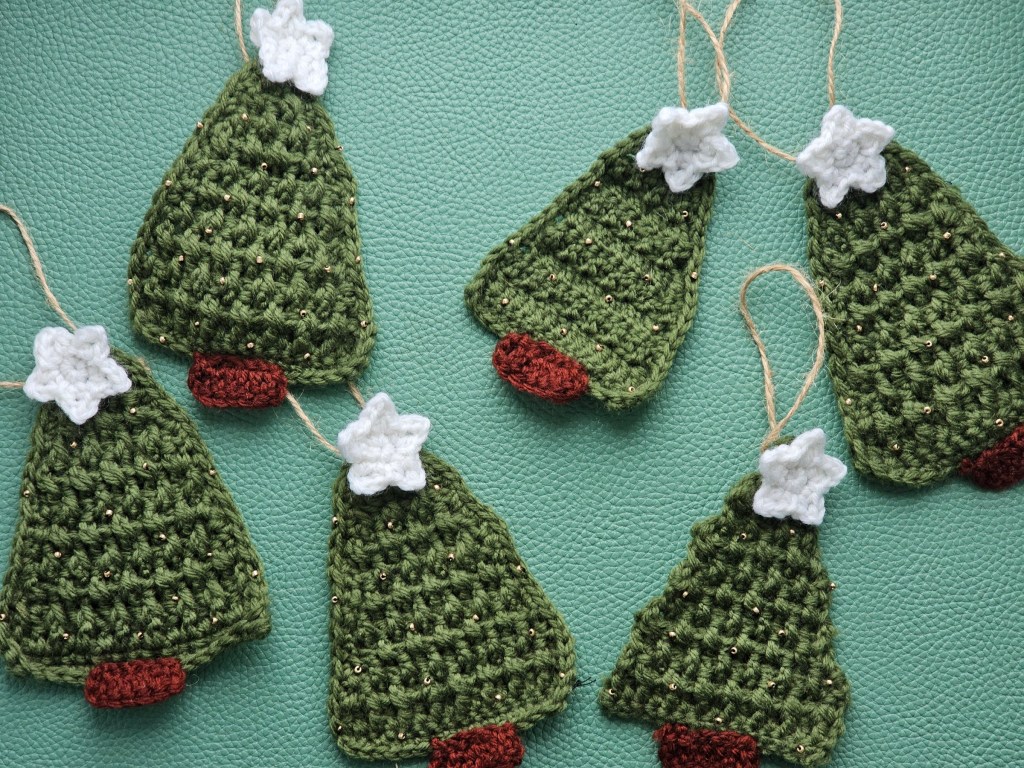
Repeat
Then, it was time to repeat the same thing until I ran out of green yarn. I ended up making 6 trees (including the first one, made with the wrong pattern) and assembled them all with trunks, stars, and beads. I ran out of green yarn when crocheting the final tree, and wasn’t able to stitch around the edges. Still, I don’t think it looks too bad!

I decided not to frog the first tree, made with the incorrect stitches. The box was supposed to make a garland, but I opted to turn my trees into hanging decorations. I even considered embroidering initials at the back to use them as gift tags! I had already made all the gift tags for this season and didn’t need any more, but I still think it would be a great idea. Kind of similar to my gingerbread needle felted gift tags I made last year.
Final thoughts
So that wraps up yet another crochet project I finished in recent weeks. I wouldn’t say it’s my favourite project ever – I’m not the biggest fan of the colour of the green yarn in this kit, and the quality of the yarn wasn’t the best either – I don’t know what it was made of, but it was a really poor quality, artificial type of thread. Yet, it was the first time when I made a conscious choice to divert from an official pattern, and I actually think my adjustments made the trees look better than the original pattern. For a beginner, that’s a major step!
Also see:


I agree, I’m not sure if it was the yarn or the plastic hook – but it made it so difficult to do the stitches! I actually am a big fan of how it turned out though since this is my first ever (finished) crochet project. Anyway this was a huge help because I lost the instructions, thankyouu!
LikeLike