I love Christmas, and one of my favourite things about the festive season is decorating my home. I can’t do much in a small, rented flat, but I try to get creative with my damage-free decorations, as I can’t install any hooks on the walls. One of the things I really wanted to do was decorate my door. Ideally, I pictured a beautiful wreath adorning my door. Unfortunately, over-the-door removable hooks don’t fit between my door and the frame, and I can’t drill a permanent hook into the door. So, I came up with a different idea, and I’m in love with the final result! I came up with a way to hang a DIY Christmas garland on my door, in a way that’s stable, secure, and completely damage free. Here is how I did that!
Supplies for making a Christmas garland
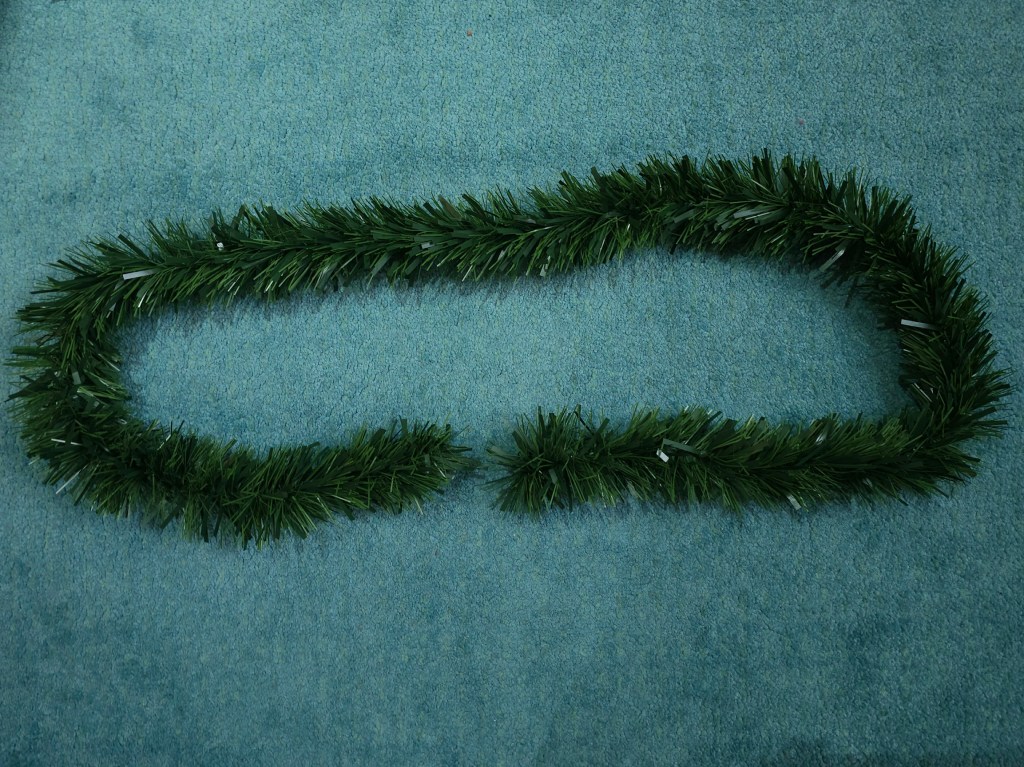
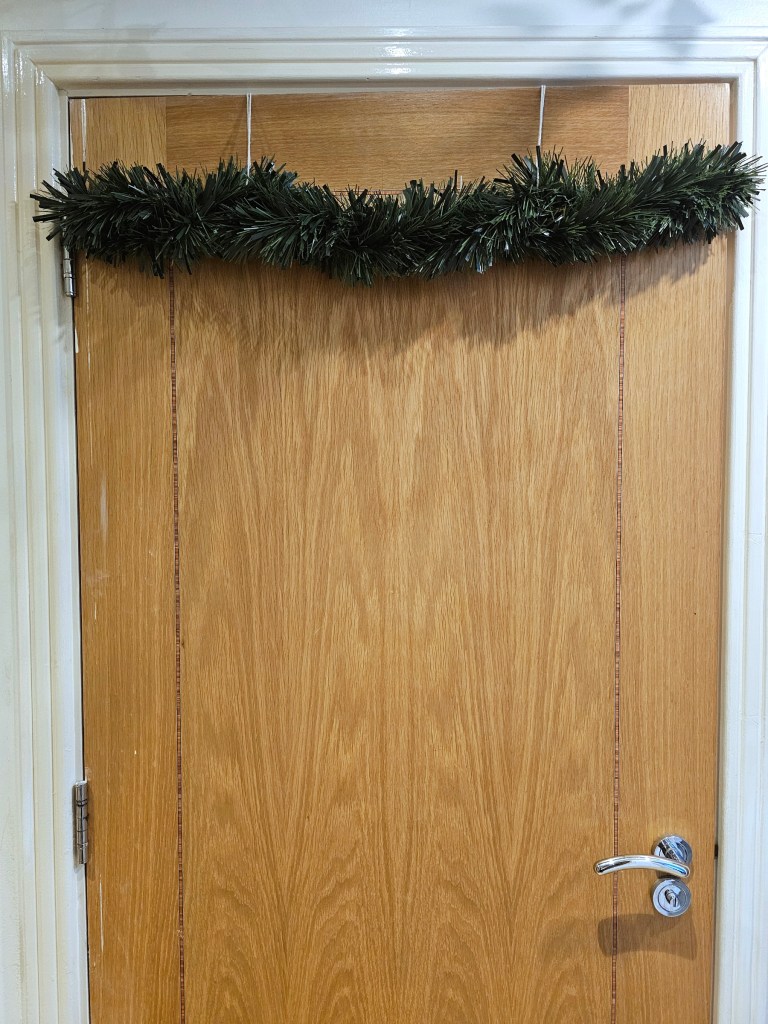
First things first – I had to buy a base for my garland. I found just the perfect one: a green tinsel, resembling a Christmas tree. It was labelled as 2 metres long (I never measured it myself to check how accurate it was), and ended up fitting perfectly on my 80cm wide door, but more about that later.
I also got various baubles, bows, and bells to decorate the garland with. I didn’t have a specific design in mind, just bought various cheap decorations. I didn’t use all of them on this garland, but they didn’t go to waste – some of them are on my Christmas tree now, others will be used to decorate wrapped presents.
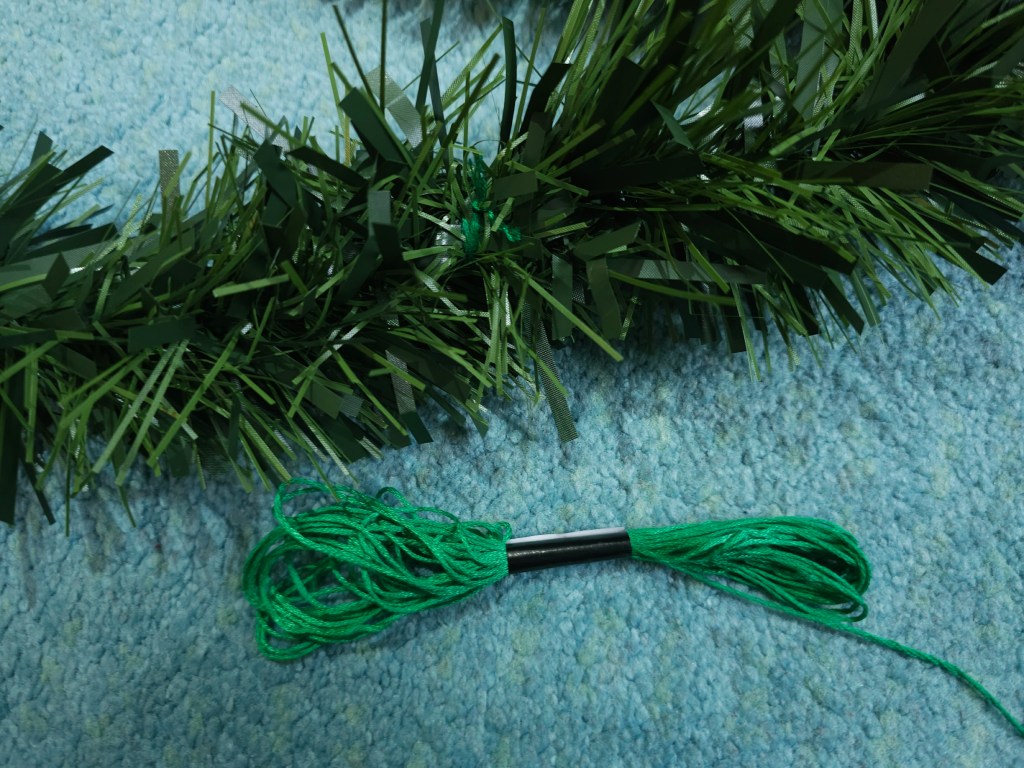
I also used some embroidery thread and a jute thread to hang the garland – I originally wanted to use a fishing wire, but couldn’t find any in my nearby stores. Luckily, a fairly thick jute thread still fit between the door and the frame.

Preparing the base of the garland
Now, it was time to prepare the garland and figure out how to hang it on the door. My plan was to have the garland on the outside, and use thread or wire to hang it from the top of the door.
So, to begin with, I needed to compress the 2 metre tinsel to a size that would fit on a 80 cm door.
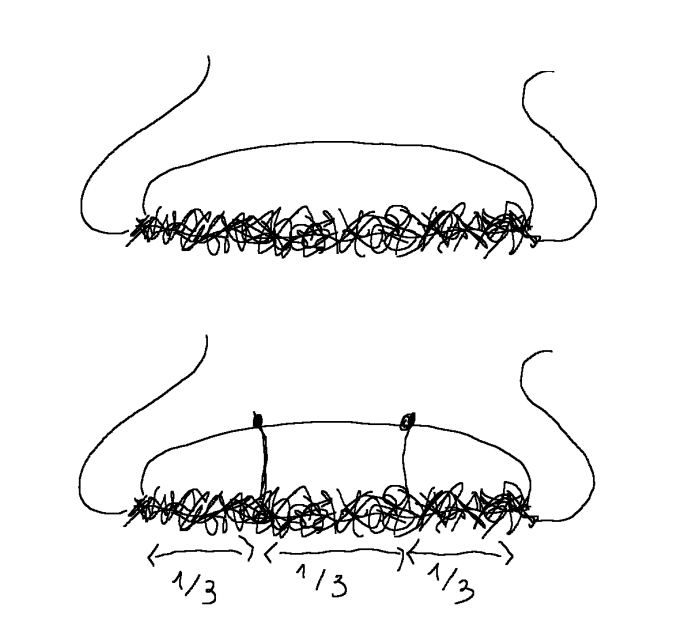
I placed the tinsel on the floor, making a circle. I made sure that the two ends were in the middle – I needed the sides not to have weak points.
I used green embroidery thread to tightly tie together the two ends. I’m sure there are other ways to do it, but it worked fine. The two ends were securely connected – I used decent force to try to pull them apart, but they stayed in place. I wasn’t too worried about the look of the green thread. The connection point was going to be concealed anyway.
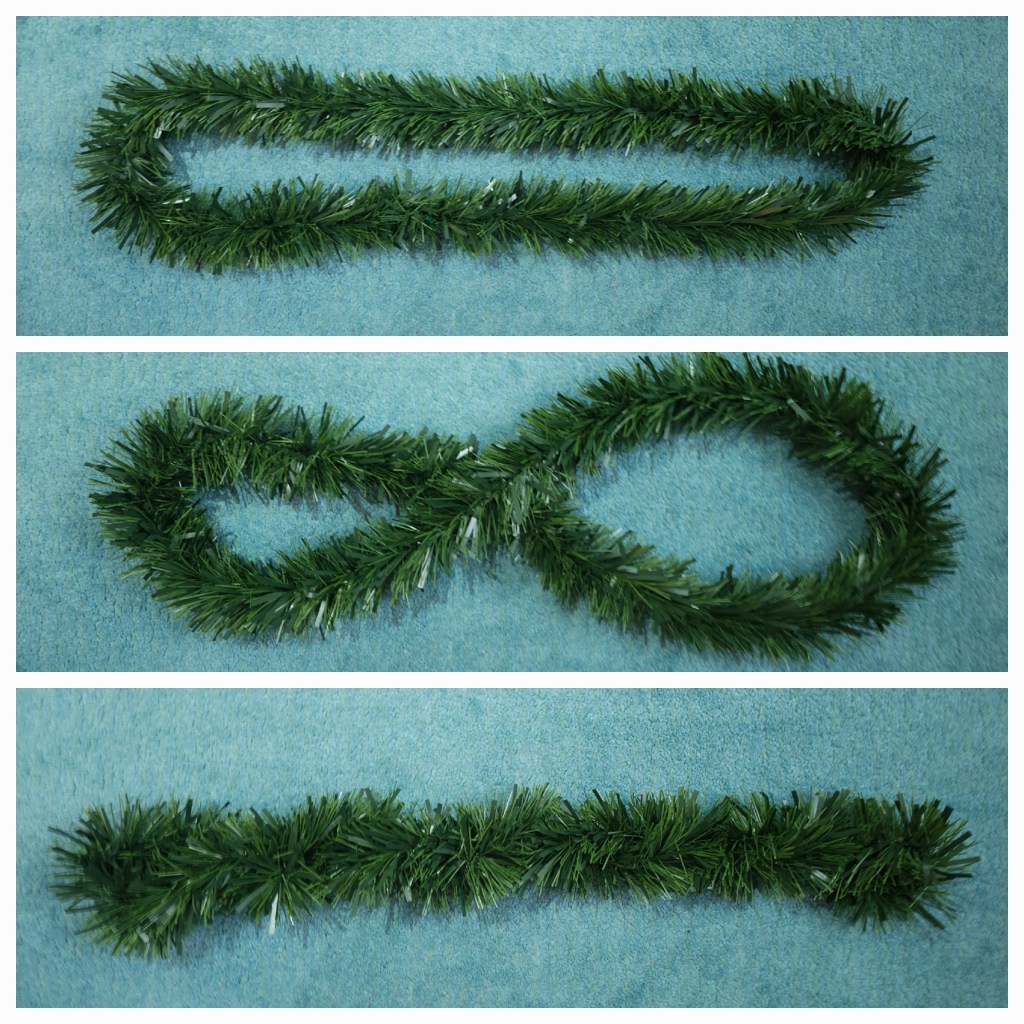
Then, I folded the garland into the shape of an ‘8’, and then continued twisting the ends until I had a thick garland looking like a straight line rather than a circle. I hope the photos explain it better!
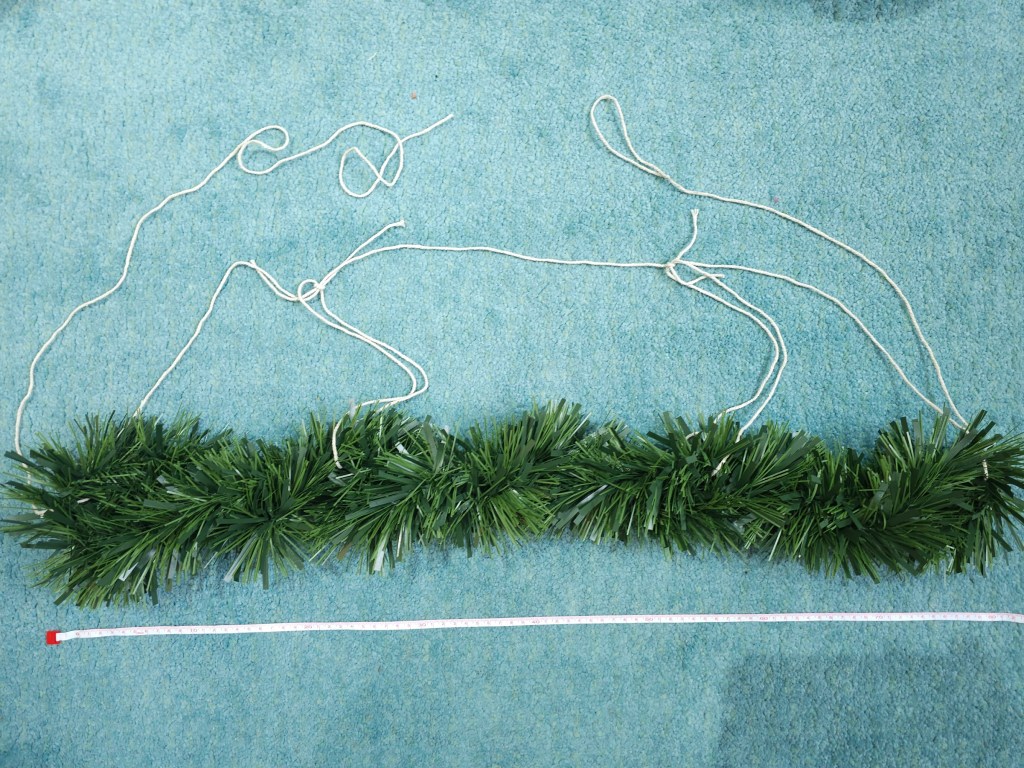
Next, it was time to attach the jute thread that would keep the garland mounted on the door.
I used one long piece of thread and ran it through the loops on both ends of the garland. I also cut two shorter pieces of string and connected the garland with the thread that was going to go at the back of the door. Those two shorter pieces of thread were to go above the door and act as hooks to keep the garland in place.
I tried to make those two pieces of thread connecting the front and the back of the construction the right length. Essentially, since the garland is mounted from the top of the door and wraps around the door (or, more specifically, the string does), I had to make sure that the garland sits horizontally above the door’s top hinge. So, I measured the distance between the hinge and the top of the door, doubled it (the short pieces of thread run vertically on both sides of the door), and added a couple of inches to accommodate for the thickness of the door. I wasn’t super accurate, and I didn’t tie anything too tightly, in case I needed to make adjustments later on.
Then, it was time to put my design to a test. It was a bit wiggly and took me a while, but eventually, my garland was hanging on one of my interior doors (they’re the same style and size as my front door). This part was fiddly, and I recommend getting someone to help you with it. Or, at the very least, grab a chair to mount the garland from the top of the door. I made my own life incredibly difficult, installing my garland on my own, jumping up from the floor. I’m not sure why I did that, grab a chair or a ladder!
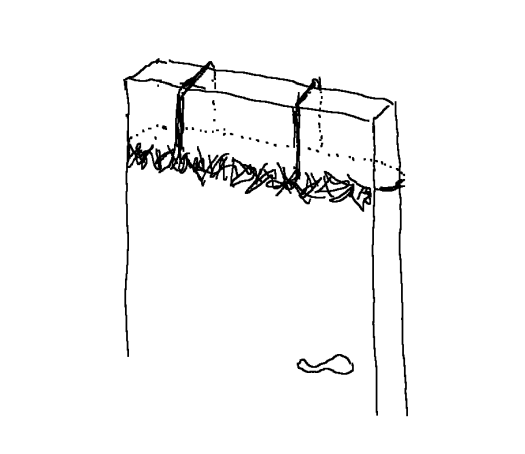
This is what it looked like from the back. Not the prettiest sight, but it did the job! It was just a proof of concept at that point anyway. I adjusted the knots afterwards and snipped the long tails of thread to tidy it up.
You can see the horizontal line of thread running through the loops on both ends of the garland and wrapping the door on the backside. You can also see the yarn sitting on top of the hinge – the location of the hinge influenced at what height the garland would be. The two strands of yarn running over the door, connecting the garland with the yarn at the back, essentially work as over-the-door hooks. They prevent the garland from sliding down and keep it level.

Decorating the garland
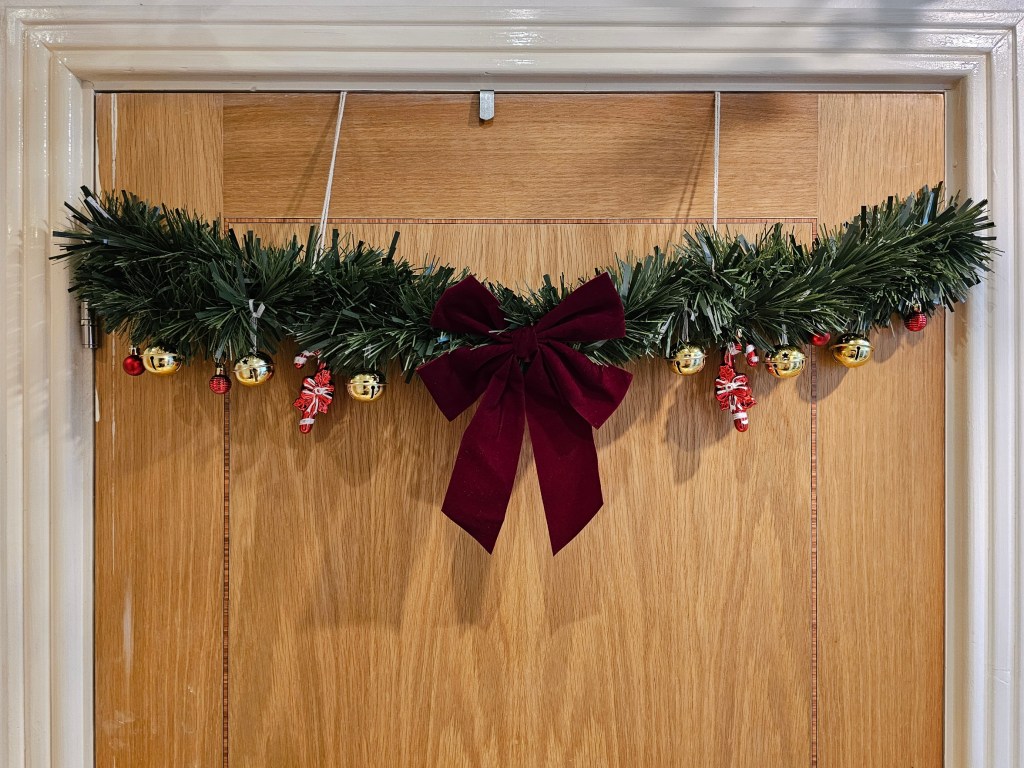
Finally, it was time to decorate the garland with bows and baubles. I didn’t go overboard and decided to keep it somewhat minimalistic. I think it turned out classy and neat! I particularly love the gold baubles which are actually bells. They look cute, but they will also act as an alarm system in case some of the neighbours try to steal or damage my creation, ha! Sadly, in today’s world, it wouldn’t be unheard of.
I was a little worried about moving the decorated garland from one of my interior doors to the designated location on my front door, but I managed to move it without dislocating the decorations – this time, I climbed on a chair to lift and mount the garland over the door. I’m so, so happy with the final result!
Final thoughts
And that’s how I made my own Christmas garland and mounted it on my door in a renter-friendly, damage-free way. My design may not be the most elaborate, and I’m sure there were other ways to achieve the same result. But all that matters is that I now have a cute garland adorning my door. It’s been there for a few days and seems to be doing well, so I guess I can assume that my engineering degree helped me design a reliable solution. I’m really pleased with how it turned out!
Also see: