
Happy spooky month! I feel like it’s now officially acceptable to start celebrating the Halloween season. Well, frankly, Halloween isn’t that huge in the UK, to my surprise. Still, there are some seasonal sweets and home decorations in the stores, and I enjoy a holiday period, no matter the holiday! So naturally, in October, I usually like to do some Halloween themed crafts or cook themed recipes. This time, I completed a mini cross stitch project featuring a skull with colourful flowers. Probably more in the style of Dia de los Muertes rather than Halloween, but the two are celebrated at the same time of year. So, here’s the first of this year’s Halloween DIY projects!
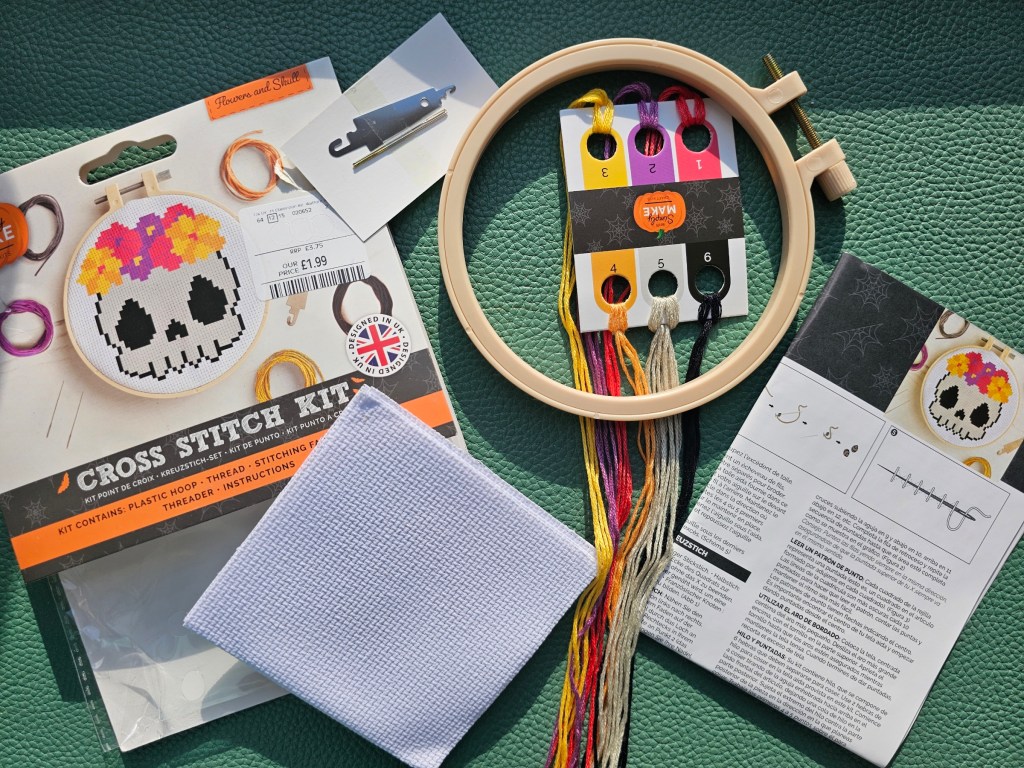
Contents of the kit
As usually, I used an assorted kit for my cross stitch project. It came with an embroidery hoop, a blank aida, threads in assorted colours, a couple of needles, a threader, and a leaflet with the pattern. I’ve been buying cross stitch sets by this brand for a long time, and I’ve noticed that they can vary – older kits have all of the threads jumbled up in one ball, while some of the new sets have the threads arranged neatly on a piece of cardboard, with numbers or symbols assigned to each thread. In my experience, the new generation of the kits is a lot more reliable – there’s usually more than enough thread in each colour provided. In the old-style kits, on the other hand, there’s often not enough thread. I’m always delighted when I learn that the set I’m about to work on is the “new” generation. It gives me extra confidence that the project will be a success!
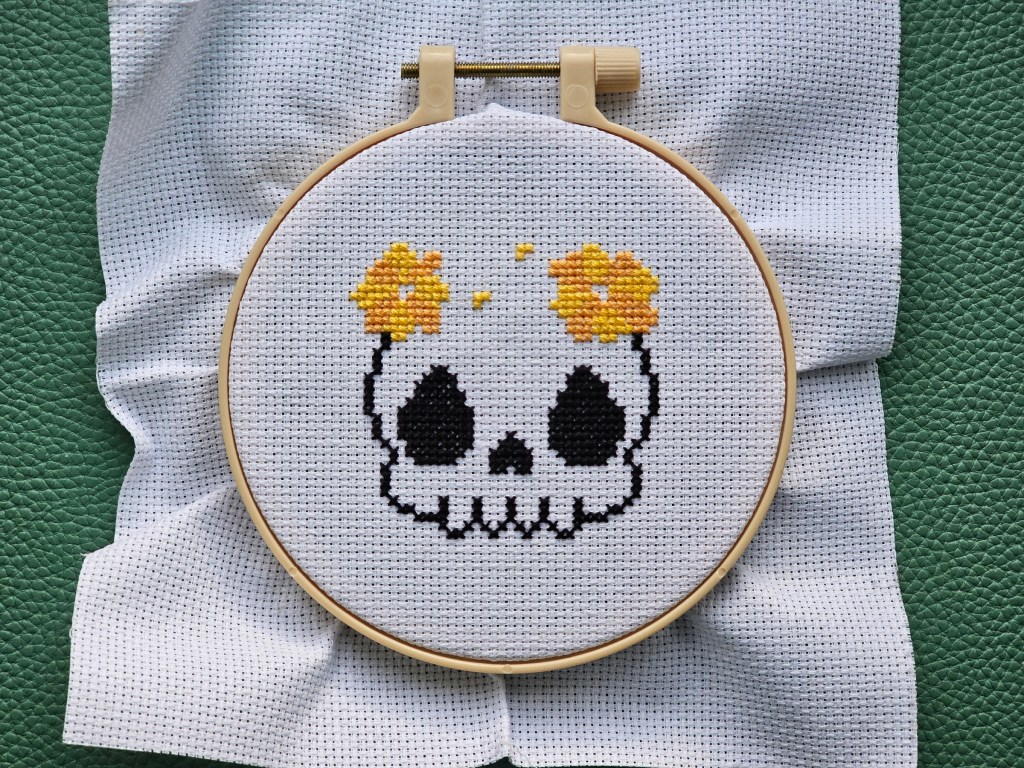
First details down
I decided to start with the black details, sewing the outline of the skull and the eyes and nose. It didn’t take long and I soon had the core shape of the design sewn.

Yellow and orange flowers
Next, I moved to the yellow and orange threads and cross stitched the first flowers. The two colours could do with a bit more contrast, in my opinion.
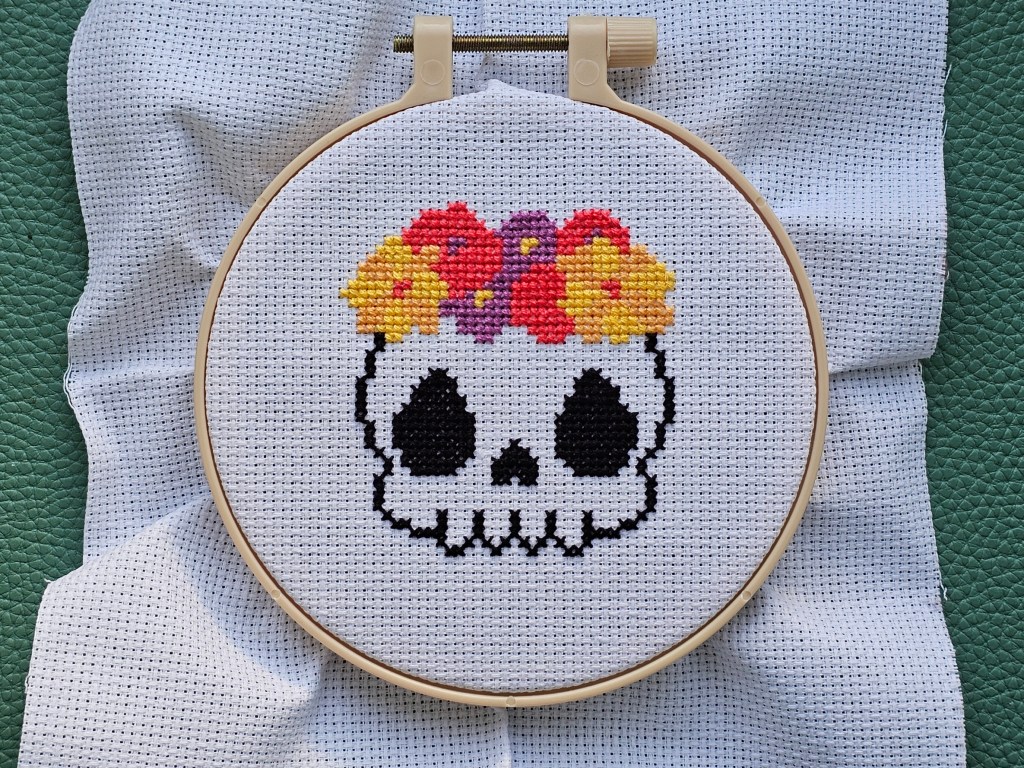
Purple and red flowers
I then added the red and purple flowers. The design was pretty much completed at that point.
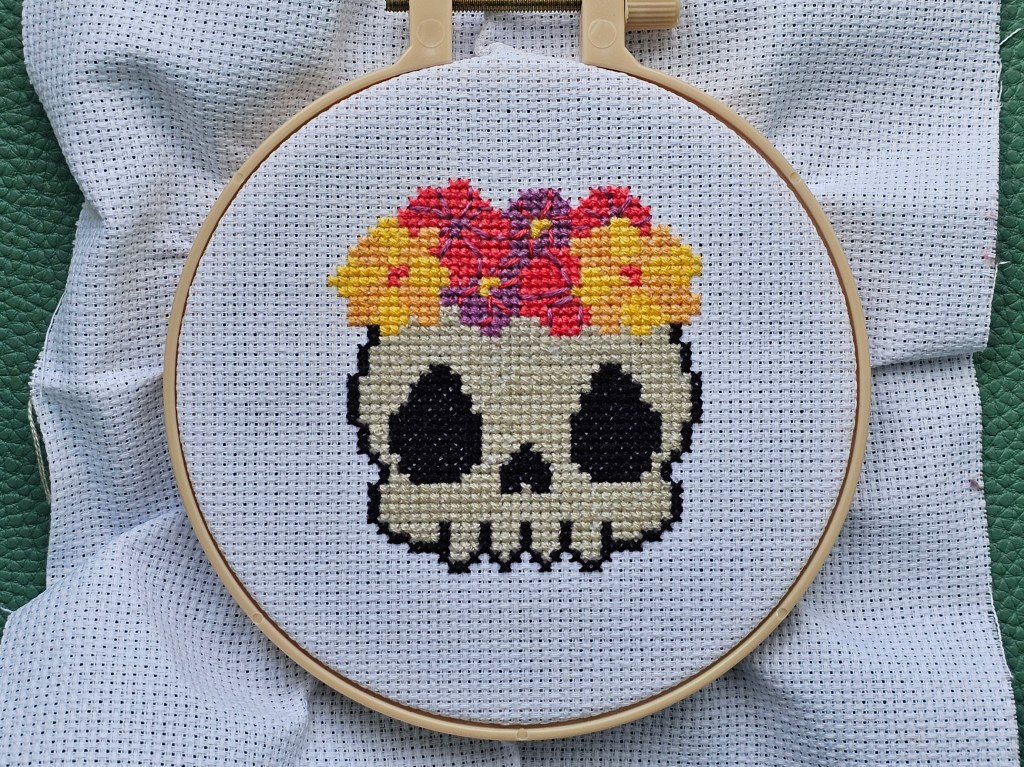
Final details
Next, it was time for the final touches. I say “touches”, but one of them was huge! It was time to fill the skull with grey thread. I didn’t have to look at the pattern, I pretty much did some colouring with a needle and a thread. It was quite relaxing and satisfying!
Then, I added a few backstitches on the red and purple flowers to mark the petals. And just like that, my first Halloween crafty project of this year was completed!
Final thoughts
I always love working on seasonal, holiday-themed DIY projects. They help get me in the festive mood! This cross stitch project was really simple, but it turned out cute. I feel like the flowers could look better in other, more contrasting colours though. The yellow blends with the orange a bit too much, and the purple and red don’t go together, in my opinion. Overall though, it was a cute design and I enjoyed cross stitching it.
Also see:


