One of my favourite seasonal foods in the UK are definitely chocolate coated apples. Available in supermarkets before Halloween, these simple treats are the reason I look forward to autumn every year. I love chocolate and apples on their own, but it’s the combination of the two, with extra toppings, that makes my mouth water every time I think about it. I have already enjoyed a few store-bought chocolate coated apples this spooky season, but finally, I decided to try to make some myself. Besides making my favourite flavour combination – dark chocolate with Biscoff – I also made some cute apple mummies!
Ingredients for Biscoff chocolate coated apples
- fridge temperature small-medium apples of your choice- I used Pink Lady
- 30g dark chocolate per apple
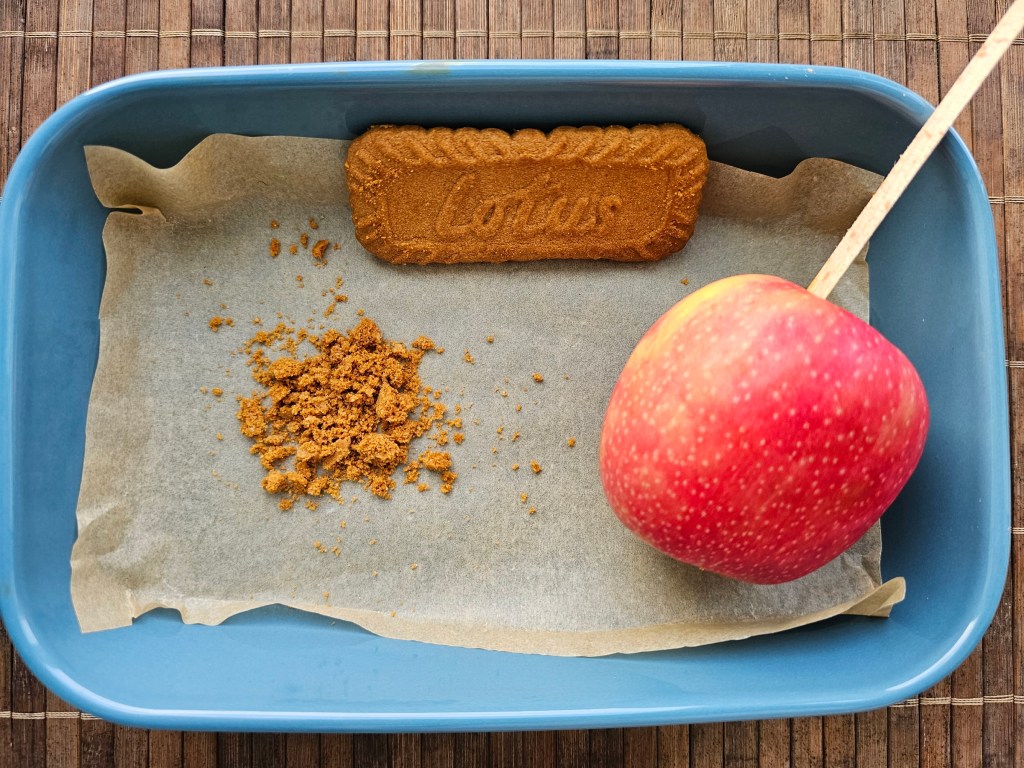
- 1 Biscoff biscuit per apple
- wooden sticks
How to make Biscoff chocolate coated apples
Chop up the dark chocolate and put it in a microwave safe bowl. Microwave in 20 second bursts until the chocolate has melted. In my case, a total of 1 minute (3x 20-seconds) was enough for the chocolate to melt, but the time will vary depending on the wattage of your microwave and the number of chocolate apples you’re making.
Take an apple out of the fridge and stab it with a stick, from the top, along the core. Try to push the stick almost all the way through the apple, but avoid piercing it through the other end.
Line a small tray or a plate with greaseproof paper. Crush a biscuit and make a small circle with the crumbs on the paper.
Using a silicone spatula, coat the apple with a thin layer of dark chocolate. You may think that it would be easier to dunk the apples in a big bowl of melted chocolate, but that’s only feasible if you’re making a large batch, or if you want to melt lots of chocolate and waste most of it. Using a spatula to cover the apple with chocolate is more small-batch friendly, and helps avoid wastage.
Place the freshly-coated apple on the bed of biscuit crumbs, then sprinkle it with more crushed Biscoff from the top.
Repeat for each apple.
Refrigerate your Biscoff chocolate coated apples for at least an hour to let the chocolate fully set.

Ingredients for mummy chocolate apples
- fridge temperature small-medium apples of your choice- I used Pink Lady
- 30g dark chocolate per apple
- 15g white chocolate per apple
- a few drops of coconut oil
- edible eyes (optional – you can draw eyes with chocolate instead)
- wooden sticks
How to make mummy chocolate coated apples
Making these Halloween-worthy treats is super simple!
First of all, make sure your apples are cold, straight out of the fridge. It will help the chocolate set quicker and prevent the chocolate sliding to the bottom of the fruit.
Chop up the dark chocolate and put it in a microwave safe bowl. Microwave in 20 second bursts until the chocolate has melted. In my case, a total of 1 minute (3x 20-seconds) was enough for the chocolate to melt, but the time will vary depending on the wattage of your microwave and the number of chocolate apples you’re making.
Stab an apple with a stick, from the top, along the core. Aim to push the stick almost all the way through the apple, but avoid piercing it through the other end.
Using a silicone spatula, coat the apple with a thin layer of dark chocolate.
Place the apple on greaseproof paper and immediately refrigerate. The sooner the chocolate sets, the less of it will drip to the bottom.
Repeat for every apple.
Refrigerate the apples for at least 10 minutes before proceeding to the next step.
Now, it’s time to make the mummies!
Chop up the white chocolate, transfer it to a bowl and add a few drops of coconut oil. Melt it in the microwave the same way you previously melted the dark chocolate, but this time use 15 second bursts. White chocolate should melt quicker than dark chocolate – for me, 45 seconds were enough.
Coconut oil is technically optional, but melting white chocolate can be tricky – it seizes easily and you may end up with baked, dry crumbs instead of liquid chocolate. Coconut oil makes the chocolate much easier to work with. You don’t need much – literally a few drops will be enough, and they won’t have any impact on the flavour.
Transfer the white chocolate to a piping cone. You can easily make one yourself from greaseproof paper – just follow this tutorial! You can also use a teaspoon to drizzle chocolate over the apple, but a piping cone will make it easier to control the lines.
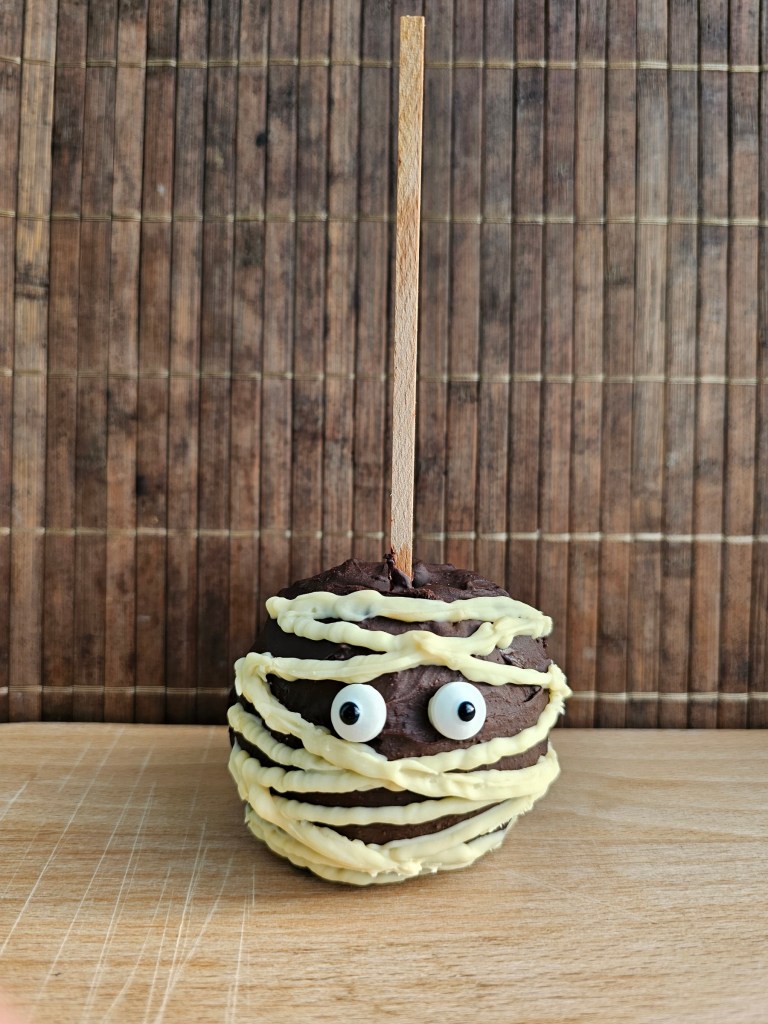
Take an apple out of the fridge and make a few thick horizontal stripes with white chocolate, at different angles. Use a tiny bit of chocolate to attach the edible eyes or, if you don’t have store-bought eyes, draw them with the melted chocolate.
Put the apple back in the fridge.
Once all apple mummies are done, refrigerate them for at least an hour so that the chocolate can fully set.
Enjoy!
How to store chocolate coated apples
Store your chocolate coated apples in the fridge. They will last a few days… if you can resist eating them for that long!
Other toppings to try chocolate coated apples with
You can make these chocolate coated apples in lots of different flavours! Consider covering your chocolate apples with mini marshmallows, sprinkles, crushed Oreo biscuits or chopped up roasted nuts. You can also replace the dark chocolate with milk or white chocolate – just choose your favourite flavour combinations, sky is the limit!
Halloween Chocolate Coated Apples

Cute and simple Halloween party snack idea
Ingredients
For each apple:- 1 small-medium apple
- 30g dark chocolate
- wooden stick
- 15g white chocolate
- a few drops of coconut oil
- a pair of edible eyes (optional)
- one crushed Biscoff biscuit, or
- a tablespoon of roasted nuts, or
- a tablespoon of mini marshmallows, or
- other toppings of your choice
Directions
Dark chocolate coated apple base- Chop up the dark chocolate and heat it up in a microwave in 20 second bursts until melted. Three 20-second blasts should be enough.
- Stab each apple with a stick along the core. Avoid piercing it through the other end.
- Coat the apple with melted chocolate using a silicone spatula.
- Crush a Biscoff biscuit and make a small circle with the crumbs on greaseproof paper.
- Place the freshly chocolate coated apple onto the crumbs.
- Sprinkle the apple with more biscuit crumbs.
- Transfer the apple to the fridge and chill for an hour to let the chocolate set.
- Refrigerate dark chocolate coated apples for 10 minutes.
- In the meantime, chop up the white chocolate and place it in a microwave safe bowl with coconut oil.
- Melt the chocolate in a microwave. 3 bursts of 15 seconds should be enough.
- Transfer the melted white chocolate to a piping cone.
- Take an apple out of the fridge and draw angled lines with white chocolate, making them look like mummy bandage.
- Attach edible eyes to the apple with a small drop of melted chocolate.
- If you don’t have edible eyes, draw some eyes with white chocolate.
- Refrigerate each mummy apple for at least an hour to let the chocolate set.
Also see: