With the spooky season officially here, it was time to finally do some Halloween crafts. And what could I have chosen if not a cross stitching project, with sewing being my main hobby this year? I found this cute scarecrow design in TKMaxx and it was too good not to buy. With a small wobble on the way, I soon had a finished scarecrow ready for the spooky times.
Contents of the box
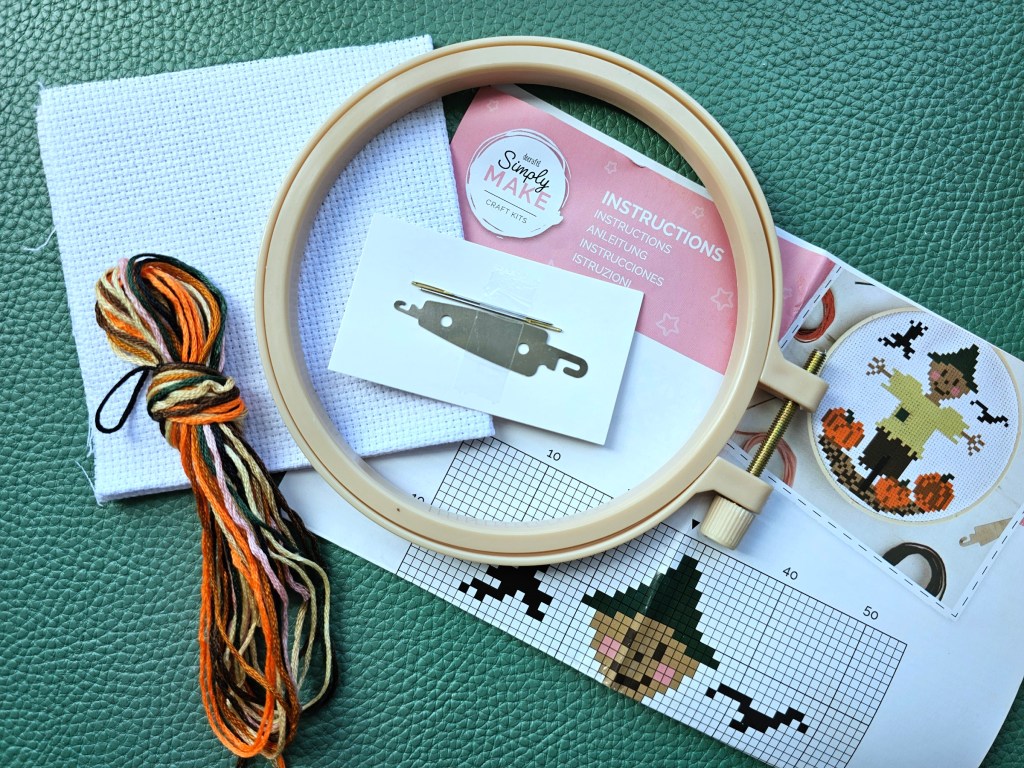
I had purchased numerous cross stitch kits by this brand in the past, so the contents of the box weren’t a surprise. It came with a blank white aida, yarn in assorted colours, two needles, a threader, a plastic hoop and a leaflet with the diagram and instructions.
First colours in
Eager to get stitching, I decided to start with the green hat and pumpkin stems.
I noticed that instructions included in these kits typically recommend starting in the middle of the diagram and moving outwards. Whilst it does sound like a safe way to avoid mistakes, I find it easier and more satisfying to just pick a colour and sew all of the blocks in that colour. It requires a lot of precision when counting the squares – I always triple or quadruple check it – but it’s fun to watch the design come to life that way. Would you be able to guess the final design from the green elements alone?

Next, I worked with the orange and brown thread to sew the pumpkins. I actually love how they turned out, they’re so cute!

Another colour fiasco
Once I got to the point of choosing the next colour to work on, I realised that the colours of the yarn included in the kit didn’t make sense. It wasn’t the first time I encountered this issue with kits by this brand, so it wasn’t a major surprise, but it’s always disappointing when it happens. Would you be able to tell that in the photo above there are two shades of beige yarn? There’s a subtle difference between them – especially in good light – but they’re very, very similar.
The colours provided for the scarecrow’s head and shirt were nearly identical. It took me quite a long time to realise that there were in fact two different beige colours! I didn’t think it was good enough, but luckily, I had plenty of leftover yarn from the previous projects I worked on. I quickly found yarn that fit the design and proceeded to work on the scarecrow’s shirt, face and hands.

Final details
Finally, I added brown and black parts of the scarecrow cross stitch design – the trousers, stick, and crows.
Completed simple cross stitch scarecrow
And just like that, another cross stitch project was completed. I always enjoy working on seasonal crafty projects, and this Halloween scarecrow was no exception.

The assorted DIY cross stitch kits are still my favourite way of choosing what to sew. They’re so convenient! No need to shop for yarn and spend money on full skeins when you only need to make a few stitches in some colour. For ~£3-£5 ‐ that’s how much I typically spend on those kits, always buying them on sale or in discount shops – it works out much cheaper than buying all the supplies individually. They may be imperfect, like this one, but in the long run, it’s still my preferred way to cross stitch.
If you cross stitch yourself, do you buy pre-assorted kits, or do you make the effort to buy all the supplies separately? Or maybe you even design the picture yourself, which is something I’d love to try one day? Let me know!
Also see: