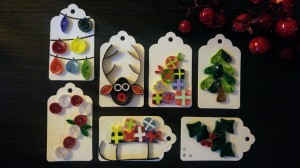
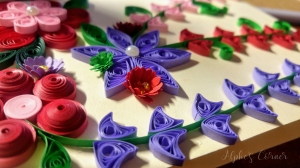
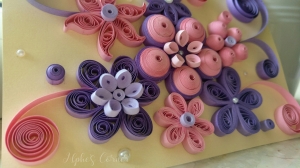
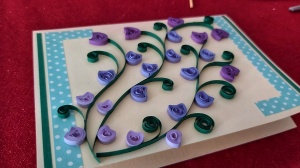
I’ve already posted about my creations in quilling technique – the art of creating designs out of swirled paper strips – quite a few times. It’s generally my go-to type of papercrafts and I use it for all different purposes: from cards, through gift tags to jewellery and 3D mini paper items. So I thought I’d post an extensive guide to my favourite papercraft, covering all of the tools and their uses, basic shapes and techniques. Part one – about the tools – is here!
If you’re sure you’d like to commit to quilling, you can get most of the tools mentions in this guide in a set, here (which is cheaper than buying them individually).
Let’s start with the basics. Most of the tools are optional, and to start quilling you only need three simple things: paper, glue, and a quilling tool (this one’s actually optional too, but it makes the whole process much, much easier and quicker).
Paper strips
The most basic and essential thing you need to quill. You can cut them yourself, but I wouldn’t recommend that – it requires patience and utmost precision. Plus, regular sheets of paper (A4) are rather short, so you’d need to use A3 or larger – which would make the process even more difficult.
Buying paper precut into strips is a much better idea. You can get them in different widths and lengths (typically 3mm or 5mm wide and around 40-50cm long), in multicoloured sets. They’re rather inexpensive, at least when you know where to get them – as always, for craft supplies I recommend Aliexpress.
Craft glue
After paper strips, this is the second crucial element of quilling – there are very few things you can do without glue.
Any glue for paper crafts will do, pretty much. I’d recommend those that turn transparent when dry (fortunately, this is usually the case). Choose one with small, narrow tip and a cap – and always make sure to screw the cap tightly on, after you’re done with your crafts.
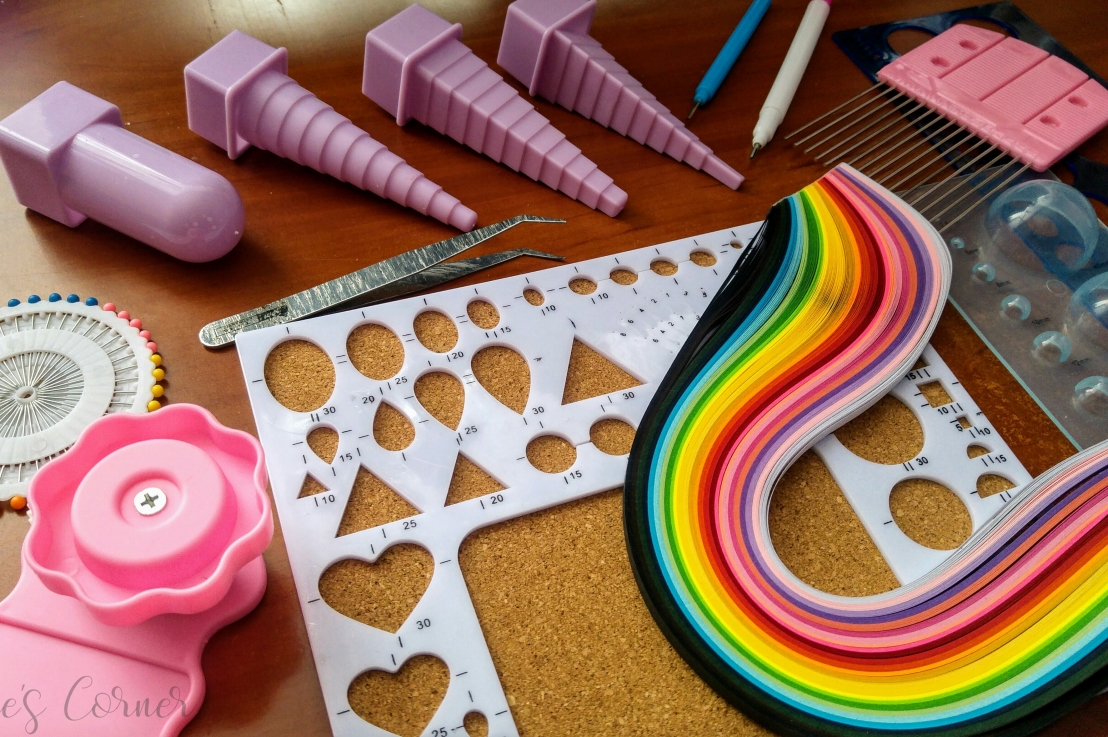
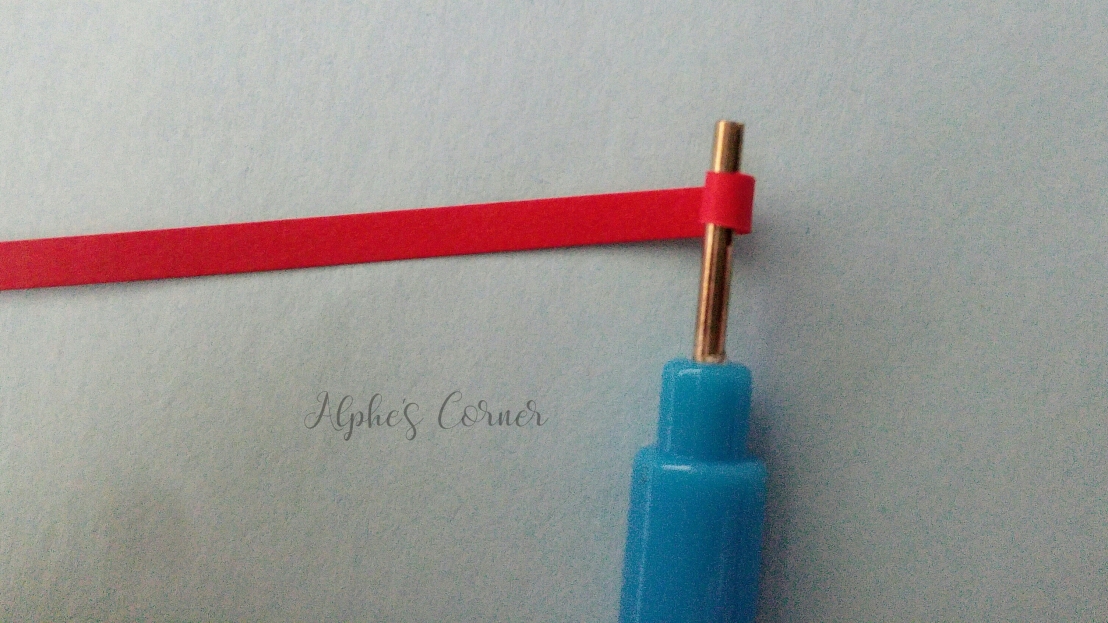
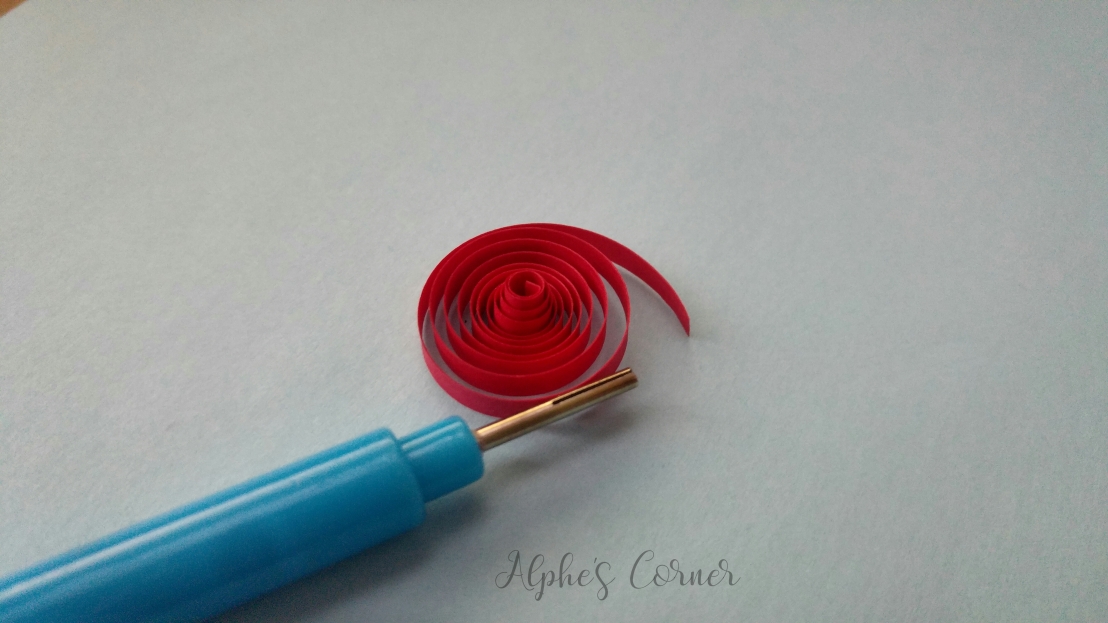
Quilling tool
Although technically not necessary, it’s definitely great to have. You can roll paper strips in your fingers, but this tool makes it a good ten times faster. And seeing that they’re usually around $1, it’s definitely good value for money.
The needle has a narrow opening at the tip – that’s where you insert one end of a paper strip. Then, you can just quickly roll the handle of the tool in your hands and you have a neat paper coil in a matter of seconds.
You can also find electric quilling tools, in case you’d like to make things even easier and even faster. I find them to be a little bit of an overkill, but to each their own. 😉
Scissors
No need for a comment, I think.
Tweezers
Great for securing the end of a freshly rolled coil to prevent it from unfolding – simply grab the outer two rings and glue the end of the coil with the second hand. Tweezers are also useful when you use size guides (described below) and need to carefully take a coil out of a ring. And finally, if you plan to make intricate designs full of small elements, tweezers are much more comfortable to use than your own fingers when it comes to arranging the elements on the card!
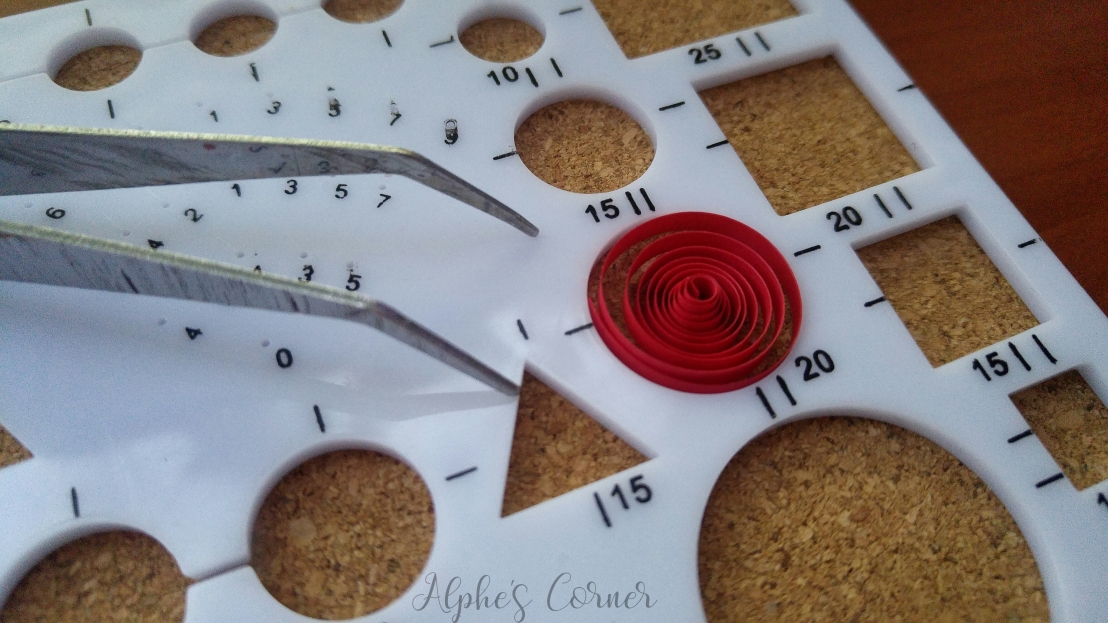
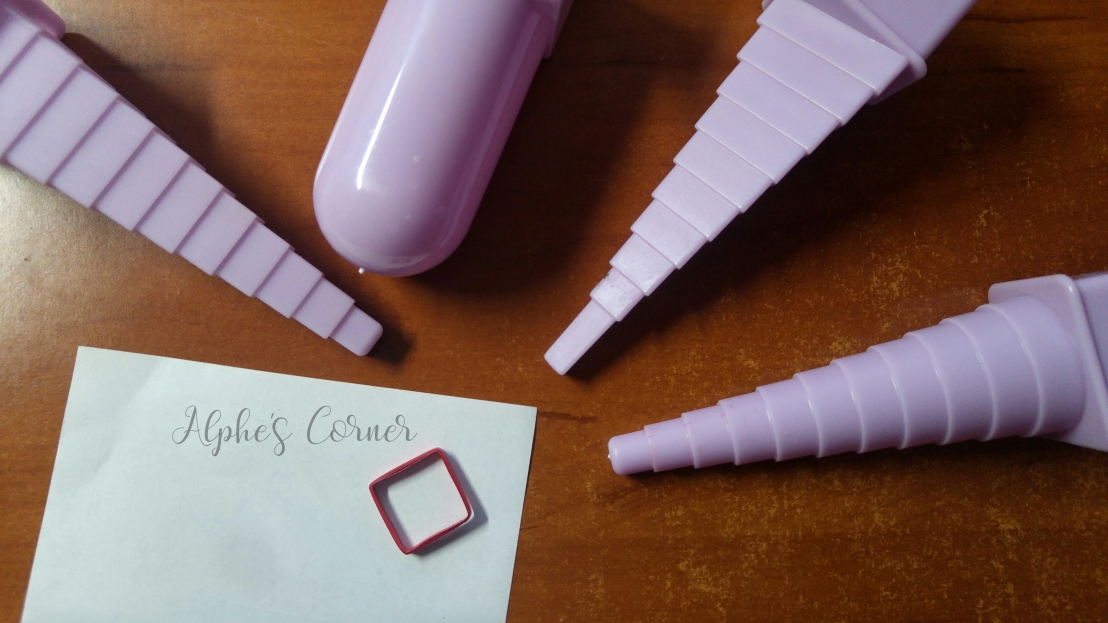
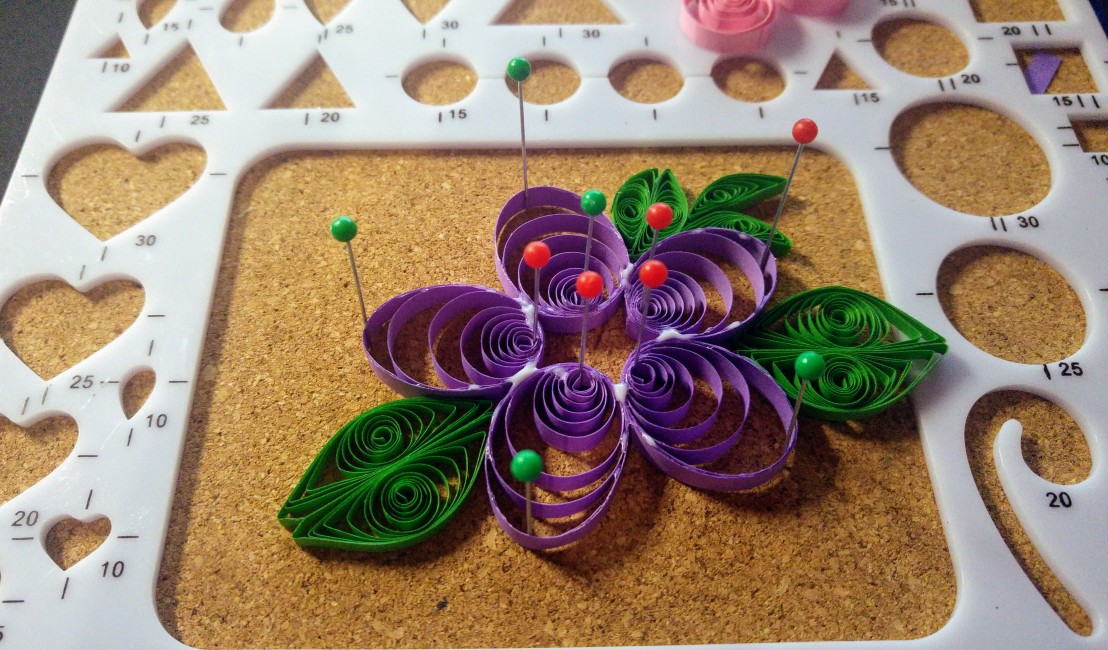
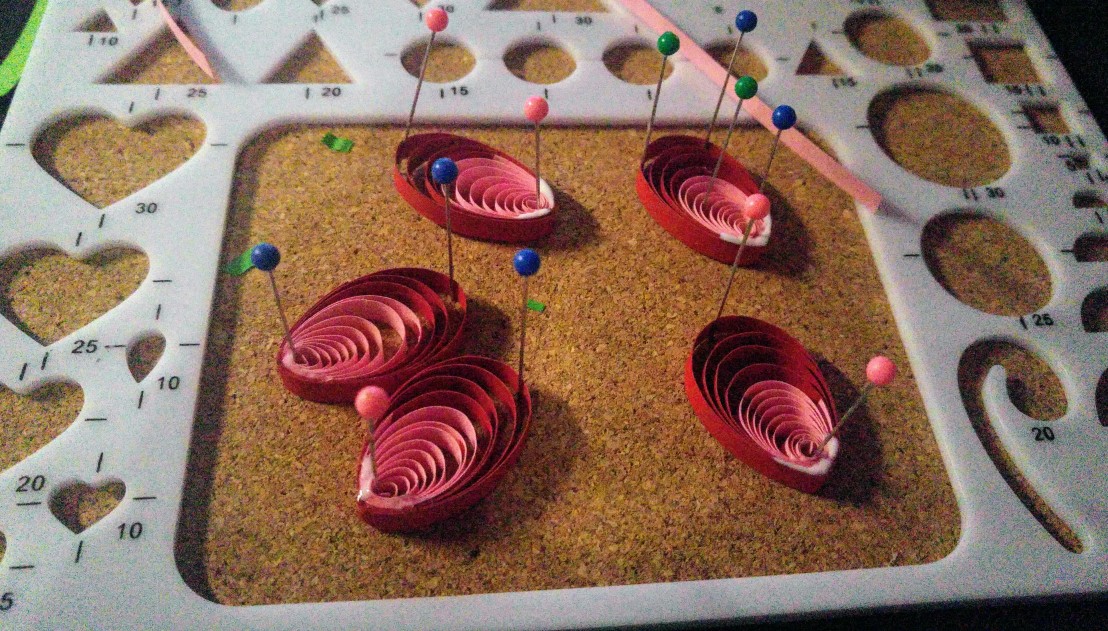
Moulds: size guides
Really, really useful. If you want to make a neat design, you’re going to use these a lot. It’s not easy to eyeball a size of a paper coil, and having to manually compare it to ones you’ve already made isn’t the most convenient. Having a size guide mould, all you need to do is put a tightly rolled coil inside a mould, let it unfold to the size of the circle and carefully take it out, with tweezers, securing the end, so it doesn’t further unfold. This way you can make sure that, for example, all petals of your flower are exactly the same size. Super handy!

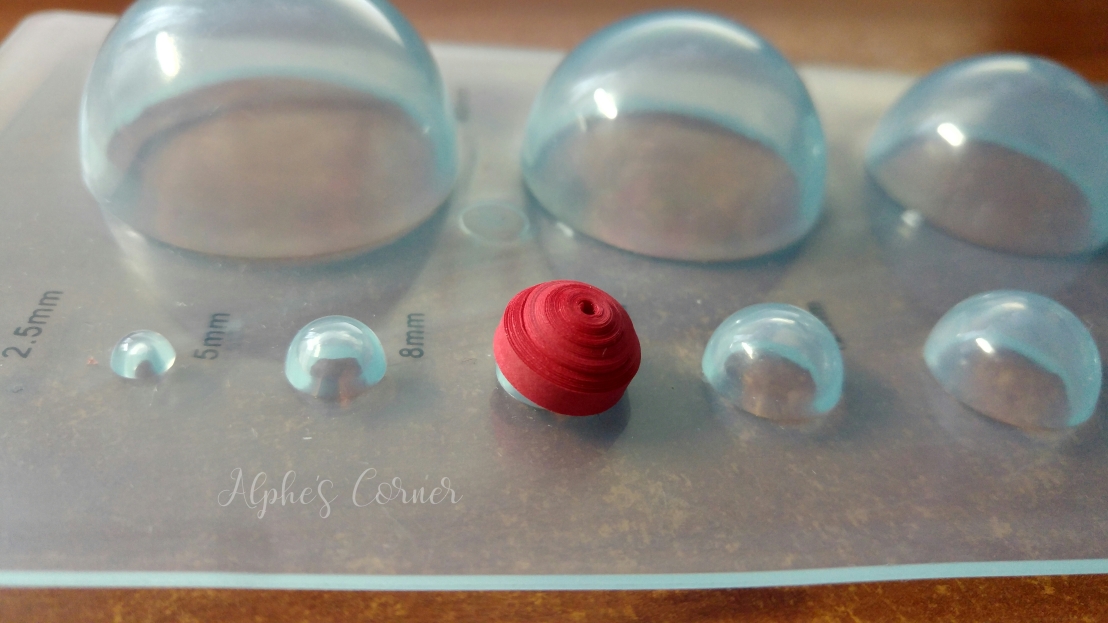
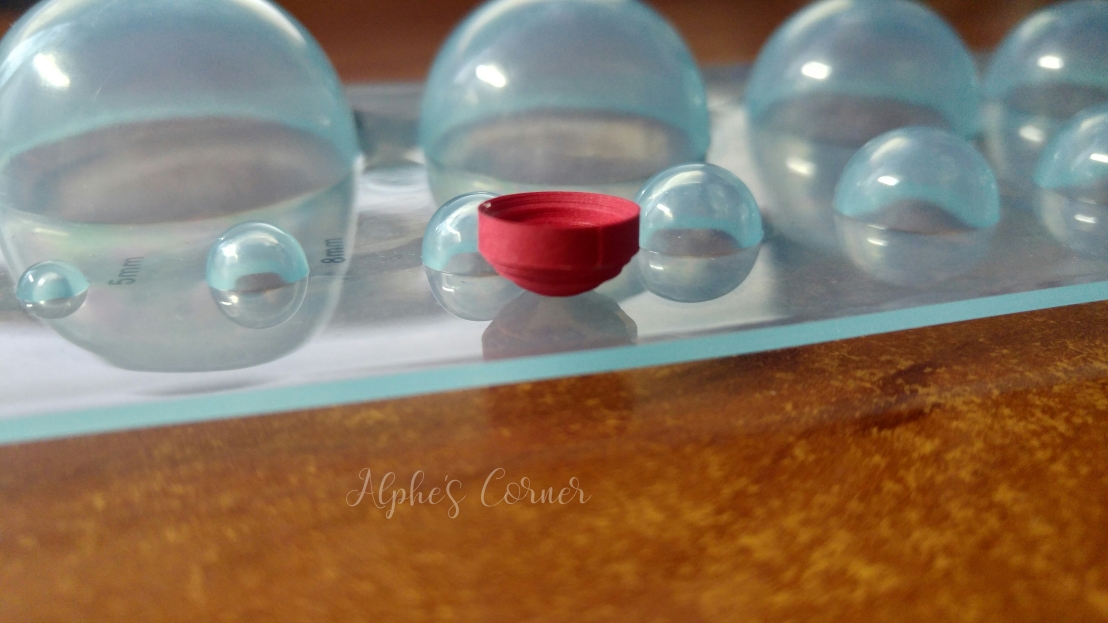
Moulds: domes
To use these, make a tight coil, glue the end, and when it’s dry – carefully press the coil against a chosen mould. You can make hemispheres and other 3D shapes this way – perfect to add a bit of volume to your design. You can also use these for 3D quilled objects (yes, you can use quilling to make mini 3D paper models! there will be one on the blog soon).
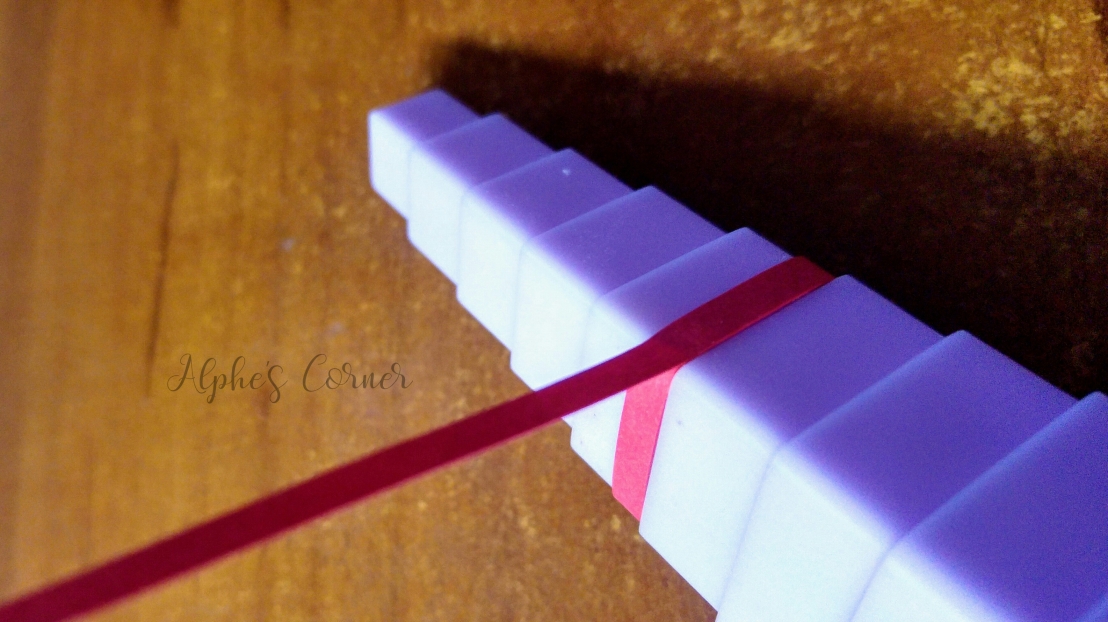
Quilling buddies
They come in different shapes (typically round, triangular and square) and can be used to make outer elements of more complex designs, that you’ll later fill with smaller pieces. Or, you can arrange a few of these in different sizes for an interesting result.
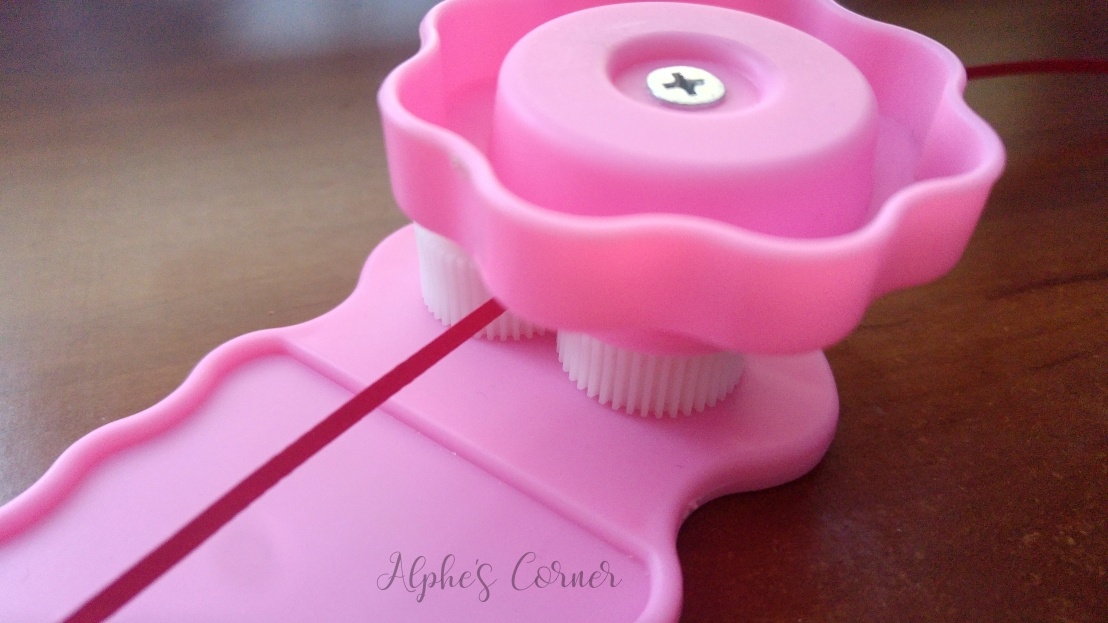
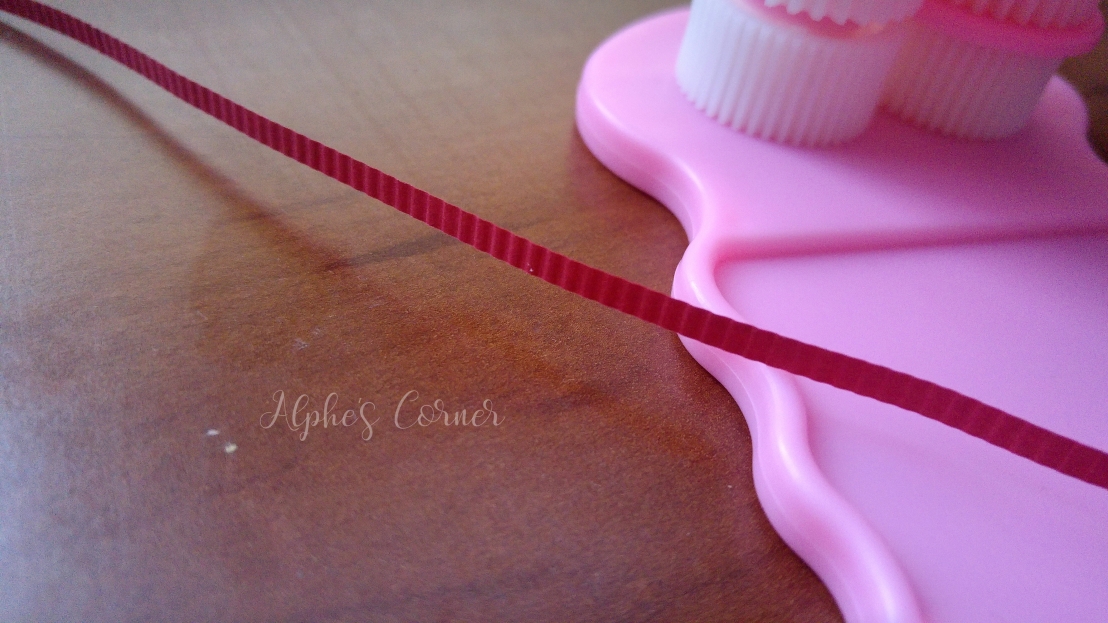
Crimping tool
This is definitely among my favourite tools. Not just quilling tools, but craft tools in general. It’s just so much fun to use! You put one end of a paper strip between the cogs and spin them. The paper comes out on the other side, wavy. It works like stress relief and I’m often tempted to run a whole set of paper strips through it!
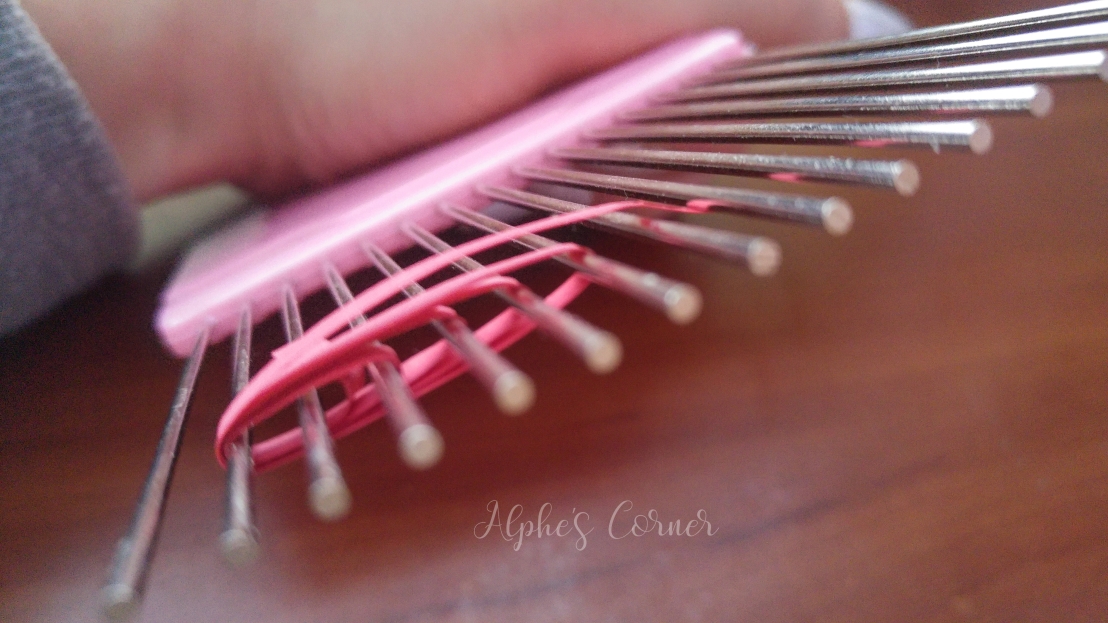
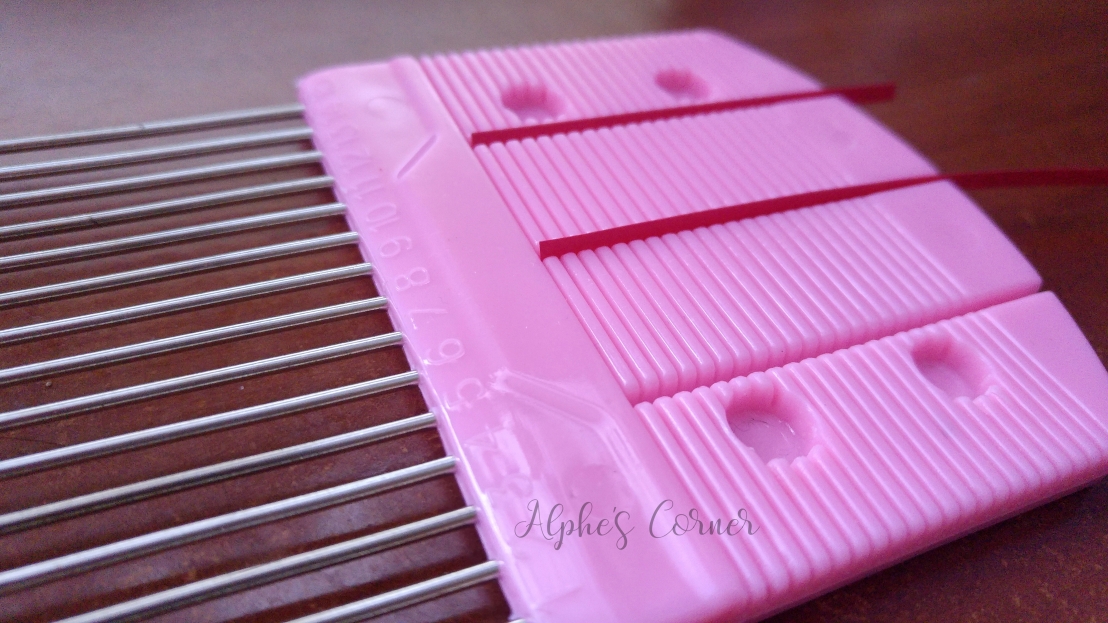
Comb
There’s a variety of shapes you can create with a simple comb (I will cover some of them in the next part of this quilling guide). They’re often used to make leaves, grass, or some kind of filling for outline shapes (e.g. those made with quilling buddies). You don’t necessarily need a quilling comb, a regular one for your hair should work too – and depending on the spaces between the teeth, you’ll achieve different results.
Corkboard and pins
Super handy for assembling small pieces into bigger elements. Any piece of corkboard and pins will do, no need to buy them in craft stores (where such trivial items can often be severely overpriced). Many of the mould/size guide boards come with corkboard background, so you get two tools in one.
That’s it for the first part of my quilling tutorial. I think I’ve covered all tools currently available in the market. If I ever see any new inventions, I’ll make sure to test them and add to this guide. And if you ever come across or know of any tools I’ve missed – let me know!
I’m now going straight into writing the second part of this guide, this time covering basic shapes and techniques. Expect it to soon appear on the blog!


The precision though, amazing piece of artwork!
LikeLiked by 1 person
Actually, it’s more about patience! The rest… A fair amount of glue is good at keeping elements where they’re supposed to be 😀
LikeLiked by 1 person
I totally agree with that, steady hands and a lot of concentration with patience.
LikeLiked by 1 person
I’ve wanted to try this for a while now! Excited to find the tools and make something that looks nothing like yours 😂 I’ll just say my kids made it
LikeLiked by 1 person
It’s much easier than it seems! I’m sure it’ll look great, give it a go! 🙂
LikeLiked by 2 people
This is amazing! I’ve always wondered how this is done! Thank you for sharing! 🙂
LikeLiked by 1 person
Give it a try! 🙂
LikeLike
These are awesome!
LikeLiked by 1 person
This looks like so much fun!
LikeLiked by 1 person
It is fun!
LikeLiked by 1 person
It is such an interesting craft! You are talented!
LikeLiked by 1 person
Aw thank you! 🙂 It may look complex but in reality it’s extremely simple!
LikeLiked by 1 person
I have always wondered how this is done.
LikeLiked by 1 person
I keep telling myself I am going to try this then put it off.
LikeLiked by 1 person
Give it a try! It’s cheap, relaxing, and the final product always looks great 🙂
LikeLike